
Your Cuisinart pans looked flawless when you first unwrapped them. Now, months later, you’re staring at stubborn brown rings, cloudy mineral deposits, and heat-induced rainbow stains that make cooking feel like a chore. Before you reach for steel wool or oven cleaner, discover exactly how to clean Cuisinart pans safely—whether you own stainless steel, non-stick, or hard-anodized aluminum models. You’ll learn professional-grade techniques that remove even the toughest residue without scratching surfaces, avoid common “hacks” that permanently damage cookware, and establish simple daily habits to keep your pans looking new for decades.
The right approach starts with understanding your specific pan material—each requires distinct care. Jumping straight to abrasive cleaners or soaking overnight often causes irreversible etching, pitting, or coating failure. This guide delivers field-tested methods verified by culinary experts, with clear warnings about what never to do. By the end, you’ll have a complete action plan to restore shine and prevent future damage.
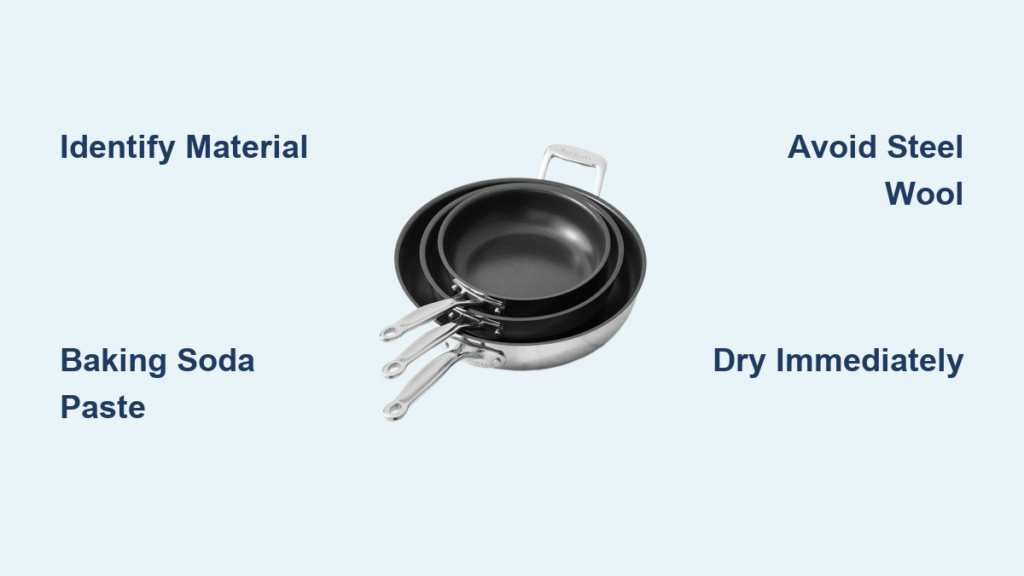
Identify Your Cuisinart Pan Material Correctly

Cuisinart manufactures three distinct pan types, each demanding specialized cleaning protocols. Stainless steel pans feature a reflective silver finish that shows every fingerprint and water spot. Non-stick versions have a dark, matte coating requiring ultra-gentle treatment. Hard-anodized aluminum appears in a uniform matte gray with exceptional scratch resistance but still needs proper care.
Critical identification test: Hold your pan under bright light. Stainless steel reflects clearly like a mirror. Non-stick surfaces appear darker with a subtle texture. Hard-anodized aluminum has a flat, non-reflective finish. Mistaking your pan type leads to disastrous cleaning attempts—like using Bar Keeper’s Friend on non-stick coatings, which destroys the surface. Always verify before proceeding.
Clean Stainless Steel Cuisinart Pans Safely
Remove Polymerized Oil Residue from Cooking Sprays
That stubborn brown film coating your stainless steel pan? It’s polymerized oil—essentially plasticized fat bonded to the metal from overheated olive oil sprays. Generic dish soap won’t touch it.
Effective baking soda and vinegar method:
– Sprinkle 2-3 tablespoons baking soda across the entire pan bottom
– Mix 1 cup hot water with 1/3 cup white vinegar
– Pour solution over baking soda (vigorous fizzing indicates active cleaning)
– Wait 7 minutes while the reaction lifts residue—do not let dry
– Gently scrub with a non-abrasive blue Scotch-Brite pad in circular motions
– Rinse thoroughly and dry immediately with a microfiber towel
This works because the acid-base reaction breaks molecular bonds without scratching. For extreme buildup, repeat twice—never escalate to harsher methods immediately.
Eliminate Burnt-On Scorch Marks
High-heat cooking leaves dark brown-to-black marks that look permanent but are just surface stains. Avoid steel wool—it leaves visible scratches that trap future stains.
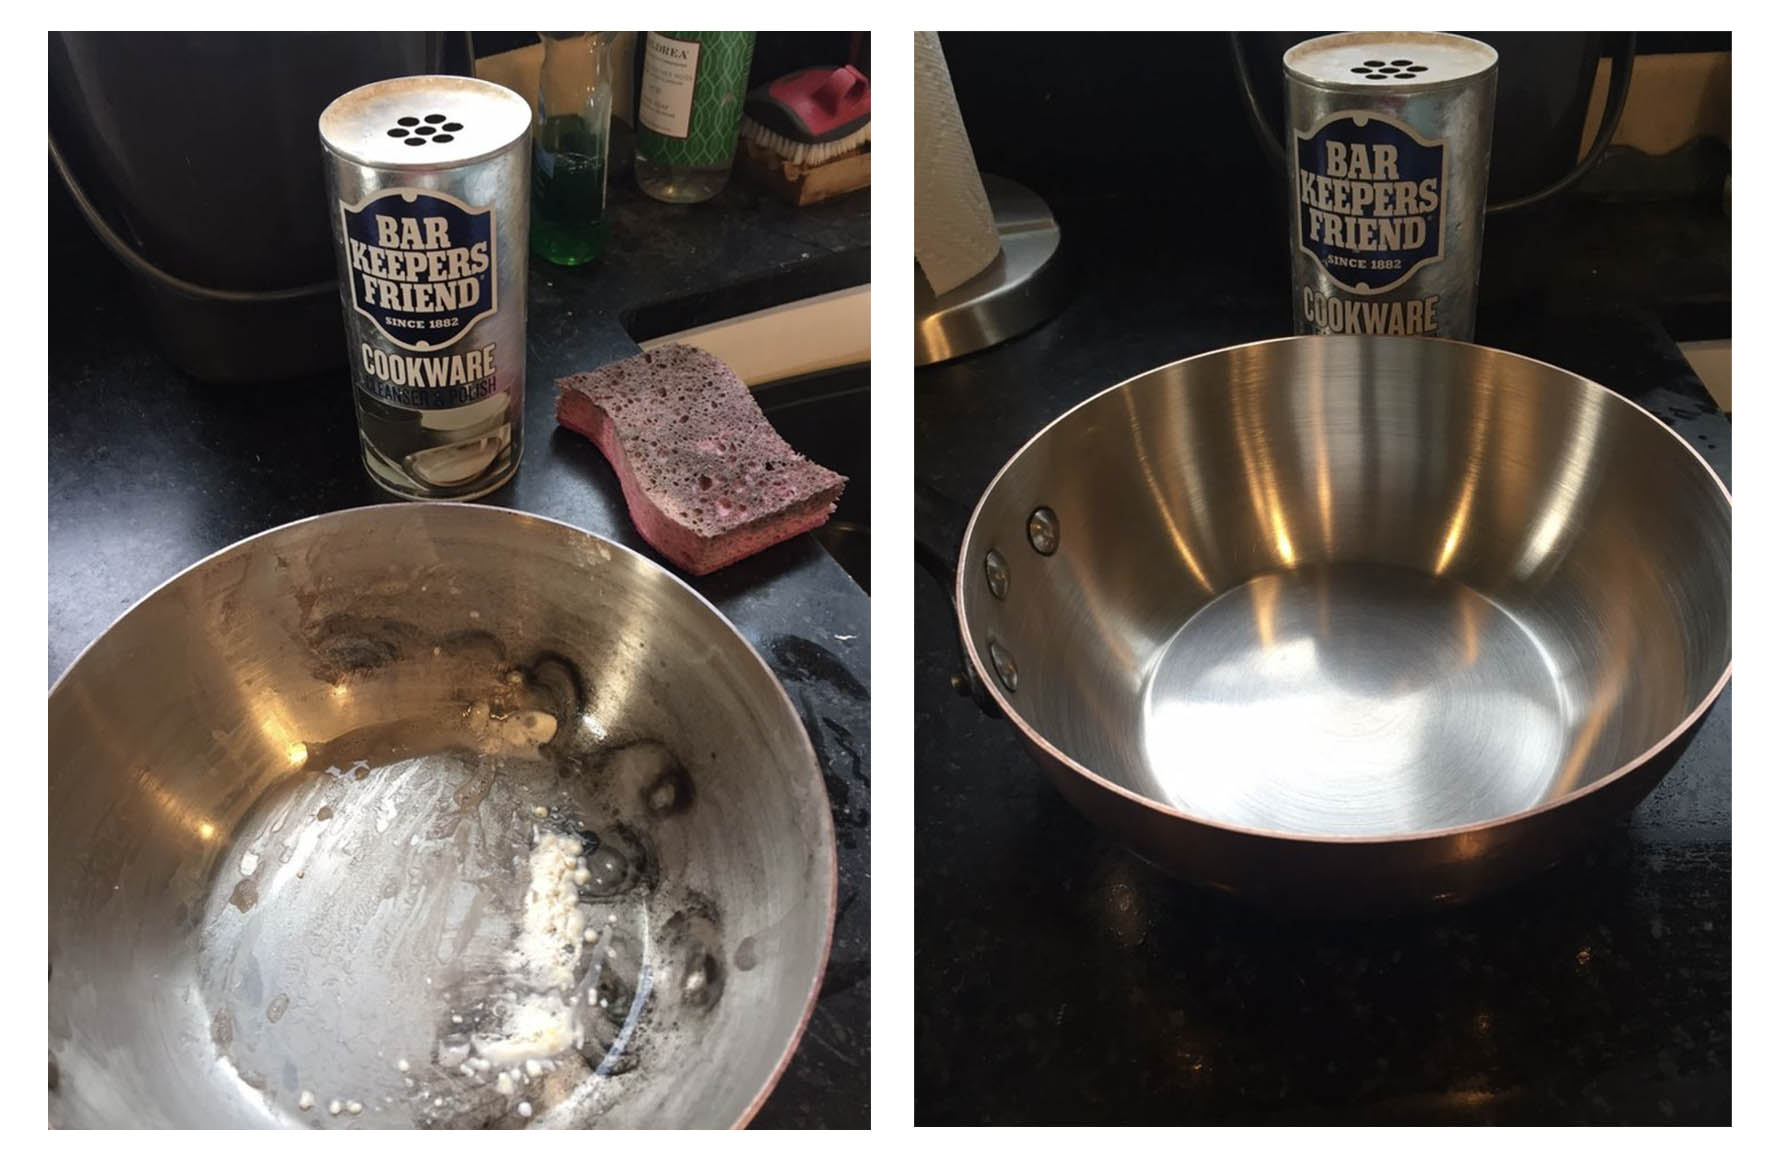
Proven Bar Keeper’s Friend technique:
1. Wet pan surface with warm water
2. Sprinkle powder directly onto stained areas
3. Add drops of water to form a thick paste
4. Scrub gently with the steel grain (visible as fine horizontal lines) for 60 seconds
5. Focus extra effort on darkest zones using light pressure
6. Rinse until water runs completely clear
7. Dry immediately to prevent new water spots
Critical tip: Work only on wet paste—dried residue becomes ineffective and abrasive. For rainbow discoloration (heat damage), apply paste for 30 seconds before rinsing.
Remove Hard Water Mineral Deposits
White, cloudy patches from hard water respond poorly to scrubbing but dissolve easily with acid. Boiling vinegar prevents the need for harsh abrasives.
Guaranteed restoration process:
– Fill pan with 1 part white vinegar to 3 parts water
– Bring to rolling boil for exactly 10 minutes
– Turn off heat and let cool naturally (do not pour hot liquid)
– Gently wipe with soft sponge—minerals should slough off
– Rinse thoroughly and dry immediately with lint-free cloth
For light deposits, skip boiling: apply baking soda paste, wait 15 minutes, then rinse. Never use lemon juice—it can cause pitting in stainless steel.
Restore Shine to Dull Cuisinart Stainless Steel
Achieve Mirror-Like Polish After Deep Cleaning
Deep cleaning often leaves stainless steel looking hazy. This isn’t damage—it’s missing the final polish that creates professional shine.
Three foolproof polishing methods:
1. Commercial stainless steel cleaner: Apply dime-sized amount with soft cloth, buffing with the grain
2. Olive oil method: Dab 3 drops on lint-free cloth, rub in small circles, then buff dry
3. Microfiber magic: Use dry microfiber cloth with firm pressure in straight lines along the grain
Always polish under bright light to spot missed areas. Circular buffing across the grain creates visible swirl marks—follow the metal’s natural pattern.
Prevent Daily Dulling Before It Starts
Shine maintenance happens during cooking, not just cleaning. These habits stop dullness before it forms:
– Clean pans while warm (not hot) within 20 minutes of cooking
– Never use cooking sprays—apply oil with paper towel instead
– Cook on medium heat; high heat causes rapid polymerization
– Dry immediately after washing—air drying guarantees water spots
Avoid These 5 Pan-Destroying Cleaning Mistakes
Never Use These Harmful Cleaners
Certain products promise instant results but cause permanent damage:
Chemical hazards to avoid:
– Easy Off oven cleaner (causes irreversible etching within minutes)
– Chlorine bleach (triggers pitting corrosion that spreads over time)
– Ammonia-based cleaners (leaves permanent rainbow streaks)
Physical abrasives that ruin surfaces:
– Steel wool (even “fine” grades leave micro-scratches)
– SOS pads with embedded chemicals
– Chore Boy “specially treated” pads
Stop Overnight Soaking Immediately
Soaking seems logical but backfires spectacularly:
– Dishwasher detergent solutions discolor pan sides within hours
– Prolonged vinegar exposure can weaken metal bonds
– Polymerized oil never releases through soaking—it requires chemical action
If residue persists after initial cleaning, repeat the baking soda-vinegar method instead of soaking.
Clean Non-Stick Cuisinart Pans Without Ruining the Coating
Non-stick surfaces demand extreme gentleness—scratches destroy their functionality. Always:
– Use only soft sponges or nylon brushes
– Wash with mild dish soap and warm water
– For stuck food, simmer 1 cup water for 5 minutes to loosen residue
– Dry with paper towel (cloth fibers can snag coatings)
Critical warning: Never use baking soda, vinegar, or Bar Keeper’s Friend on non-stick pans—these abrasives degrade the coating. Cooking sprays are equally damaging; apply oil with a paper towel instead.
Fix These 3 Specific Cuisinart Pan Stains
Remove Olive Oil Spray Residue Permanently
Spray oils create the toughest stains due to propellants that bond to metal. Standard cleaning fails—try this:
1. Heat pan on low for 3 minutes to soften residue
2. Apply baking soda paste while warm (not hot)
3. Wait 15 minutes—do not let dry
4. Scrub gently with non-scratch pad
5. Repeat if needed (severe buildup may require 2 treatments)
Never scrape with metal utensils—this creates permanent scratches that trap future stains.
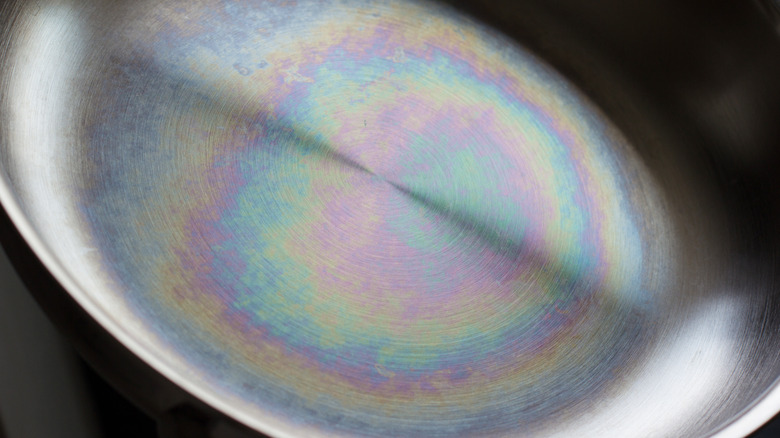
Correct Rainbow Heat Discoloration
Overheating creates oil-slick rainbow patterns—a sign of surface oxidation, not dirt. Fix with:
– Bar Keeper’s Friend paste applied for 45 seconds
– Gentle circular rubbing followed by immediate rinsing
– Final polish with stainless steel cleaner to minimize appearance
This won’t remove deep oxidation but restores functionality and appearance significantly.
Maintain Cuisinart Pans for Decades of Use
Daily Care Routine That Prevents Damage
Success comes from consistency, not crisis cleaning:
– After cooking: Wash while warm with soft sponge, dry immediately
– Weekly: Inspect for developing stains; treat early with baking soda paste
– Monthly: Apply stainless steel polish to maintain protective layer
Hard-anodized pans need identical care except for rainbow discoloration—they resist heat damage better.
Storage Secrets to Prevent Corrosion
Improper storage causes 40% of preventable pan damage:
– Always store pans bone-dry (use towel inside if stacking)
– Place paper towels between nested pans
– Never store with metal utensils inside
– Hang pans when possible to avoid contact points
When Professional Help Beats DIY
Some damage requires expert restoration:
– Deep scratches penetrating the metal surface
– Persistent stains after 3 cleaning attempts
– Warping from extreme overheating
Weigh costs carefully—professional restoration averages $35-$60 per pan versus $80+ for replacement. For non-stick pans with coating failure, replacement is usually more cost-effective.
Your Cuisinart pans can regain their showroom shine with the right approach. Start with the gentlest method—baking soda and vinegar solves 80% of cleaning challenges. Reserve Bar Keeper’s Friend for scorch marks, and never use it on non-stick surfaces. Most critically, change three daily habits: clean while warm, ditch cooking sprays, and dry immediately. Within one week of consistent care, you’ll notice dramatically improved performance and appearance. Remember—the secret to how to clean Cuisinart pans successfully isn’t harsh chemicals, but understanding your specific pan material and treating it with scientifically-proven methods. With these techniques, your cookware will deliver professional results for decades, turning every meal preparation into a pleasure rather than a battle against stubborn stains.


