
Tired of cluttered countertops and limited workspace? A custom-built kitchen cart solves both problems while costing half as much as store-bought versions. When my own kitchen renovation left me with awkward dead space near the stove, I built a rolling cart in one weekend that now holds my mixer, spices, and wine glasses—no professional carpentry skills required. This guide cuts through confusing online tutorials to give you actionable steps for constructing a sturdy, functional kitchen cart that fits your exact needs. You’ll learn exactly which materials prevent wobbling, how to choose casters that won’t dent floors, and clever storage hacks most guides miss. By the end, you’ll have a mobile workstation that handles daily cooking chaos while looking like it came from a high-end catalog.
Choosing Between Plywood and Solid Wood for Kitchen Carts
Skip expensive hardwoods unless you’re building a permanent island. For most DIYers, 3/4-inch Baltic birch plywood delivers the best balance of strength and affordability. Its void-free layers won’t splinter when you drill shelf pins, and it withstands humidity better than particleboard. If you prefer visible wood grain, opt for poplar boards for legs and frame—it’s cheaper than oak but takes paint beautifully. Avoid pine for shelves; its soft surface dents easily under heavy pots. For a $200 cart (versus $500+ retail), buy one 4×8-foot plywood sheet for shelves/box and four 1×3 poplar boards for framing. Pro tip: Have the hardware store cut your sheet to 24×36-inch sections to avoid garage sawing mistakes.
Why Your Cart Will Wobble If You Skip This Step
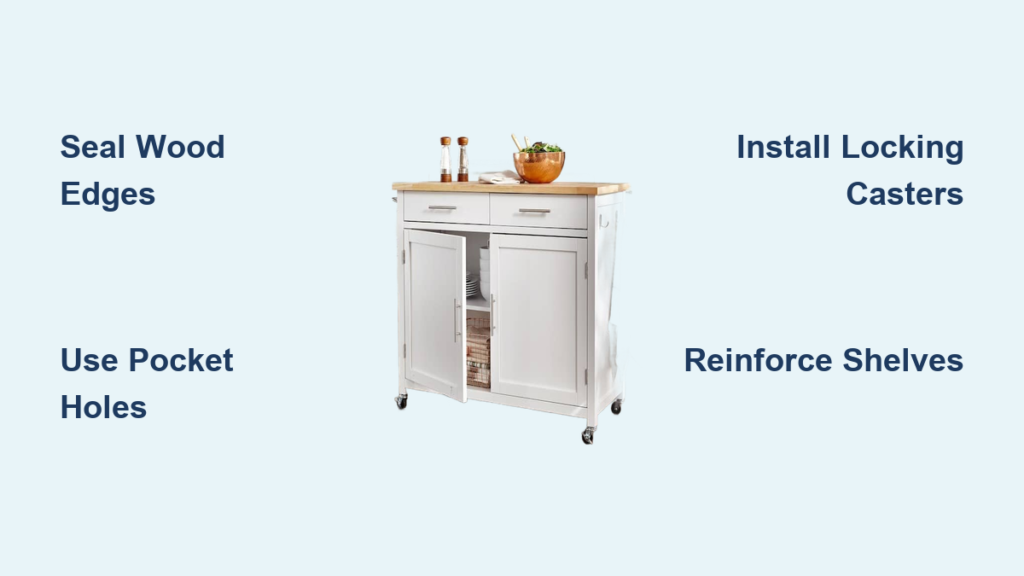
Plywood edges need sealing before assembly. Unsealed edges swell when exposed to steam or spills, warping shelves over time. Brush two coats of oil-based primer on all cut edges using an old credit card as a spreader—it forces sealer into the wood fibers better than a brush. Skip this, and your $150 cart becomes a wobbly eyesore within months.
Critical Tools That Prevent Costly DIY Disasters
Forget industrial-grade equipment. You only need six tools for precision results:
- Cordless drill/driver (with 1/8-inch and 3/16-inch drill bits)
- Kreg Jig for pocket holes (eliminates visible screws)
- T-square (not a ruler—ensures perfect 90-degree cuts)
- Orbital sander (80- and 120-grit paper)
- Clamps (four 24-inch bar clamps minimum)
- Digital angle finder (prevents leaning shelves)
The Kreg Jig is non-negotiable for kitchen carts. Pocket screws create joints that won’t split when you adjust shelves later. Without it, you’ll rely on weak butt joints that fail under 50 pounds of weight. Test your drill’s torque setting on scrap wood first—too high cracks plywood, too low strips screws.
How to Avoid “Measurement Amnesia” During Cutting
Label every cut piece immediately with pencil: “LFT 1,” “SHELF T,” etc. I learned this after cutting eight identical side panels instead of four legs and four sides. Tape a measuring app (like MagicPlan) to your phone to photograph each stage—this creates a digital blueprint if you lose track.
Assembling a Wobble-Free Frame in Under 2 Hours
Start by building the base rectangle (30″x18″ for standard carts). Clamp two 30-inch poplar boards (front/back) to two 18-inch boards (sides), leaving 1/4-inch gaps at corners for wood expansion. Drill pocket holes every 6 inches along inner edges, then drive 1 ¼-inch pocket screws. Critical check: Place a level diagonally across corners—if measurements differ by more than 1/8 inch, disassemble and re-clamp. An uneven base guarantees a rolling cart that veers left or right.
Installing Casters That Won’t Destroy Your Floors
Locking casters with rubber treads (2.5-inch diameter minimum) prevent scratches on hardwood. Position them 2 inches from each corner—never centered under legs. Before attaching, flip the base upside down and mark caster locations with a nail punch. Drill pilot holes 1/16-inch smaller than screw diameter to avoid stripping. Tighten screws in a star pattern (like lug nuts) so pressure distributes evenly. Test mobility on tile before adding shelves; if it wobbles, sand high spots on caster mounting plates with 100-grit paper.
Building Adjustable Shelves That Hold Heavy Loads

Fixed shelves limit functionality. Instead, drill 3/16-inch shelf-pin holes every 1.5 inches vertically along side panels. Use a shelf-pin jig ($8 at hardware stores) for perfect alignment—misaligned holes make shelves tilt dangerously. For heavy items like mixers, reinforce shelves with 1×2 poplar cleats screwed into side panels. Place cleats 1 inch below shelf position, then secure shelves with 1-inch brad nails. Load test with 25-pound weights before final finishing.
Why Your Spice Rack Will Collapse Without This Trick
Spice jars concentrate weight on front edges. Prevent sagging by adding a ¼-inch plywood underlayment beneath the main shelf surface. Glue it in place with Titebond III before attaching the visible top layer—this doubles load capacity without adding bulk.
Sanding and Finishing for Spill-Proof Protection
Kitchen carts face daily splatters, so skip basic polyurethane. Instead:
- Sand entire cart with 120-grit paper, focusing on edges
- Wipe away dust with tack cloth
- Apply two coats of wipe-on poly (Minwax PolyShades) using lint-free rags
- Wait 24 hours, then add paste wax for water beading
Wipe-on poly won’t drip in corners like brush-on versions. Test finish on scrap wood first—some stains darken dramatically when sealed. For food-safe surfaces (like butcher block tops), use mineral oil and beeswax instead.
Five Costly Mistakes That Ruin 80% of DIY Kitchen Carts
Mistake #1: Skipping wood acclimation
Bringing plywood straight from cold garage to humid kitchen causes warping. Store materials indoors for 72 hours before cutting.
Mistake #2: Using drywall screws
They shear under lateral stress. Only use coarse-thread cabinet screws for load-bearing joints.
Mistake #3: Overlooking clearance
Leave 1-inch gaps between cart and cabinets for wheel clearance when rolling. Measure your narrowest doorway first!
Mistake #4: Ignoring weight distribution
Place heaviest items (appliances) on lower shelves. Top-heavy carts tip at 30-degree angles.
Mistake #5: Skipping the stress test
Load cart with 50 pounds of books and roll over thresholds. If wheels bind, sand doorjambs or reduce caster height.
Custom Storage Hacks for Small Kitchens
Maximize tight spaces with these field-tested mods:
- Slide-out trash bin: Mount under lower shelf with drawer slides
- Magnetic knife strip: Attach to side panel using #8 screws (not adhesive)
- Tiered spice racks: Cut 1×2 scraps into 6-inch L-brackets
- Fold-down leaf: Add hinges to one side for instant counter extension
For renters, build modular sections that disassemble in 60 seconds. Use cam locks instead of permanent glue—store hardware in a hidden compartment under the cart.
Maintaining Your Cart: Quick Fixes for Daily Wear
Address problems before they escalate:
- Wobbly wheels: Tighten mounting plate bolts with a 10mm socket—never pliers (strips threads)
- Sticky drawers: Rub paraffin wax on runners
- Water rings: Cover with mayo for 1 hour, then wipe dry
- Squeaks: Inject graphite powder into caster joints
Season wood twice yearly with orange oil conditioner to prevent cracking. Never use vinegar-based cleaners—they degrade finishes over time.
Final Note: Your DIY kitchen cart should handle daily cooking chaos for years with minimal upkeep. Focus on precision during frame assembly—this prevents 90% of structural failures—and always seal wood edges before building. For under $250, you’ve created mobile storage that adapts to your kitchen’s quirks, unlike rigid store-bought units. Next, explore adding under-cart LED lighting for midnight snacks or a removable cutting board top for instant prep space. Remember: the perfect cart isn’t flawless—it’s the one that solves your specific storage headaches without breaking the bank.


