
Transforming your kitchen dining area with a custom booth creates an inviting space that combines practicality with personality. Unlike traditional chairs that clutter walkways and limit seating capacity, a well-built kitchen booth maximizes every inch of available space while adding distinctive character to your home. Whether you’re working with a cozy breakfast nook or a spacious dining area, constructing a kitchen booth yourself saves thousands compared to custom installations and gives you complete creative control over dimensions, materials, and style. This comprehensive guide walks you through every critical phase of building a kitchen booth, from precise measurements and frame construction to upholstery and finishing touches—ensuring professional results even if you’ve never picked up a circular saw before.
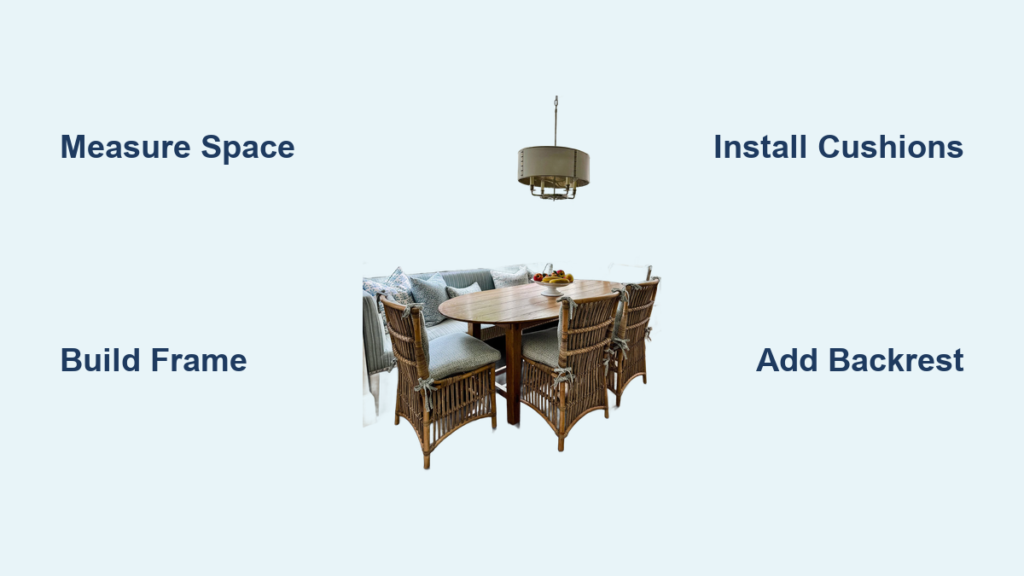
Determine Your Kitchen Booth Configuration
Before purchasing a single piece of lumber, you need to decide which booth layout will best serve your space and family needs. The right configuration creates functional seating while enhancing your kitchen’s flow rather than disrupting it. Measure your available wall space carefully, noting any windows, doorways, or cabinet obstructions that might affect placement. For standard dining comfort, aim for a bench depth of 18-24 inches—any narrower feels cramped, while deeper benches work better for casual lounging than formal dining.
Calculate the ideal height relationship between your booth and table. The seat cushion should sit 17-19 inches from the floor, allowing comfortable legroom beneath a standard 29-30 inch high table. Consider your backrest height carefully too—a low 12-inch back creates a modern, open feel in small spaces, while a full 34-inch back matches cabinet height for seamless integration with your existing kitchen design.
Choose from three primary configurations based on your space. A straight booth along one wall works perfectly for galley kitchens or narrow dining areas, providing efficient seating without sacrificing traffic flow. An L-shaped corner booth maximizes seating in underutilized corners and creates a natural dining zone within larger kitchens. For maximum capacity in spacious areas, a U-shaped booth wraps around three sides of your table, offering true restaurant-style dining for six or more people, though it requires careful planning to maintain adequate clearance.
Sketch your design with precise measurements, ensuring at least 36 inches of clearance between the booth and opposing counters for comfortable movement. Factor in table legroom—most people need 10-12 inches between seat cushion and table bottom for comfortable dining posture. If you have children, consider building a slightly lower bench (15-17 inches) with matching child-sized table sections.
Select Permanent or Portable Construction
Decide whether your booth will be permanently anchored or designed as movable furniture. Permanent booths require securing to wall studs for safety and stability, creating a true built-in look that adds value to your home. Portable booths offer flexibility to rearrange your space but need heavier construction to prevent tipping when occupied. For permanent installations, plan for mounting rails that attach securely to wall studs, while portable versions require reinforced legs and possibly hidden casters for occasional movement.
Gather Your Booth Building Materials
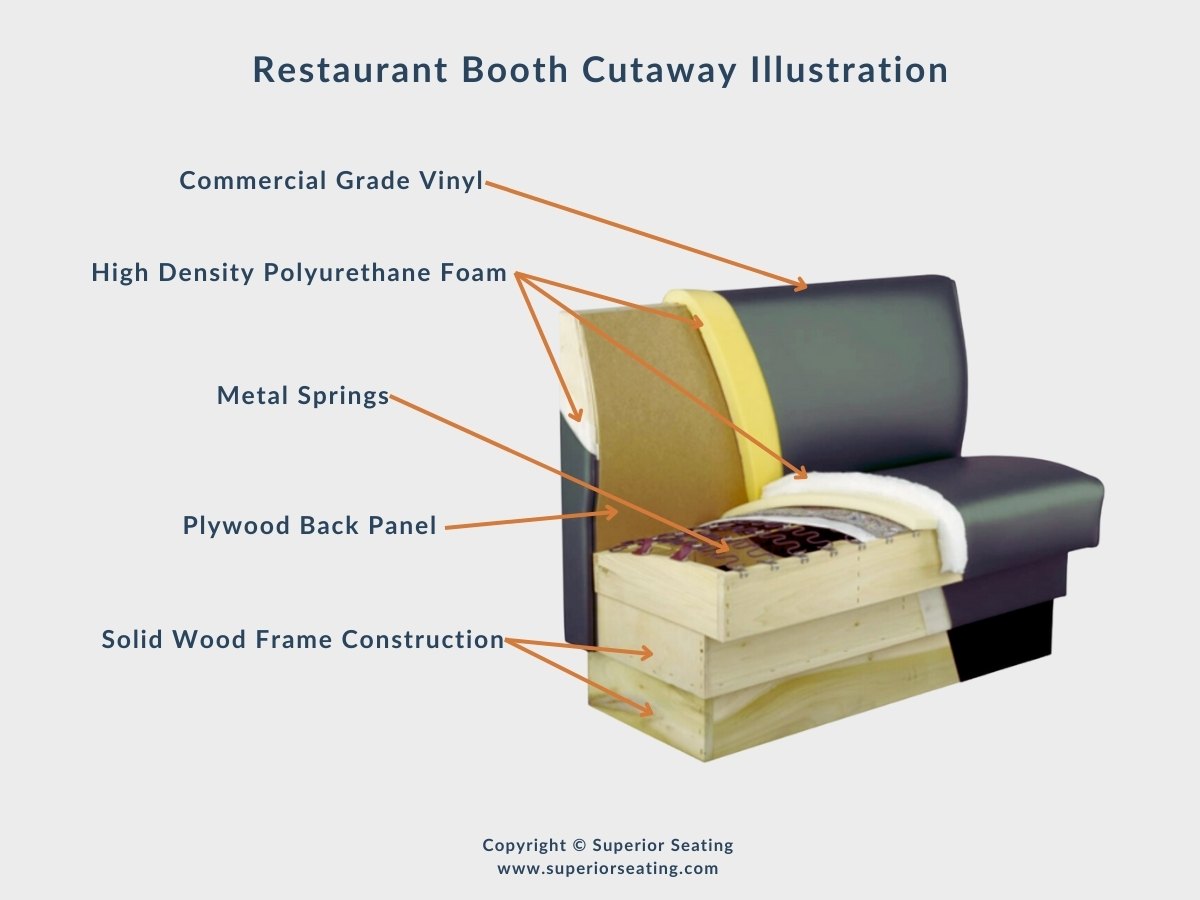
Collect all necessary supplies before starting construction to avoid frustrating mid-project hardware store runs. For the structural frame, select straight, knot-free 2×4 lumber from your home center’s premium selection—avoid warped or twisted boards that compromise stability. Purchase 3/4-inch plywood for the seat platform; this thickness prevents sagging under weight while remaining workable with standard tools. If your design includes storage, choose moisture-resistant plywood for the storage compartment box.
For bench cushions, select high-density foam rated at 2.5-3.0 pounds per cubic foot—this density provides lasting support without excessive firmness. Performance fabrics like Crypton or Sunbrella withstand kitchen spills and stains better than standard upholstery materials, while leather offers timeless appeal with easy wipe-clean surfaces. Don’t forget batting for smoothing cushion edges, quality staples, wood glue, and construction screws in multiple lengths (2″, 2.5″, and 3″).
Your essential tool list includes a circular saw or miter saw for precise cuts, a power drill with multiple screwdriver bits, a 4-foot level for ensuring straight installation, and multiple clamps to hold pieces steady during assembly. A stud finder becomes critical if mounting to walls, while a foam cutter or electric carving knife makes shaping cushion foam much easier. For beginners, consider renting a Kreg jig for pocket holes—it creates nearly invisible, incredibly strong connections perfect for visible booth joints.
Build a Solid Booth Frame
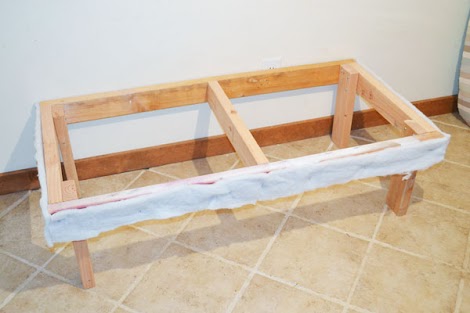
Start frame construction by cutting all lumber pieces according to your precise measurements, labeling each piece as you go to avoid confusion during assembly. Begin with the bench seat frame, creating a sturdy rectangular box with front and back rails connected by evenly spaced vertical supports. For a standard 60-inch long booth section, include four vertical supports—two at the ends and two spaced evenly in between—to prevent sagging.
Assemble the frame using wood glue at all joints combined with two 3-inch construction screws per connection. Apply wood glue generously along mating surfaces before screwing pieces together—this creates a bond stronger than the wood itself. Check for squareness after each connection using your carpenter’s square, as even small angular errors compound during assembly. Clamp pieces together while screwing to maintain alignment and prevent twisting.
For wall-mounted booths, install horizontal mounting rails directly into wall studs using 3.5-inch lag screws. Position these rails at the same height as your booth frame’s back rail, creating a secure anchor point that transfers weight directly to your home’s structure. Attach the booth frame to these mounting rails with heavy-duty L-brackets for maximum stability—never rely solely on screws into drywall.
If incorporating storage, construct a hinged lid system using continuous piano hinges along the back edge. Install magnetic catches at the front to keep the lid securely closed. Reinforce the storage box front with additional vertical supports to handle the stress of frequent opening and closing with heavy items inside.
Install Seat Platform and Create Comfortable Cushions

Cut your plywood seat platform to match the outer dimensions of your frame, leaving a 1/8-inch gap around all edges to allow for wood expansion. Test-fit the platform before securing it to ensure proper alignment. Attach the platform using 1.5-inch wood screws driven upward through the frame rails, spacing them every 6 inches along all support members for maximum stability without visible hardware.
Measure and cut your foam cushion to match the seat platform dimensions, adding 1 inch of extra length and width to allow for compression when seated. Most builders create 4-5 inch thick cushions for dining booths—thinner cushions feel too firm for extended seating, while thicker ones encourage slouching. Use an electric carving knife to shape the foam edges with a slight bevel, creating a more comfortable seating surface that won’t dig into thighs.
Wrap the foam in a single layer of polyester batting, securing it with spray adhesive to prevent shifting. Cut your upholstery fabric with generous 5-inch overhang on all sides to allow for proper tension and clean corners. Staple the fabric to the platform bottom, starting with the center of each side and working toward the corners. Pull fabric taut but not stretched, creating smooth, wrinkle-free surfaces that will maintain their appearance with regular use.
Create Professional-Looking Corners
Master the art of mitered corners for clean, professional upholstery. After stapling the center sections, fold the side fabric over the corner at a 45-degree angle, creating a neat triangular flap. Fold the adjacent side fabric over this flap, creating a layered, overlapping corner that resembles professional furniture. Staple securely along the bottom edge, ensuring no raw fabric edges remain visible. For extra durability, apply a thin bead of fabric glue along the folded edges before stapling.
Add Backrest and Final Details
Construct your backrest frame using 1×4 or 1×6 boards, creating a structure that attaches securely to the booth’s rear edge. For fabric backrests, build a plywood panel slightly smaller than your backrest frame, then attach foam and fabric using the same techniques as the seat cushion. Secure the backrest to the seat frame using pocket screws from beneath the seat platform for invisible connections that won’t interfere with cushion placement.
Install baseboard trim along the bottom edge to conceal gaps between floor and booth, using wood filler to blend seams seamlessly. Sand all surfaces thoroughly before applying your chosen finish—start with 120-grit sandpaper, then progress to 220-grit for ultra-smooth results. Apply at least two coats of cabinet-grade paint or polyurethane finish, sanding lightly between coats for professional results.
Consider adding subtle enhancements that elevate your booth’s functionality. Install LED strip lighting beneath the seat overhang for ambient evening lighting that creates restaurant-like atmosphere. Add decorative throw pillows in complementary fabrics to introduce color and extra comfort. For matching tables, build a simple farmhouse-style design using the same wood and finish as your booth for cohesive visual appeal.
Maintain Your DIY Kitchen Booth
Establish a simple maintenance routine to keep your booth looking fresh for years. Vacuum upholstered surfaces weekly to remove crumbs and debris before they become embedded in fabric. Wipe wooden components with a barely damp cloth followed by immediate drying to prevent moisture damage—never use excessive water near upholstery seams.
Treat fabric with a quality protector spray immediately after installation, especially for lighter colors. Address spills immediately by blotting (not rubbing) with clean white cloths, working from the spill edges inward. Twice yearly, inspect all connections and tighten any loose screws before they cause more significant problems.
Protect wooden surfaces from kitchen hazards by using coasters and trivets for hot items, and wiping up moisture immediately. Consider applying fresh polyurethane coats annually in high-traffic households to maintain protective barriers. With proper care, your DIY kitchen booth becomes a lasting feature that enhances daily meals and home value for decades.
Building your own kitchen booth delivers remarkable satisfaction—transforming raw materials into a functional centerpiece that perfectly fits your space and style. By following these systematic steps and paying attention to critical details like proper measurements, strong connections, and quality finishes, you’ll create a custom seating solution that looks professionally installed while saving thousands compared to custom cabinetry. The process requires patience and precision, but the result—a welcoming, space-efficient dining area that reflects your personal style—makes every careful measurement and precise cut worthwhile.


