
Your kitchen should work as hard as you do, but if your appliances are scattered randomly across countertops and stuffed haphazardly into cabinets, you’re probably wasting valuable time and energy every time you cook. Learning how to arrange kitchen appliances properly transforms chaotic meal prep into a seamless, enjoyable experience that saves you steps, reduces frustration, and makes your kitchen genuinely functional. Whether you’re dealing with a cramped apartment kitchen or a spacious chef’s dream, strategic appliance placement can dramatically improve your daily cooking routine—without requiring a full renovation. This guide reveals professional organizers’ proven methods for creating a kitchen that flows with your natural movements rather than fighting against them.
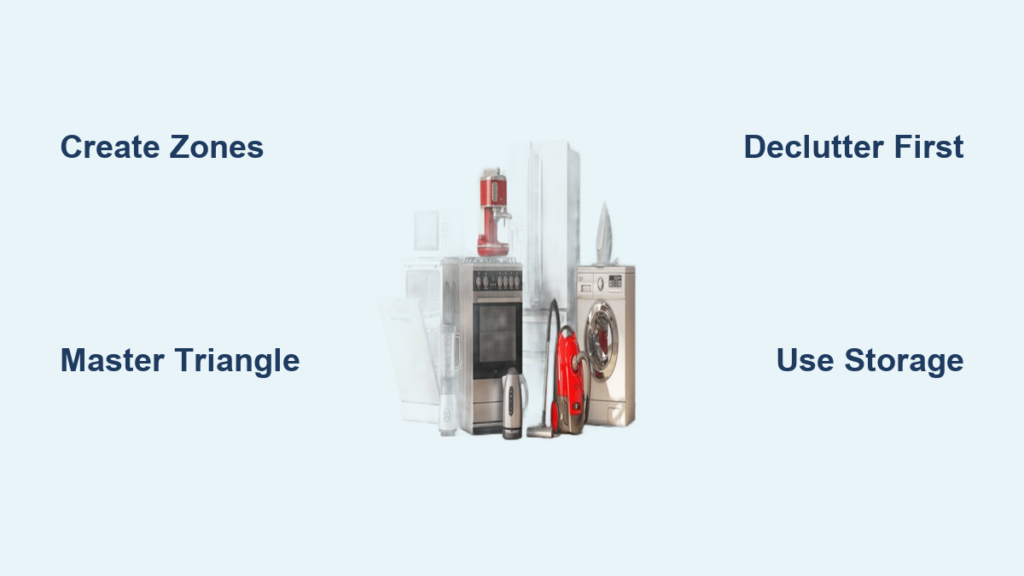
Create Functional Kitchen Zones for Seamless Workflow
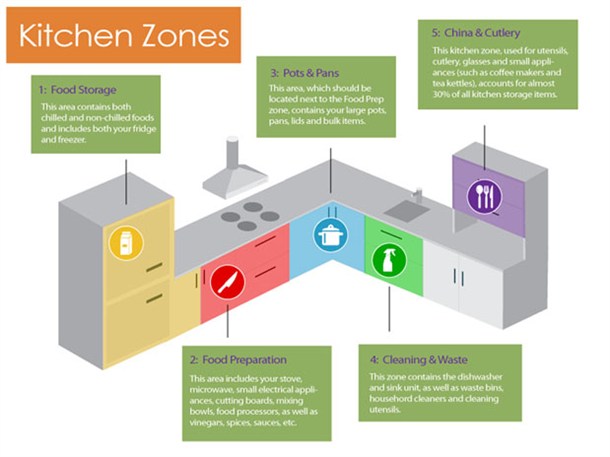
Stop scattering appliances randomly and start grouping them where you actually use them. Professional kitchen designers organize spaces into distinct activity zones that mirror your natural cooking workflow. Your refrigerator and pantry form the food storage zone—keep this area near your main entry point for effortless grocery unloading. Position your cutting boards, prep bowls, and knives in the preparation zone close to the sink where you wash ingredients. The cooking zone centered around your stove needs immediate access to pots, pans, and cooking utensils you use daily.
Build Your Coffee Station Away from Cooking Chaos
Create a dedicated beverage prep zone near your dining area rather than cluttering your main cooking workspace. Group your coffee maker with mugs, coffee beans, tea supplies, and sweeteners in one accessible spot—ideally near an electrical outlet and water source. This separation prevents morning coffee chaos from interfering with dinner preparation later in the day. Keep your toaster and toaster oven in this same zone if you use them primarily for breakfast items, creating one streamlined area for all your morning routines.
Designate a Baking Command Center
If you bake regularly, establish a dedicated baking zone that keeps your stand mixer, measuring cups, baking sheets, and specialty ingredients together. Position this zone away from your main cooking area to prevent flour dust from contaminating savory dishes. Store baking appliances on lower shelves or in a cabinet with pull-out trays for easy access—never force yourself to lift heavy mixers from high cabinets. This specialized zone saves you time searching for scattered tools and keeps your workspace organized for specific cooking tasks.
Master the Work Triangle for Effortless Movement

The work triangle connecting your refrigerator, sink, and stove forms the foundation of every functional kitchen layout. When arranged properly, this triangle minimizes unnecessary steps during cooking and creates a natural flow between essential tasks. Your refrigerator should sit within 4-9 feet of both the sink and stove, with no major obstacles blocking the pathways between these three points. This strategic placement ensures you can grab ingredients, wash them, and start cooking without crisscrossing your kitchen multiple times.
Position Your Refrigerator for Grocery Unloading Efficiency
Place your refrigerator near your kitchen entrance to streamline grocery unloading—this simple adjustment saves you from carrying heavy bags across the entire kitchen. Ensure the door opens in a direction that doesn’t block traffic flow when accessing contents, and maintain at least 36 inches of clearance in front for comfortable access. Never position your refrigerator directly next to heat sources like ovens or dishwashers, as the additional heat forces your fridge to work harder, increasing energy consumption and potentially shortening its lifespan.
Optimize Stove Placement with Essential Landing Zones
Your stove requires immediate counter space on both sides—aim for at least 15 inches of clear landing zone on each side for safely placing hot pots and pans. Position your range directly below proper ventilation to effectively capture cooking fumes and heat. If space constraints force you to place your stove against a wall, ensure the adjacent counter space remains completely clear for landing hot cookware. Avoid positioning your stove directly under windows where cross breezes could interfere with gas flame stability or ventilation effectiveness.
Declutter Before You Arrange Kitchen Appliances
Before rearranging anything, conduct a thorough appliance audit to eliminate items that waste valuable space. Remove every appliance from cabinets, shelves, and countertops—yes, even those buried in the back of deep cabinets. Sort them into categories: coffee makers together, blenders together, specialty appliances together. Be brutally honest about what you actually use—most households discover 30-40% of their appliances haven’t been touched in over a year.
Implement the One-Year Usage Rule
Ask yourself when you last used each appliance—anything untouched for 12 months should be donated, sold, or recycled. That second coffee maker, the single-use waffle iron, or the bread machine used twice are stealing precious space from tools you actually need daily. Keep only appliances that serve unique functions; if your food processor handles shredding, skip the standalone cheese grater. This ruthless editing creates breathing room for the essentials and prevents future clutter from accumulating.
Install Space-Saving Storage Solutions for Small Appliances
Heavy appliances like stand mixers shouldn’t permanently occupy counter space but should remain instantly accessible when needed. Invest in sliding bamboo trays that let you tuck appliances away while keeping them plugged in and ready. These trays glide smoothly in and out of lower cabinets, eliminating the struggle of lifting heavy equipment from storage. For coffee makers and blenders, use rolling carts with built-in outlets that let you wheel appliances to the sink for filling and cleaning, then tuck them neatly away when finished.
Maximize Vertical Storage Without Sacrificing Function
Install pull-out shelves in existing cabinets to transform dark, hard-to-reach spaces into highly functional appliance storage. These sliding mechanisms bring every item to the forefront, eliminating the frustration of digging through deep cabinets. For wall-mounted storage, add hooks under upper cabinets to hang lightweight appliances like hand mixers or immersion blenders—keeping them visible and accessible without using counter space. Dedicate one tall cabinet as your “appliance garage” with built-in outlets, creating a single location for all small appliances that disappears behind closed doors.
Overcome Common Kitchen Space Limitations
:max_bytes(150000):strip_icc()/make-galley-kitchen-work-for-you-1822121-hero-b93556e2d5ed4ee786d7c587df8352a8.jpg)
In compact kitchens, every inch matters—strategically position your largest appliances to maximize remaining space. Place your refrigerator along the longest wall rather than in a corner, allowing full door access without blocking pathways. If your kitchen has an island, position your sink there to create a secondary work zone that doesn’t interfere with primary cooking activities. For galley kitchens, arrange appliances along both walls to create two efficient work triangles rather than one congested space.
Manage Traffic Flow Around Major Appliances
Ensure your refrigerator door doesn’t swing into high-traffic areas—this creates dangerous collision risks when someone approaches from behind. Position dishwashers away from main thoroughfares so open doors don’t block movement during meal prep. In multi-cook households, create separate work zones that allow multiple people to operate simultaneously without bumping into each other. The goal is to maintain at least 42 inches of clear walking space between major work areas for comfortable movement.
Professional Organizers’ Top Appliance Arrangement Secrets
Group related appliances together rather than scattering them across your kitchen—this creates visual calm and functional efficiency. Keep all breakfast items in one zone, cooking tools in another, and baking supplies in a third. Avoid lining appliances up against the back wall, which creates visual tension and wastes the prime front counter space where you actually work. Instead, position frequently used appliances toward the front of countertops where they’re easiest to access.
Create Hidden Storage with Appliance Garages
Install a dedicated appliance garage with roll-up doors near your main prep area to maintain clear countertops while keeping essentials accessible. This cabinet with built-in outlets houses your coffee maker, toaster, and blender behind closed doors that disappear when open. When prepping meals, you’ll appreciate the uncluttered workspace, and during cleanup, you can simply slide appliances back into their garage. This solution works particularly well in open-concept kitchens where visible appliances disrupt the aesthetic flow between rooms.
Transform Your Kitchen with These Proven Arrangement Strategies
How to arrange kitchen appliances effectively comes down to understanding your actual cooking habits rather than aspirational ones. The perfect kitchen layout reflects how you truly use your space—not how you think you should use it. Start small by optimizing just one zone, like your coffee station or baking area, then gradually implement changes throughout your kitchen. Remember that the ultimate goal isn’t a Pinterest-perfect kitchen but a functional space that makes your daily cooking routines easier and more enjoyable. When you arrange kitchen appliances with intention, you’ll spend less time searching for tools and more time enjoying the food you create—because a well-organized kitchen isn’t just beautiful, it’s genuinely useful.


