
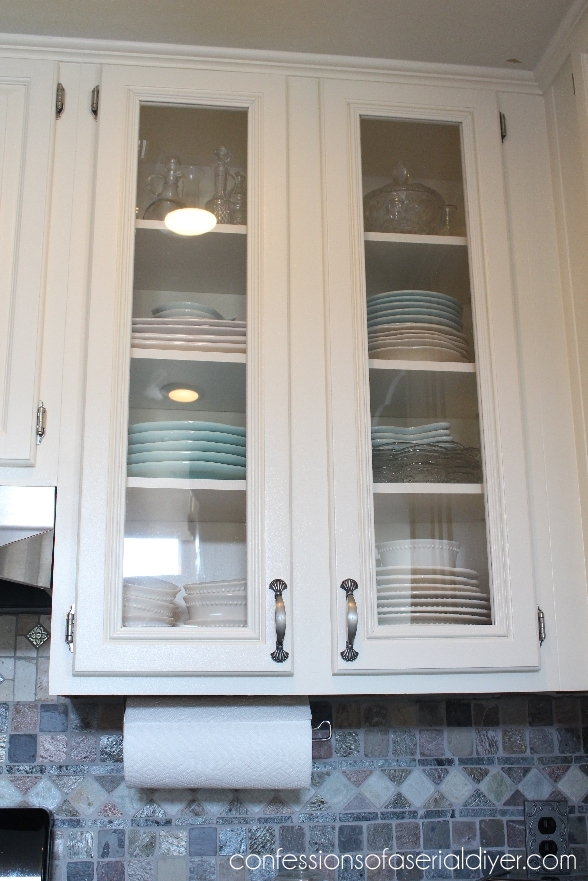
Tired of staring at the same solid cabinet doors every time you cook? Adding glass inserts transforms your kitchen’s appearance without requiring a full remodel. This affordable upgrade creates visual interest, allows light to flow through your space, and showcases your beautiful dishware collection. Most homeowners can complete this project over a weekend with basic tools and intermediate DIY skills. Whether you’re looking to brighten a dark kitchen, display heirloom china, or simply modernize dated oak cabinets, glass inserts deliver dramatic results. In this guide, you’ll discover exactly how to measure, select materials, and install glass panels that look professionally done—without hiring expensive contractors.
Determine If Glass Inserts Suit Your Kitchen Layout
Before committing to glass cabinet doors, evaluate your kitchen’s specific needs and limitations. Glass inserts work exceptionally well in kitchens with abundant natural light, as they amplify brightness and create an airy atmosphere. They’re particularly effective for upper cabinets where contents typically include decorative dishware rather than everyday items. Consider your storage habits—if your cabinets contain mismatched containers or cluttered shelves, you might need to invest time in organizing before installing glass panels.
Safety concerns matter significantly if you have young children or pets. Lower cabinets with glass inserts require tempered glass for safety, which increases costs but provides essential protection. Kitchens with limited counter space benefit from glass upper cabinets because they reduce visual weight and make the room feel more expansive. Measure your cabinet doors carefully—extra-large doors may require thicker glass to prevent flexing and potential breakage. If your kitchen has a cohesive design theme, ensure glass inserts will complement rather than clash with your existing style elements.
Select the Ideal Glass Material for Your Needs
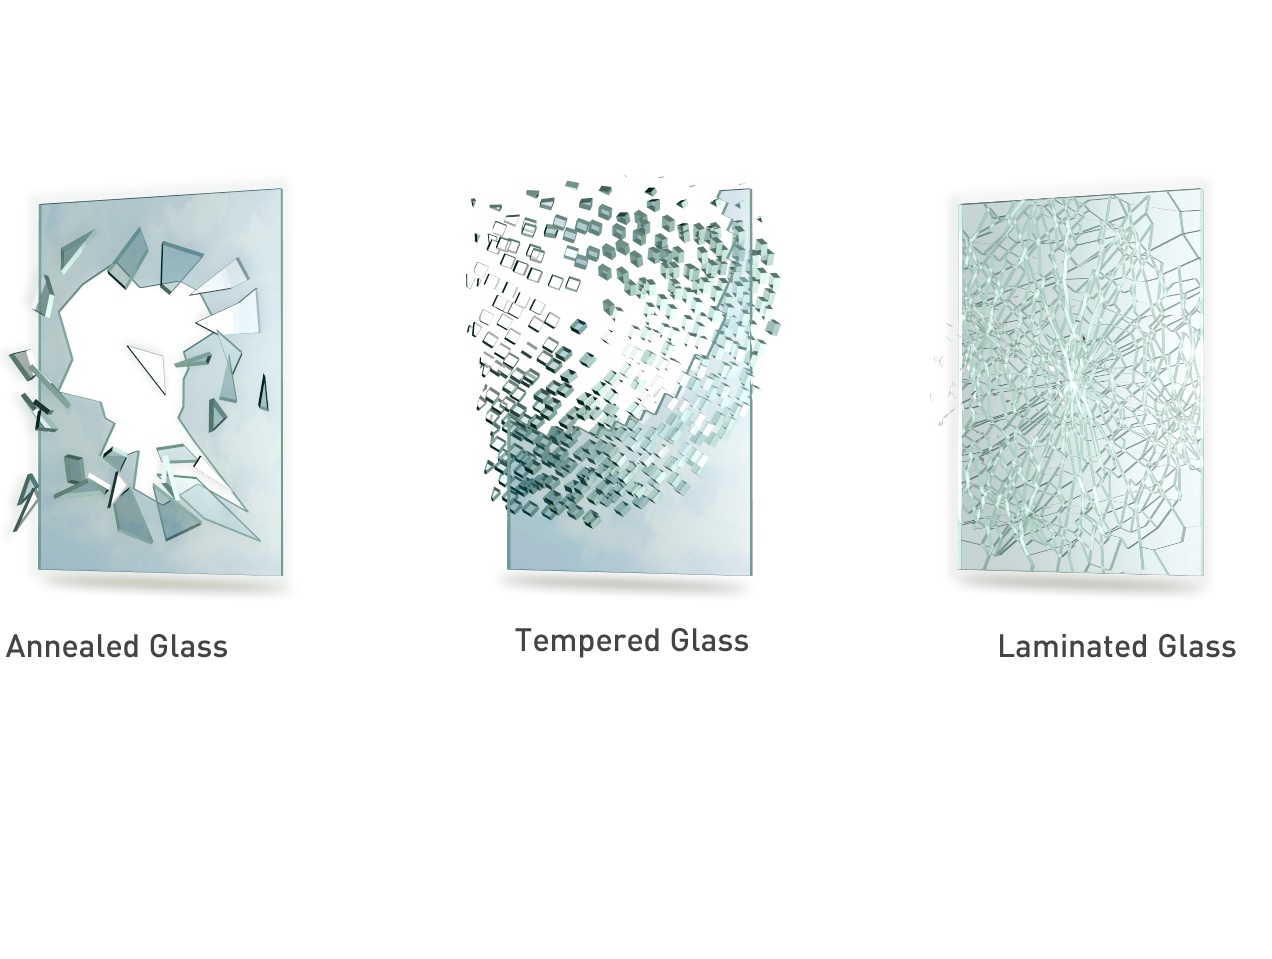
Choosing the right glass type balances aesthetics, safety, and budget. Tempered glass represents the safest option for kitchen environments, especially for lower cabinets or homes with children. This heat-treated glass shatters into small, rounded pieces rather than dangerous shards when broken. While more expensive than standard glass, tempered panels provide crucial safety benefits and often meet local building codes for cabinet doors.
Annealed glass offers a budget-friendly alternative for upper cabinets where impact risk remains minimal. This standard float glass costs less but breaks into sharp, potentially hazardous pieces. Consider frosted or textured glass if you want to display cabinet contents without revealing every detail—these options hide fingerprints better than clear glass while maintaining light flow. Specialty glass like reeded, hammered, or seeded varieties adds visual interest and works well with traditional kitchen designs. For contemporary spaces, consider ultra-clear low-iron glass that eliminates the green tint visible in standard glass edges.
Gather Necessary Equipment Before Starting
Assemble all required tools and materials before removing cabinet doors to prevent workflow interruptions. Essential tools include a tape measure with metal casing for durability, a rubber mallet for gentle adjustments, and a high-quality silicone caulk formulated for kitchen use. You’ll need safety glasses and work gloves to protect against glass shards during installation, plus a caulk gun for precise application.
For door preparation, have wood filler, sandpaper (120- and 220-grit), and wood glue ready. A level ensures doors hang straight after installation, while wood shims help with alignment. If modifying existing doors, a jigsaw with fine-tooth blades works best for cutting out center panels without splintering. For glass installation, collect glazing points (small metal clips), a putty knife for applying caulk, and microfiber cloths for final cleaning. Purchase glass cleaner specifically designed for streak-free results on kitchen surfaces.
Modify Existing Cabinet Doors Properly
The door modification process varies significantly based on your cabinet construction. Solid wood panel doors with stiles and rails offer the easiest conversion—you can remove the center panel and replace it with glass. Carefully pry out the existing panel using a thin putty knife, working around the perimeter to avoid damaging the frame. Clean any residual glue with mineral spirits and a soft cloth, then sand the rabbet (the groove holding the panel) smooth.
MDF or particleboard doors present challenges since they lack a true frame structure. Attempting to cut out the center often causes chipping and delamination. For these doors, consider building a wooden frame that mounts over the existing door surface to hold the glass. Use 1×2 pine boards cut to size, mitered at the corners and secured with wood glue and brads. Raised panel doors require routing out the center section to create a flat surface for glass installation—this advanced technique works best with a plunge router and requires careful depth adjustment.
Measure with Precision to Avoid Costly Mistakes
Accurate measurements prevent expensive glass ordering errors and ensure professional-looking results. Measure the opening width at three points—top, middle, and bottom—and record the smallest dimension. Repeat for height, measuring left, center, and right. Subtract 1/8 inch from both width and height measurements to allow for expansion and easier installation. For example, if your smallest width measurement is 14-3/4 inches, order glass cut to 14-5/8 inches.
When working with existing frames, measure the inner dimensions of the rabbet rather than the overall door size. Use a metal tape measure for accuracy and record measurements immediately to avoid transposition errors. Double-check all numbers before placing your glass order, and specify whether measurements represent the opening size or the desired glass size—glass shops typically cut to your exact specifications. Request polished or beveled edges for safety and aesthetics, particularly for any exposed edges.
Install Glass Panels Using Professional Techniques
Two primary installation methods produce excellent results: interior mounting (glass sits within a rabbet) and surface mounting (glass attaches to the door face). For interior mounting, apply a thin bead of clear silicone caulk along the bottom of the rabbet. Carefully position the glass panel, pressing gently against the caulk to create adhesion. Insert glazing points approximately four inches apart around the perimeter to secure the glass, then apply another bead of caulk around the edges, smoothing with a wet finger for a clean finish.
Surface mounting works well for DIYers seeking simpler installation. Apply silicone caulk directly to the door surface where the glass will sit, position the panel, then attach thin wooden stops around the perimeter using small finishing nails. This method allows easy glass removal for future replacement. Always work on a padded surface to prevent scratching, and have a helper assist with larger panels. Never overtighten fasteners or apply direct pressure to glass surfaces during installation.
Upgrade Hardware for Glass Door Functionality
Standard cabinet pulls often prove inadequate for glass doors, requiring specialized hardware for proper function and safety. Glass-specific pulls feature extended backs that wrap around the door edge, providing secure grip without drilling through the glass. These mounts use screws passing through pre-drilled holes in the glass, with decorative rosettes covering hardware on the interior surface.
If drilling glass seems intimidating, consider surface-mounted pulls that attach using strong adhesive. These work well for lightweight glass panels but may not provide the same secure grip as through-mounted hardware. When selecting new hardware, match finishes to existing kitchen fixtures for cohesion—brushed nickel pulls complement stainless steel appliances, while oil-rubbed bronze coordinates with traditional kitchens. Measure existing hardware hole spacing to ensure new pulls align with existing holes, or fill old holes with wood filler before drilling new ones.
Maintain Glass Cabinet Doors for Longevity
Establish proper cleaning routines to keep glass inserts looking pristine. Clean surfaces weekly with a vinegar-water solution (equal parts) or commercial glass cleaner, using microfiber cloths to prevent lint residue. Address fingerprints immediately in high-traffic kitchens to prevent buildup. Check silicone caulk joints annually for cracks or separation, replacing deteriorated caulk promptly to prevent moisture damage to door frames.
Tighten hardware periodically as repeated use loosens screws over time. Loose pulls stress mounting holes and can cause glass cracks. Inspect panels regularly for chips or stress lines, particularly around hardware points, and replace damaged glass immediately. For frosted or textured glass, use soft brushes to clean intricate patterns without scratching. Avoid abrasive cleaners that can damage specialty glass finishes.
Adding glass to kitchen cabinets dramatically enhances your space’s appearance while increasing functionality. By selecting appropriate materials, measuring precisely, and following professional installation techniques, you’ll achieve results that look custom-made. This weekend project delivers maximum visual impact for minimal investment, transforming ordinary cabinets into stunning focal points that showcase your kitchen’s best features. With proper maintenance, your glass cabinet doors will maintain their beauty for years to come, continually refreshing your kitchen’s appearance without requiring major renovations.


