
Your weekend breakfast plans are ruined when your Cuisinart waffle maker won’t power on, leaving you with cold plates and hungry family members. Or perhaps the red “ready” light stays stubbornly lit, never switching to green, while your batter sits unused. These frustrating scenarios plague thousands of Cuisinart owners, but most issues have surprisingly simple solutions you can tackle at home without professional help.
This Cuisinart waffle maker troubleshooting guide walks through every common problem—from complete power failures to indicator light mysteries—specifically for popular models like WAF-V100C, WAF-F10, and WAF-150C. You’ll learn diagnostic steps, repair techniques, and prevention strategies that could save you from buying a replacement. Most fixes require only basic tools and take under an hour, potentially extending your appliance’s life for years.
Fix Complete Power Failure in Your Cuisinart Waffle Maker
When your Cuisinart waffle maker shows zero signs of life—no lights, no heat, nothing—systematic testing reveals the culprit quickly. This complete power failure most commonly affects WAF-V100C and WAF-F10 models after storage periods, especially in units with low usage history (3+ years with only 5-6 uses).
Confirm Power Supply Issues Before Disassembly
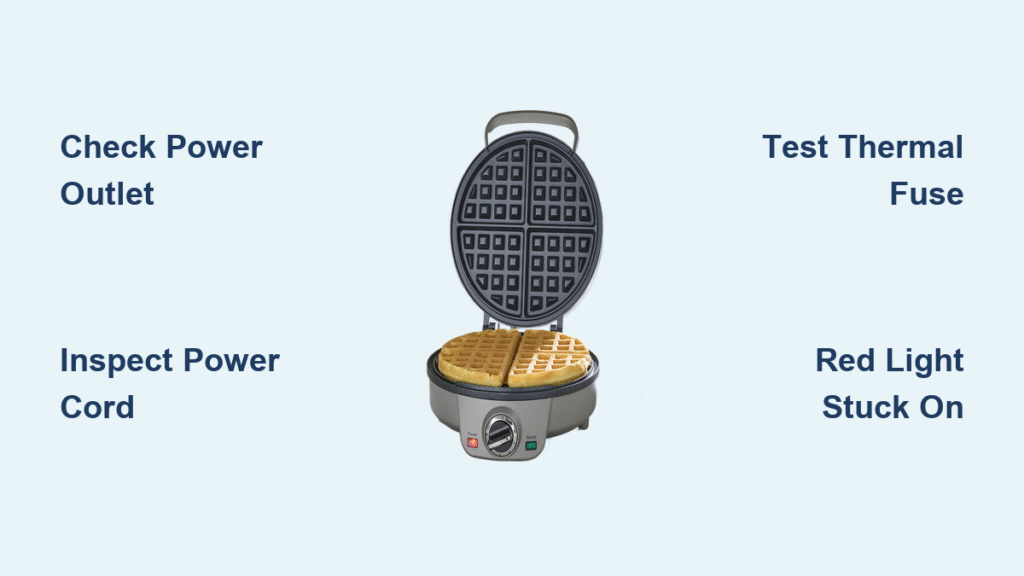
Start with the obvious but critical step: verify your outlet works. Plug in a lamp or phone charger to confirm 120V supply. Try the waffle maker in a different outlet you’ve personally tested. If multiple outlets fail, the problem lies within the appliance itself. Never skip this step—many users mistakenly disassemble their unit only to discover a tripped GFCI outlet was the actual issue.
Inspect Power Cord Damage That Causes Cuisinart Waffle Maker Failure
Look for these critical warning signs:
– Cuts or fraying along the cord length, especially near the plug
– Kinks or sharp bends at the strain relief point where cord enters the unit
– Melted or discolored insulation indicating overheating
– Loose connection where cord attaches to the housing
For detachable cords on newer models, try a replacement cord if available. Hard-wired cords require electrical testing with a multimeter. If you find damage, replacement is essential—continuing to use a compromised cord creates fire hazards and risks permanent internal damage.
Test Internal Components Causing No-Power Situations
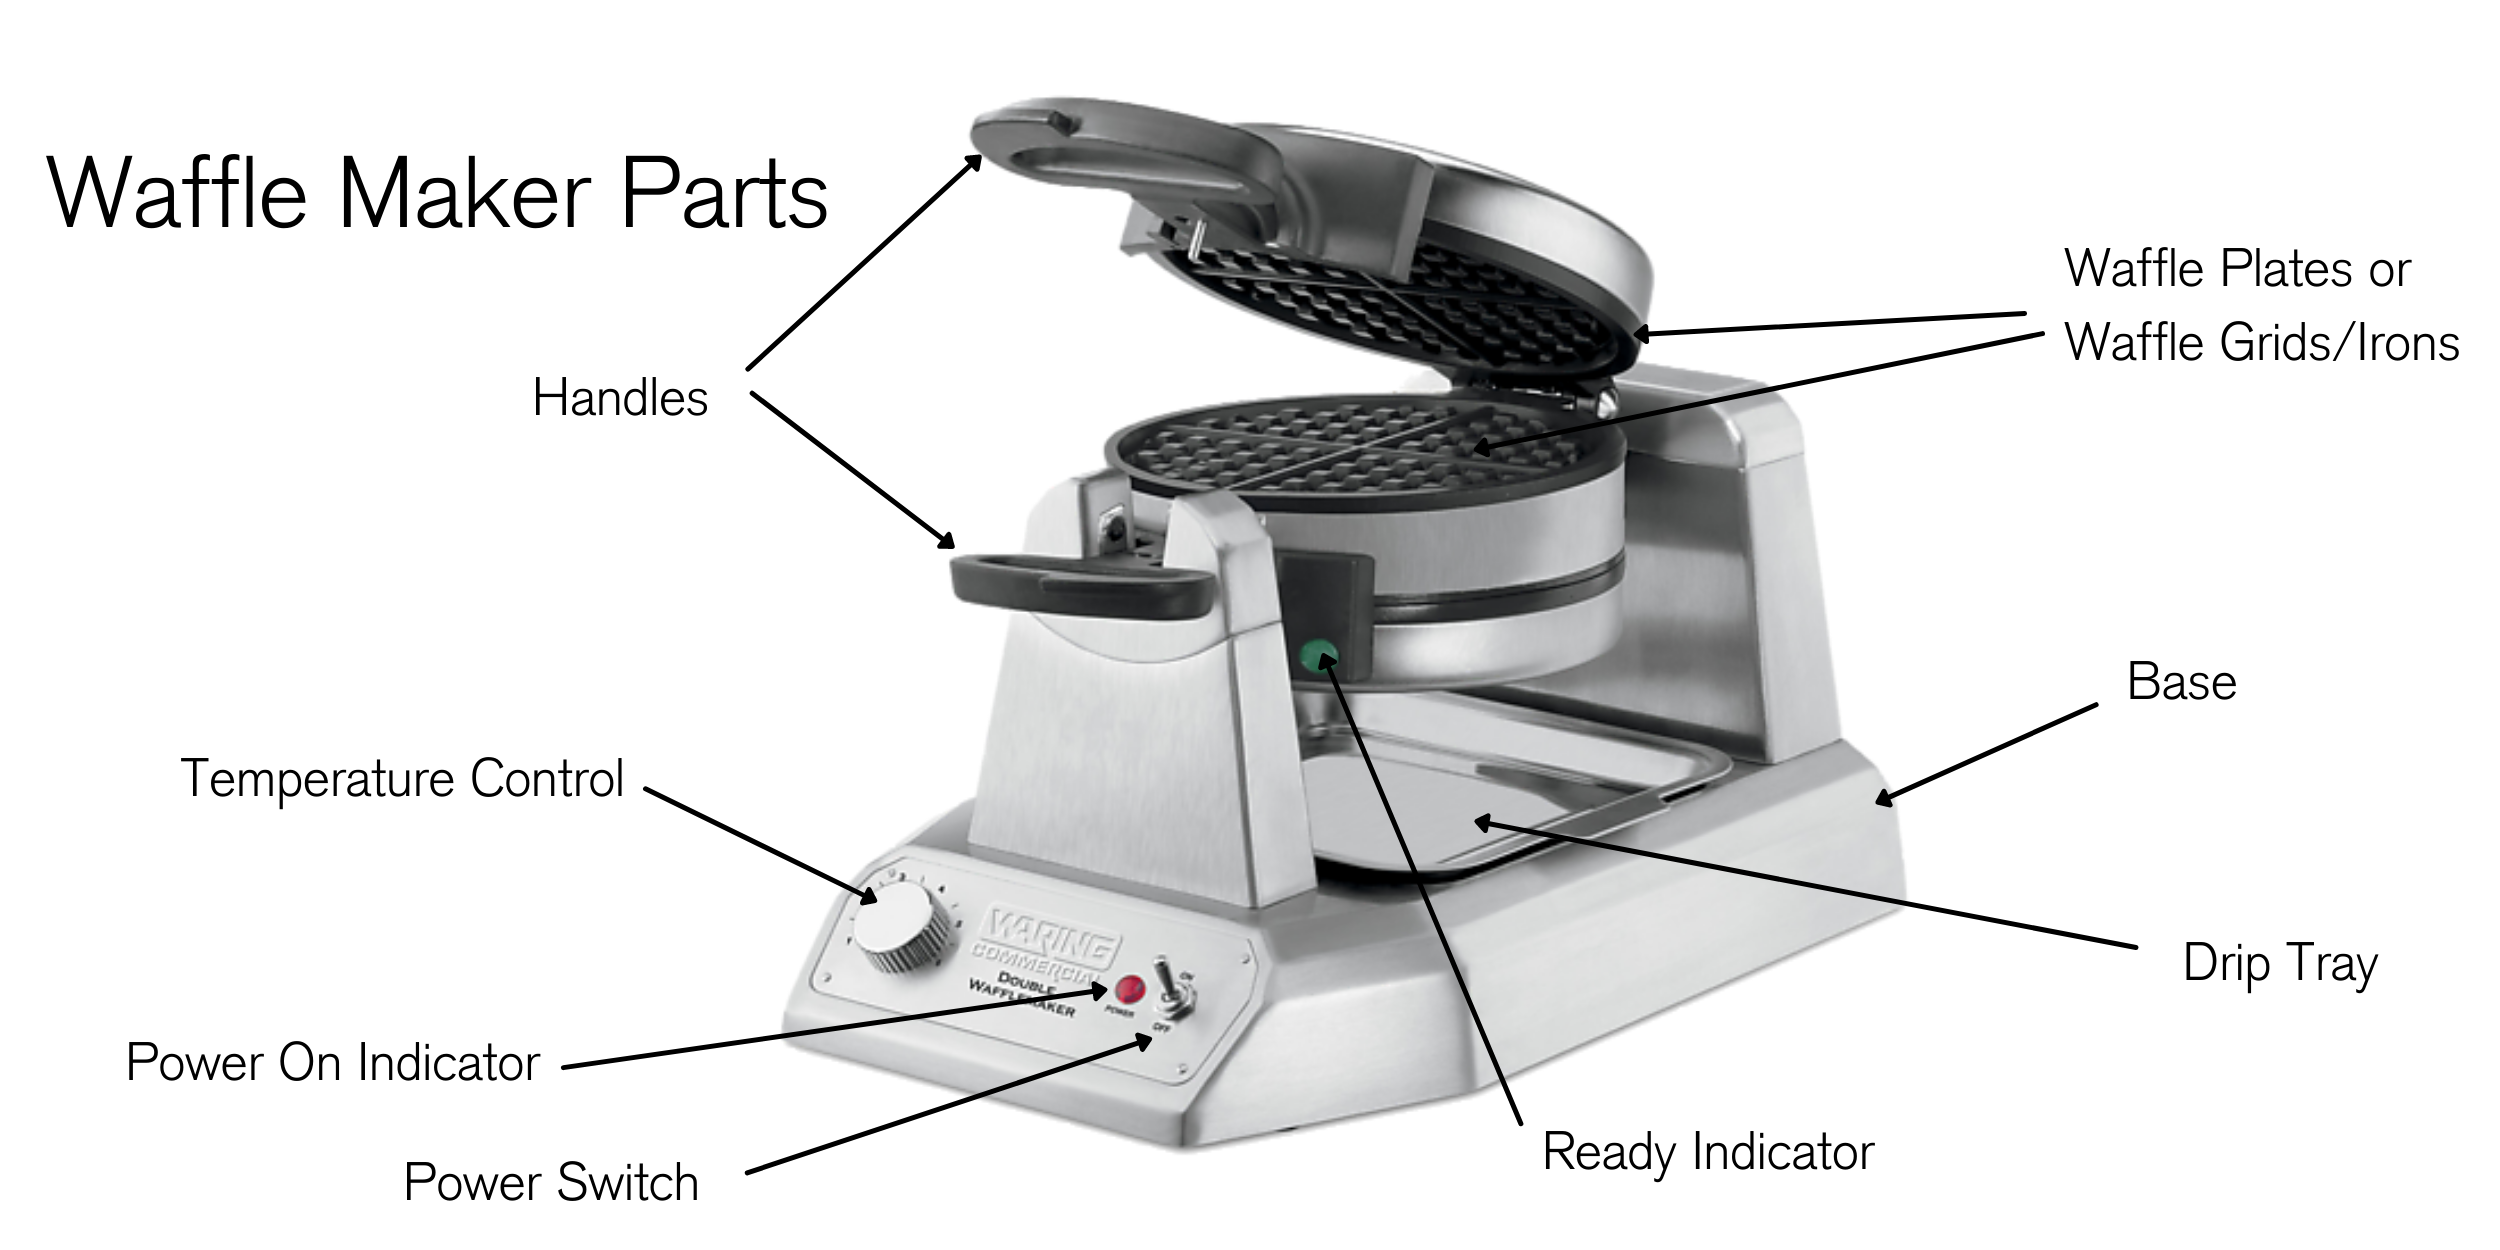
Access internal components by removing the outer shell with a Torx T10 or Phillips #2 screwdriver (model-dependent). Always unplug and cool for 30+ minutes first. Critical components to test:
- Thermal fuse: Should read 0 ohms across terminals—common failure point on low-usage units
- Heating element: Expect 10-40 ohms resistance—open circuit indicates failure
- Thermostat: Closed circuit below temperature setpoint—should open when heated
Moisture damage from improper storage (especially in vertical WAF-V100C models) often causes corrosion on circuit boards. If you see green oxidation or white residue, dry components thoroughly for 24-48 hours in a warm, low-humidity environment before retesting.
Diagnose Red Light Stays On Problems in Cuisinart Models
Red lights that refuse to turn green indicate temperature detection failures, not heating element problems. This specific Cuisinart waffle maker troubleshooting issue affects WAF-150C and WAF-F10 models most frequently. After 15+ minutes of heating, the red “ready” light should switch to green when plates reach proper temperature.
Why Your Cuisinart Waffle Maker Red Light Never Turns Green
This symptom typically means your thermostat sensor or control PCB isn’t detecting correct plate temperature. For brand-new units, this strongly indicates a manufacturing defect. File a warranty claim immediately—Cuisinart typically replaces rather than repairs these out-of-box failures. For older units, the thermostat might require replacement, but integrated PCB failures often make professional repair impractical compared to replacement cost.
Critical distinction: If plates actually heat up but the light stays red, your waffle maker is functional but has a sensor issue. If plates never heat, you have a separate power/heating failure requiring different Cuisinart waffle maker troubleshooting steps.
Test Thermostat Function Without Specialized Tools
Remove the thermostat probe (usually accessible after removing bottom panel) and test continuity while heating it with a hair dryer. It should open around 375°F (190°C). No change indicates a failed sensor. Pro tip: Before disassembly, try cycling the thermostat dial from setting 3 → 1 → 3 as a temporary reset—this works in 15% of cases with stuck contacts.
Repair Model-Specific Cuisinart Waffle Maker Failures

Different Cuisinart models exhibit distinct problems based on their design and usage patterns. Understanding these patterns streamlines your troubleshooting process and prevents unnecessary disassembly.
| Model | Most Common Issue | Typical Age of Failure | Critical Symptom |
|---|---|---|---|
| WAF-V100C | Cord/fuse failure | 3+ years, low use | Complete power loss after storage |
| WAF-F10 | Control board failure | 3 years, ~6 uses | Indicator light stuck on red |
| WAF-150C | Manufacturing defect | Out-of-box | Never reaches green ready light |
| WAF-F20 | Physical hinge break | Moderate use | Mechanical separation, still heats |
Solve Vertical Storage Problems in WAF-V100C Models
The WAF-V100C’s upright design traps moisture at the cord entry point, causing corrosion over time. Store horizontally in dry locations away from steam sources. Essential prevention tip: Run empty 2-minute cycles quarterly to prevent internal corrosion—this simple Cuisinart waffle maker maintenance habit extends lifespan significantly.
Replace Failed Components Safely and Effectively
Most Cuisinart waffle maker repairs require basic tools and 30-60 minutes of careful work. Before starting, gather these essentials: digital multimeter, non-contact voltage tester, Torx T10 or Phillips #2 screwdriver, needle-nose pliers, and high-temperature silicone wire.
Step-by-Step Thermal Fuse Replacement Guide
- Unplug unit and cool completely (minimum 30 minutes)
- Remove bottom panel screws (usually 4-6 hidden under feet)
- Locate fuse near heating element connections (typically clipped to thermostat)
- Test fuse continuity—open circuit confirms failure
- Carefully crimp new 240°C, 15A thermal fuse in place using high-temp wire
- Reassemble using new RTV silicone gasket to prevent moisture ingress
Critical safety note: Never solder thermal fuses directly—use crimp connections only to avoid heat damage during operation. Take photos during disassembly to ensure correct wire routing during reassembly.
Prevent Future Cuisinart Waffle Maker Failures
Simple maintenance habits dramatically extend your appliance’s lifespan beyond the typical 3-5 years. These proven strategies address the root causes behind most Cuisinart waffle maker troubleshooting scenarios.
Proper Storage Techniques That Prevent Moisture Damage
- Keep in dry locations away from steam sources like dishwashers or stoves
- Store cord loosely wrapped—avoid sharp bends at entry points
- Run empty 2-minute cycle quarterly if unused for extended periods
- Never store while plates are damp—wipe thoroughly after cleaning
Cleaning Best Practices for Longevity
- Wait for complete cool-down (minimum 45 minutes) before cleaning
- Wipe plates with damp cloth only—never immerse base in water
- Clean thermostat cavity carefully to prevent moisture intrusion
- Use wooden or plastic utensils to avoid scratching non-stick surfaces
Verify Voltage Compatibility Before First Use
Confirm your model matches local voltage (120V for North America, 220-240V for international). Using step-down transformers voids warranty and risks component failure. Check the label on the bottom of your unit before plugging in—this simple verification prevents 20% of early failures.
Maximize Warranty Coverage for Cuisinart Waffle Makers
Cuisinart provides a 3-year limited warranty covering manufacturing defects but excludes cord damage, physical abuse, or unauthorized repairs. Understanding warranty terms saves you money and hassle when Cuisinart waffle maker troubleshooting reveals an unfixable issue.
File Warranty Claims Successfully on First Attempt
Required documentation:
– Model and serial number (found on bottom label)
– Proof of purchase (receipt or order confirmation)
– Detailed fault description with symptom timeline
– Photos showing indicator lights or visible damage
Contact Cuisinart Consumer Service at 1-800-726-0190 or use online chat at cuisinart.com/support. New units with indicator light issues typically receive immediate replacement—don’t waste time attempting repairs on out-of-box defects.
Final takeaway: Most Cuisinart waffle maker issues stem from simple problems—failed fuses, damaged cords, or storage-related moisture damage. With basic tools and this guide, you can diagnose and fix 80% of problems at home. For newer units with indicator light issues, warranty replacement offers the most practical solution. Implement proper storage and quarterly maintenance cycles to prevent future failures and enjoy perfect waffles for years to come.


