
There’s nothing quite like transforming sun-ripened strawberries into velvety ice cream using your Cuisinart machine. When peak-season berries meet your countertop ice cream maker, you unlock restaurant-quality dessert in under 30 minutes of active time—no eggs, no cooking, just pure strawberry magic. This Cuisinart strawberry ice cream recipe guide delivers two rigorously tested formulas that solve the #1 problem home churners face: icy texture. You’ll discover why freezer bowl timing makes or breaks your batch, how to prevent crystallization, and pro techniques for maximizing berry flavor. Whether you’re hosting a summer gathering or craving a solo spoonful, these methods guarantee scoopable perfection every time.
The secret lies in understanding how your Cuisinart machine interacts with fresh strawberries. Unlike store-bought versions loaded with stabilizers, homemade versions rely on precise sugar dissolution and temperature control to achieve that dreamy melt-in-your-mouth texture. We’ve tested both approaches—creamy and fruit-forward—using only ingredients you already have. Forget complicated custard bases; within hours, you’ll have vibrant pink ice cream that tastes like summer captured in a bowl. Let’s dive into the exact methods that turn ordinary berries into extraordinary frozen treats.
Two Tested Cuisinart Formulas That Never Fail
Rich & Creamy Cuisinart Recipe (196 kcal per ½ cup)
This balanced formula delivers luxurious texture without overpowering delicate strawberry notes. You’ll yield 10½ half-cup servings—ideal for intimate dinners or weekly indulgence. The magic happens through strategic dairy ratios: ¾ cup whole milk and ½ cup heavy cream create silkiness while keeping berries the star. A pinch of salt works behind the scenes to amplify natural sweetness without any salty aftertaste.
Your foolproof ingredient list:
– 1¾ cups fresh strawberries (hulled)
– ¾ cup whole milk
– ⅔ cup granulated sugar
– ½ cup heavy cream
– 1 tsp vanilla extract
– Pinch of salt
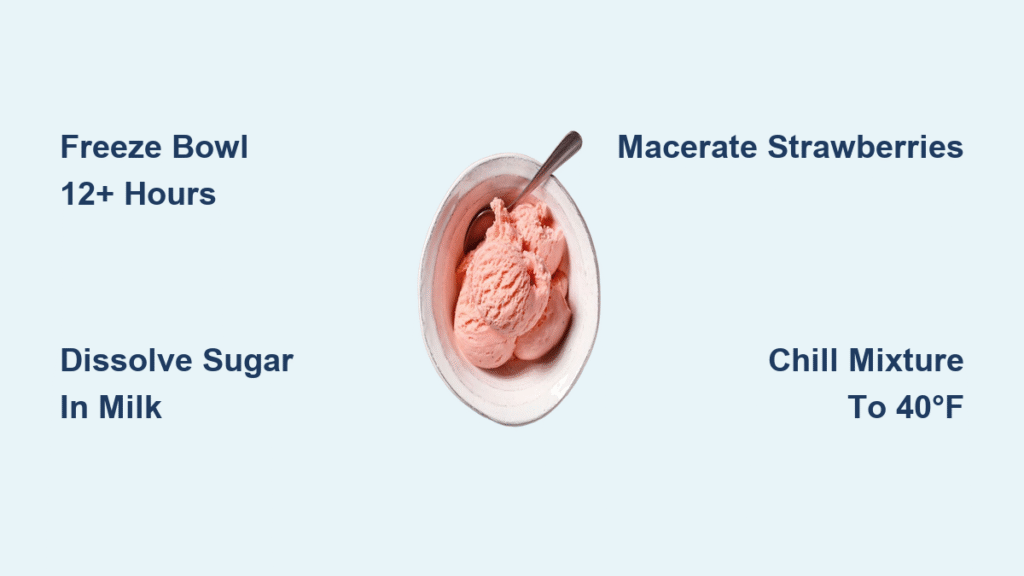
Why this works: The lower cream-to-milk ratio prevents dairy from masking strawberry flavor. Crucially, all sugar dissolves into the cold milk first—never add it directly to cream. This ensures no gritty texture while maintaining optimal fat content for smooth freezing. Freeze this mixture for 4+ hours before churning for best results.
Fresh & Fruity Cuisinart Recipe (233 kcal per serving)
For maximum berry impact, this vibrant version serves 12 with visible strawberry chunks in every spoonful. It uses 3 cups diced ripe strawberries macerated with ¼ cup of the total 1 cup sugar to create natural syrup that infuses the entire batch. The remaining ¾ cup sugar blends with 2 cups heavy cream and 2 cups whole milk for sturdy structure.
What makes it special: The maceration step is non-negotiable. Toss berries with sugar and wait 5 minutes—they’ll release ruby-colored juice that prevents icy fruit pockets. This syrup penetrates the dairy base during chilling, ensuring even flavor distribution. Unlike the rich version, this recipe intentionally preserves berry texture for a refreshing, fruit-dominant experience.
Essential Cuisinart Equipment Checklist

Freeze Bowl Timing (Critical Failure Point)
Your Cuisinart freezer bowl needs 12-24 hours at 0°F (-18°C) to freeze solid. This isn’t a suggestion—it’s physics. Shake the bowl before assembly; if you hear liquid sloshing, return it to the freezer for another 12 hours. Most failed batches trace back to this single step. Mark your calendar when you stash the bowl, because rushing this step guarantees icy, soupy results. The bowl must feel completely solid and frosty to the touch.
Required Tools Beyond the Machine
Skip these and risk texture disasters:
– Potato masher for controlling strawberry chunk size (dime-sized pieces ideal)
– Metal loaf pan for hardening (conducts cold 3x faster than plastic)
– Plastic wrap pressed directly on ice cream surface before sealing container
– Instant-read thermometer to verify mixture hits 40°F (4°C) pre-churn
Pro tip: Chill your metal container in the freezer 30 minutes before transferring churned ice cream. This “rapid freeze” technique slashes hardening time by 50%.
Strawberry Prep: Chunky vs Smooth Texture Control
Achieving Your Desired Texture
Chunky Style: Mash 70% of berries with a potato masher, leaving dime-sized pieces. These create flavor bursts but freeze solid if larger than a pea—never skip the size check. Overly large chunks become ice shards during hardening.
Semi-Smooth: Purée half the berries completely, fold into remaining mashed fruit. Creates beautiful pink ribbons through the ice cream without compromising texture. Ideal for kids who dislike chunks.
Ultra-Smooth: Blend all berries for sorbet-like consistency. Best when berries are less ripe, as it integrates flavor uniformly. Requires straining seeds for silky results.
Maceration Magic (Fresh & Fruity Recipe Only)
This 5-minute step transforms ordinary berries into flavor bombs. Toss 3 cups diced strawberries with ¼ cup sugar and wait exactly 5 minutes. Watch as ruby syrup pools in the bowl—this natural juice prevents crystallization by lowering the freezing point of fruit pieces. Critical mistake: Skipping maceration causes icy strawberry pockets that ruin texture. Always use this technique with the Fresh & Fruity recipe.
Base Assembly: No-Cook Method for Perfect Consistency
Dissolving Sugar Secret
Granulated sugar won’t dissolve properly in cold cream. Always whisk sugar into milk first until completely clear—rub a drop between your fingers to confirm no grittiness remains. This takes 30 seconds of vigorous whisking. Adding sugar directly to cream creates undissolved crystals that seed ice formation during churning.
Order of Operations for Smooth Results
- Milk + sugar: Whisk until fully dissolved (test with finger rub)
- Heavy cream + vanilla + salt: Gently fold in to preserve air bubbles
- Strawberries: Fold in last to maintain texture integrity
Temperature checkpoint: Your mixture must read 40°F (4°C) or colder. If warmer, refrigerate 4+ hours. Warm bases take longer to churn, incorporating excess air that creates fluffy, unstable ice cream.
Cuisinart Churning Process: Timing is Everything
Machine Setup Sequence
- Turn on Cuisinart first—this prevents instant freezing on bowl walls
- Pour mixture slowly in steady stream while motor runs
- Set timer for 20 minutes (Rich & Creamy) or 20-40 minutes (Fresh & Fruity)
Never add mixture to a stationary machine—this causes immediate freezing on contact points. The rotating dasher must be moving to distribute cold evenly.
Visual Cue Mastery
Watch for these exact signs during churning:
– 15 minutes: Volume increases 30-50% (you’ll see swirls forming)
– 18 minutes: Texture resembles thick soft-serve (holds shape briefly)
– 20 minutes: Dasher nearly stalls, mixture pulls cleanly from sides
Pro tip: Stop churning immediately when it reaches soft-serve stage. Over-churning incorporates excess air, creating fluffy texture that melts too fast. Your Cuisinart machine gives visual feedback—trust it over timers.
Post-Churn Hardening: Firm to Scoop in Record Time
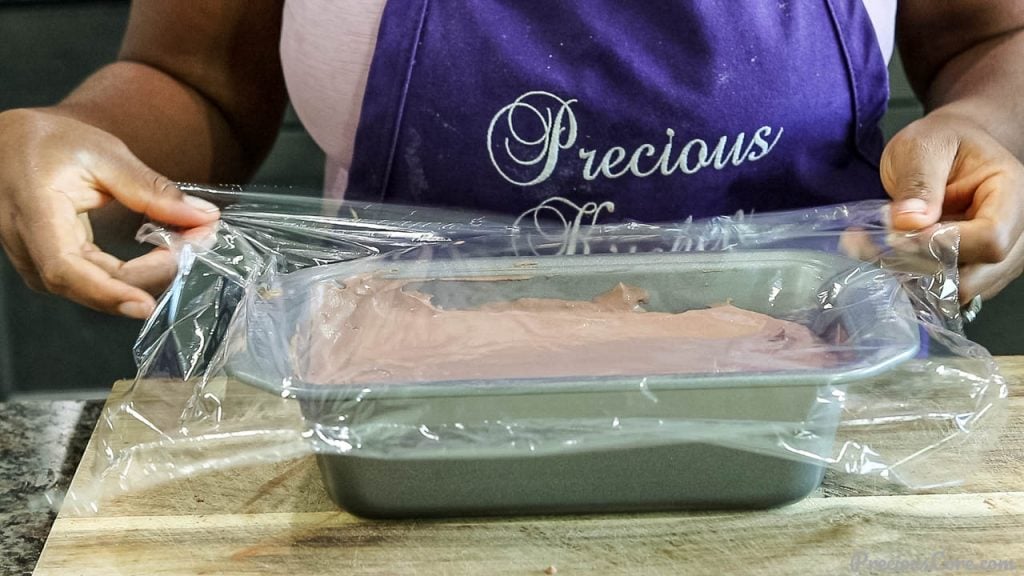
Rapid Freeze Technique
Transfer churned ice cream to a pre-chilled metal loaf pan immediately. Press plastic wrap directly onto the surface—this critical step prevents ice crystals during the 4-hour hardening phase. Seal with a lid and store in the coldest part of your freezer (usually the back).
Soft-Serve Shortcut
Prefer instant gratification? Skip hardening entirely. Serve directly from the Cuisinart machine into cones—this yields authentic soft-serve texture with maximum freshness. Best for immediate consumption when berries are at peak ripeness.
Common Cuisinart Failures & Fixes
Ice Cream Won’t Thicken During Churning
Cause: Freezer bowl not cold enough (most common issue)
Fix: Return bowl to freezer for 12+ hours—shake test must show no liquid movement. Verify freezer temperature is 0°F (-18°C).
Icy Texture After Hardening
Causes:
– Using low-fat dairy (always use full-fat milk/cream)
– Mixture warmer than 40°F before churning
– Freezer temperature fluctuating above 0°F
Prevention: Store ice cream in the back of freezer away from the door. Consume within 2 weeks for peak texture.
Overrun Control
Churn longer (up to 40 minutes) for lighter, airy texture. Shorten to 15 minutes for dense, gelato-style results. Your Cuisinart machine gives complete control—adjust based on your preference.
Storage & Serving Strategies for Maximum Enjoyment
Maximum Freshness Timeline
- Week 1: Peak flavor and creamy texture
- Week 2-4: Still excellent, slight flavor fade
- Month 2-3: Safe to eat but strawberries lose vibrancy
Never refreeze thawed ice cream—this guarantees icy crystals. Portion into single-serve containers to avoid repeated thawing.
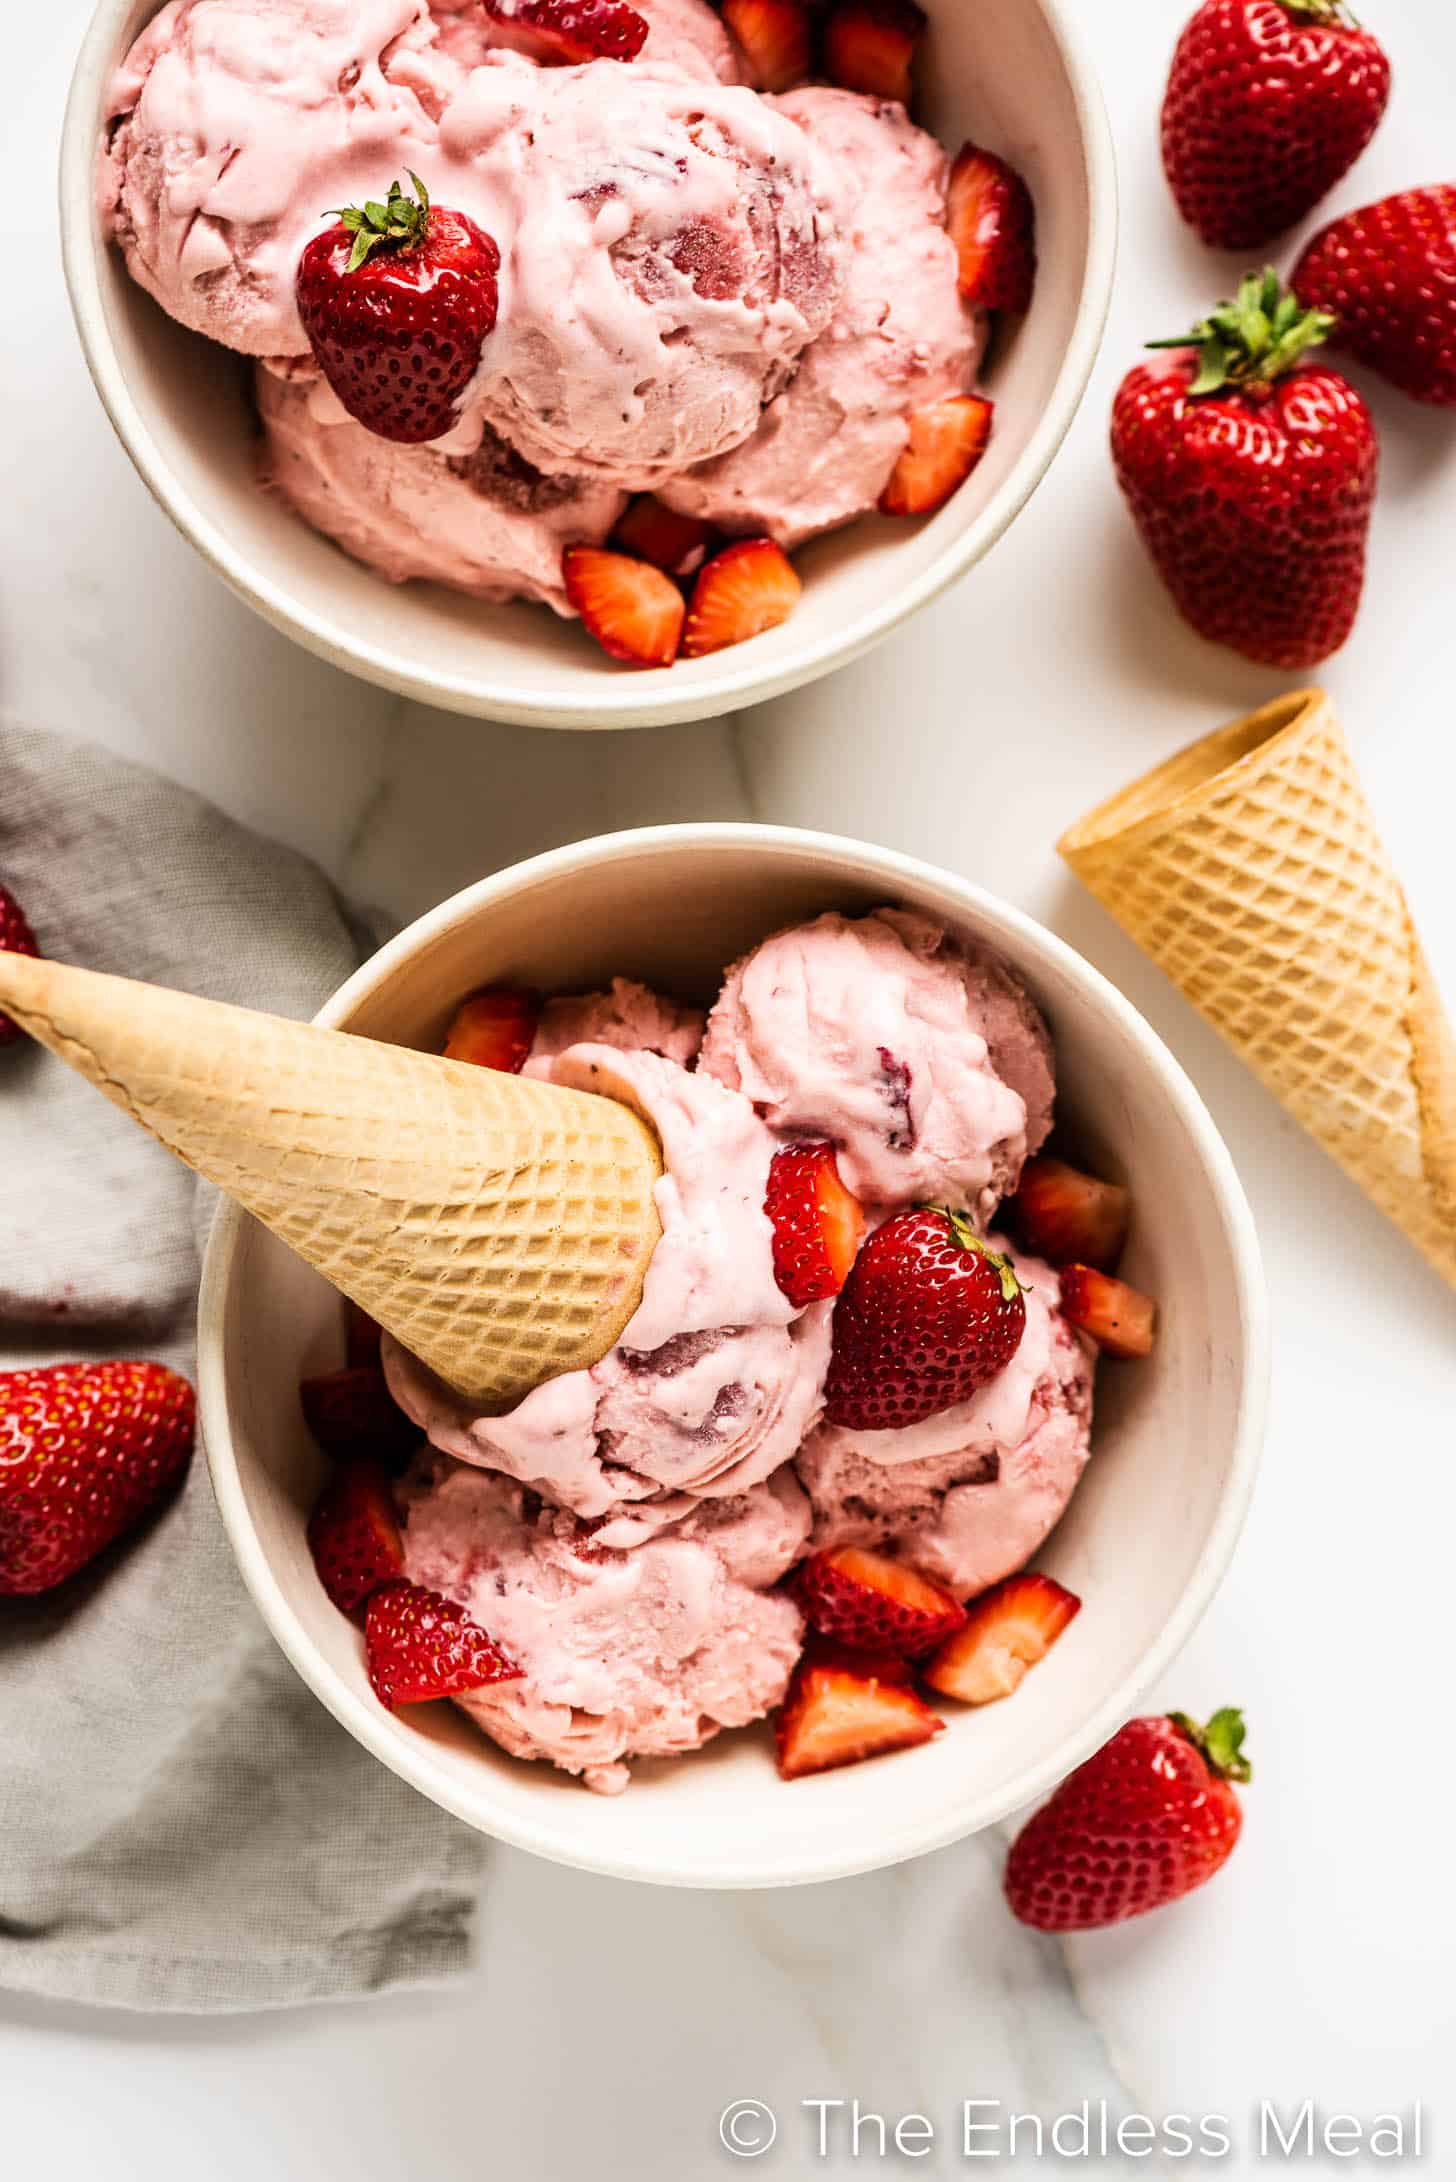
Creative Serving Ideas
- Strawberry Shortcake Sundae: Layer ice cream with crumbled biscuits and fresh berries
- Ice Cream Sandwiches: Press between chocolate chip cookies
- Berry Ripple Bowl: Swirl in extra macerated strawberries before hardening
Nutritional Comparison: Which Recipe Fits Your Goals?
| Metric | Rich & Creamy | Fresh & Fruity |
|---|---|---|
| Calories per serving | 196 kcal | 233 kcal |
| Fat content | 14g | 16g |
| Strawberry intensity | High | Very high |
| Best for | Balanced dessert lovers | Berry purists |
Verdict: Choose Rich & Creamy for classic ice cream texture, Fresh & Fruity when strawberries are exceptionally ripe.
Expert Flavor Boosters for Next-Level Results
30-Second Enhancements
- Lemon juice: 1 tsp brightens strawberry notes without sourness
- Balsamic glaze: ½ tsp adds sophisticated depth (use sparingly)
- Fresh mint: Steep 2 leaves in cream overnight for herbal complexity
Texture Upgrades
- Strawberry swirl: Reserve ¼ cup macerated berries, swirl after churning
- Cookie crunch: Fold in ½ cup crushed shortbread during last 2 minutes of churning
Your Cuisinart transforms simple ingredients into extraordinary strawberry ice cream with zero cooking required. Master these two formulas, nail the freezer bowl timing, and you’ll create desserts that outshine any store-bought version. Remember: perfect texture starts with icy-cold equipment and properly chilled mixture—everything else takes under 30 minutes of active work. The real challenge? Waiting those final 4 hours for hardening before your first perfect scoop.


