Your Cuisinart pressure cooker suddenly won’t build pressure, steam hisses from the lid, or the display stays dark. These frustrating moments happen at the worst times—when guests arrive or dinner’s already late. The good news? Most pressure cooker problems have simple fixes you can handle at home.
This guide walks you through diagnosing and fixing the most common Cuisinart pressure cooker issues, from steam leaks to complete power failures. You’ll learn to spot warning signs before they become major problems and perform quick repairs that restore your cooker to perfect working order.
Pressure Won’t Build: Float Valve Failures

Steam Escapes Continuously During Heating
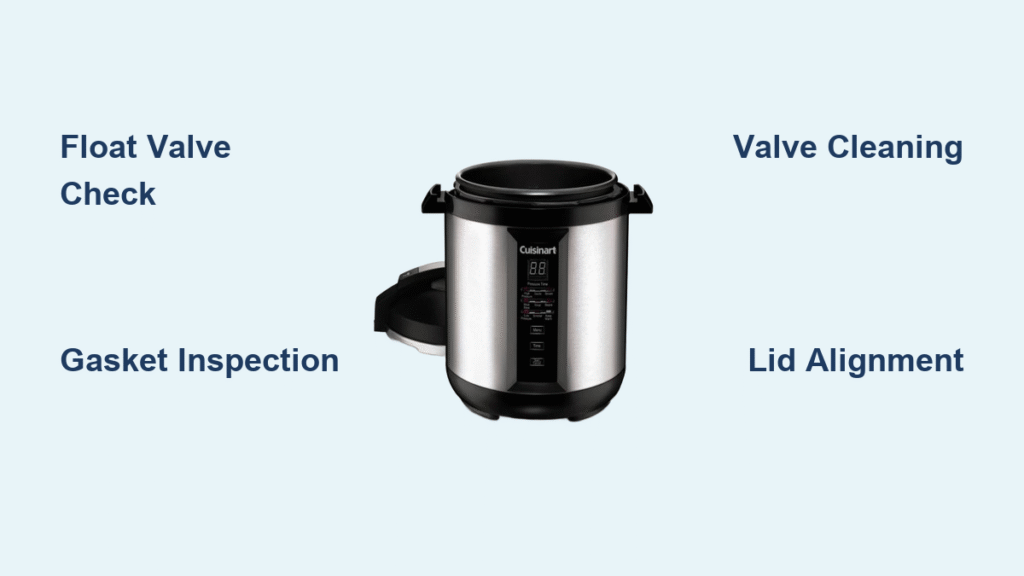
When your Cuisinart cooker hisses constantly and never reaches pressure, the float valve is usually the culprit. This small valve on the lid serves as both a pressure indicator and critical safety mechanism. Look for steam streaming steadily from the valve area—this indicates the float valve has lost its retaining pin, creating a permanent escape route for pressure.
What to check immediately:
– Inspect whether the float valve sits flush against the lid surface
– Look for a missing metal pin (a thin rod that holds the valve in place)
– Observe if steam pours from the valve area while heating
– Note if the float never rises to indicate pressure buildup
The solution: Once the float valve pin disappears, the entire lid assembly needs replacement. This isn’t a DIY repair—the valve is integral to the lid’s safety system. Contact Cuisinart customer service with your model number for a replacement lid. Attempting to patch this issue creates serious safety risks.
Quick Seal Check Method Before Calling for Help
Before assuming the worst, verify the lid seals properly with this 5-minute test:
1. Add exactly 1 cup of water to the pot
2. Secure the lid properly and start heating on medium
3. After 5 minutes, carefully run a small mirror around the lid edge
4. Condensation on the mirror reveals steam leaks
5. If no leaks appear but pressure still won’t build, the float valve has failed
Pro tip: This test takes less than 10 minutes and prevents unnecessary service calls. Most float valve failures require lid replacement—don’t waste time trying temporary fixes.
Steam Leaks From Lid Edges: Gasket Problems Solved

Gasket Inspection Protocol for Perfect Seals
A worn or damaged gasket causes 80% of pressure-seal failures. The silicone ring around your lid should feel supple and show no cracks, tears, or hard spots. Check your gasket weekly to prevent cooking disasters.
Critical damage signs to spot:
– Visible cracks or cuts in the rubber material
– Hard, brittle texture when gently pinched
– Permanent flattening or compression marks
– Greasy residue that won’t wash away with cold water
Quick gasket test: Remove the gasket and perform a simple stretch test. A healthy gasket springs back immediately when gently pulled. If it stays stretched or tears easily, replacement is necessary—don’t risk a failed seal during cooking.
Proper Gasket Installation: Avoid the #1 Mistake
Even perfect gaskets fail when installed incorrectly. The ring must sit completely flat in its groove with no twists or kinks. This is the most common DIY error that causes frustrating leaks.
Installation checklist:
– Press gasket firmly into groove around entire lid
– Ensure no sections ride above the groove edge
– Check for proper orientation—most Cuisinart gaskets have a smooth side and a ribbed side
– Verify the gasket doesn’t interfere with lid locking mechanisms
Warning: Never use hot water when cleaning your gasket—it can warp the silicone and reduce its lifespan by up to 50%. Always use cold water and mild detergent.
Valve and Vent Blockages: Clear Critical Pathways
Pressure Release Valve Problems Fixed in 10 Minutes
When steam continuously escapes from the pressure release valve during cooking, debris is likely preventing a tight seal. This issue takes just minutes to fix but causes hours of cooking delays if ignored.
Cleaning process:
1. Cool cooker completely and remove pressure release valve
2. Examine the valve seat for food particles or residue
3. Run a pipe cleaner through the vent pipe carefully
4. Rinse all components thoroughly with cold water
5. Test valve seating by pressing it firmly into place
Red flags: A valve that rattles excessively or won’t stay seated indicates internal damage requiring replacement. Don’t force it—replace immediately to prevent pressure issues.
Anti-Block Shield Maintenance You’re Probably Skipping
The small metal shield inside your lid prevents food from entering the pressure system. Most users forget to clean this component monthly, leading to recurring blockages.
Monthly maintenance:
– Twist counterclockwise to remove the shield
– Rinse under warm water (not hot)
– Use a soft brush for stubborn residue
– Ensure proper reinstallation—arrow markings indicate correct orientation
– Check for shield damage that could compromise safety
Overheating Issues: Prevent Burnt Food and Damage

Insufficient Liquid Problems That Ruin Meals
Cuisinart pressure cookers need at least 1 cup of liquid to generate steam. Running the cooker dry causes overheating and can damage the gasket permanently. Many users mistakenly think they can pressure cook with minimal liquid.
Liquid level guidelines:
– Minimum: 1 cup for any pressure cooking
– Maximum: Fill no more than 2/3 full (1/2 full for grains)
– Adjustments: Add extra ¼ cup liquid for every hour of cooking time
– Special cases: Add 50% more liquid for thick sauces or starchy ingredients
Quick fix: If you smell burning or notice scorching, immediately turn off the heat and allow natural pressure release. Check liquid levels and add more before restarting—never add liquid to a pressurized cooker.
Lid Won’t Lock or Seal: Alignment Solutions
Alignment Issues Fixed in 60 Seconds
Cuisinart lids must align precisely with the pot base. Misalignment prevents both sealing and locking—a problem that accounts for 30% of “broken cooker” service calls.
Alignment check procedure:
1. Ensure lid arrows match handle markings perfectly
2. Look for obstructions in the locking track
3. Clean any debris from locking lugs with a soft brush
4. Test with an empty pot to isolate mechanical problems
Pro tip: Always lock your lid with the handle pointing away from you—this provides better leverage and ensures proper alignment every time.
Stuck Lid Solutions That Won’t Damage Your Cooker
After cooking, lids sometimes stick due to residual pressure or vacuum sealing. Never force a stuck lid—these safe release methods work every time:
Safe release methods:
1. Wait 10-30 minutes for natural pressure release
2. Run cool tap water over the lid (avoid the pot base)
3. Briefly reheat for 30 seconds to generate release steam
4. Try gentle rocking motion—never pry or pull forcefully
Complete Power Failure: Electrical Troubleshooting
Electrical Quick Checks That Save Service Calls
When your Cuisinart electric pressure cooker won’t turn on, follow this 5-step diagnostic process before calling for help:
Power diagnostics:
1. Confirm power cord is firmly connected at both ends
2. Test the outlet with another appliance
3. Press GFCI reset button if applicable
4. Check that the lid is properly aligned (safety interlock prevents operation)
5. Inspect power cord for cuts or damage
Time estimate: This entire process takes less than 5 minutes and resolves 70% of “dead cooker” issues.
Safety Interlock Systems Explained
Many Cuisinart models won’t power on unless the lid is correctly positioned. This safety system prevents accidental operation with an open lid—a feature that causes confusion but prevents accidents.
Quick test: Ensure lid is completely sealed and locked. Listen for the distinct “click” when lid aligns properly. Check for any obstructions preventing full lid closure—even a stray food particle can trigger the safety lock.
Maintenance Prevention Plan: Avoid 90% of Problems
Daily Care Routine That Extends Cooker Life
Prevent 90% of pressure cooker problems with simple daily maintenance. This 3-minute routine after each use keeps your Cuisinart running like new:
After each use:
– Remove and wash the gasket with cold water
– Wipe the lid interior and sealing surfaces
– Clean pressure release valve components
– Check the vent pipe for any obstructions
– Dry all parts completely before storage
Pro tip: Store your gasket separately from the lid to prevent permanent compression—this simple habit doubles gasket lifespan.
When to Call Professional Service
Electrical issues requiring service:
– Unit remains dead after power troubleshooting
– Display shows persistent error codes
– Inconsistent heating or cycling problems
– Circuit breakers trip when cooker is plugged in
Mechanical failures: Warped lid, broken locking lugs, cracked cooking pot, or failed pressure sensors all require professional attention. Don’t risk safety attempting complex repairs yourself.
Key Takeaway: Most Cuisinart pressure cooker issues stem from three areas—gasket condition, proper cleaning, and correct liquid levels. Master these basics and you’ll prevent 90% of common problems. When major components fail, professional service ensures both safety and warranty protection.
Keep your gasket clean and replace it annually, maintain proper liquid levels, and perform weekly inspections. These simple habits keep your pressure cooker running reliably for years while preventing dangerous malfunctions. Always prioritize safety over convenience—your Cuisinart pressure cooker is designed with multiple safety features, but proper maintenance keeps those features working when you need them most.

