

That first cup of coffee shouldn’t turn into a frustrating battle with a silent machine or a countertop puddle. When your Cuisinart coffee maker refuses to brew, leaks water, or flashes cryptic error codes, professional repair costs can rival buying new. But 80% of these issues stem from simple problems you can fix in under 30 minutes with basic tools. This Cuisinart coffee repair guide covers proven fixes for DCC-1200, DGB-850, Veloce EM1000, and other popular models, using only household items and manufacturer-approved parts. You’ll learn to diagnose electrical faults, clear stubborn blockages, and replace critical components—saving hundreds while extending your machine’s life.
Fix Cuisinart Coffee Maker Power Failures in 10 Minutes
When your Cuisinart stays dark after pressing power, skip the panic. Start with outlet verification: plug in a lamp or phone charger to confirm power. For DCC-3200 and DGB-650 models, inspect the cord’s stress points near the plug and machine entry—fraying or burn marks mean immediate replacement. Always match voltage and amperage specs (e.g., CHW-12 requires 120V/10A cords).
Reset the Control Board Before Replacing Parts
Electronic glitches often mimic hardware failure. Unplug your machine for 15 full minutes—this drains residual power and clears error memory. For Veloce EM1000 espresso makers, press and hold the power button for 10 seconds while plugged in to force a hard reset. If the display remains dead, test cord continuity with a multimeter: readings above 1Ω indicate a broken wire needing replacement. Never attempt internal fuse repairs unless you’re certified—these require opening sealed compartments.
Clear Brewing Blockages Causing Incomplete Cycles

Mid-cycle shutdowns plague DCC-1200 and DCC-3400 models when water flow stops. First, confirm the reservoir clicks securely into place—DGB-850 units have sensors that halt brewing if seating is imperfect. Then tackle these three critical zones:
Unclog Water Flow Tubes Without Disassembly
Visible coffee grounds in your carafe signal a blocked shower head. Remove the brew basket and use a straightened paperclip to clear each pinhole in the shower head assembly. For DCC-1100 models with persistent slow flow, insert a flexible pipe cleaner through the water tube connecting the reservoir to the heating element. Pro tip: Run compressed air through these tubes weekly to prevent buildup—never use metal wires that scratch internal surfaces.
Execute the Vinegar Descale Fix That Works
Mineral deposits choke 70% of brewing failures. Mix equal parts white vinegar and water in the reservoir. Run a full brew cycle without coffee grounds, then let the solution sit for 30 minutes to dissolve scale. Complete two rinse cycles with clean water. For Veloce EM1000 espresso units, use manufacturer-approved descaling solution instead—vinegar damages sensitive pressure valves.
Seal Leaking Cuisinart Thermal Carafes Permanently

Water pooling under your machine usually traces to one of three failure points. Place paper towels beneath the unit during a brew cycle to pinpoint leaks. DCC-1200 owners often find reservoir cracks at seam joints—shine a flashlight along stress points to spot hairline fractures invisible in normal light.
Replace Thermal Carafe Gaskets in 5 Minutes
Cracked rubber seals cause 90% of carafe leaks. Remove the lid and inspect the gasket for brittleness or missing chunks. Order model-specific replacements (DCC-3400 uses part # CPT-2001). Before installation, soak the new seal in warm water for 5 minutes to increase flexibility. Press it firmly into the groove, starting at the handle base, and test with water before brewing coffee. Warning: Super glue repairs fail under heat—always replace seals.
Decode Cuisinart Error Codes and Reset Systems
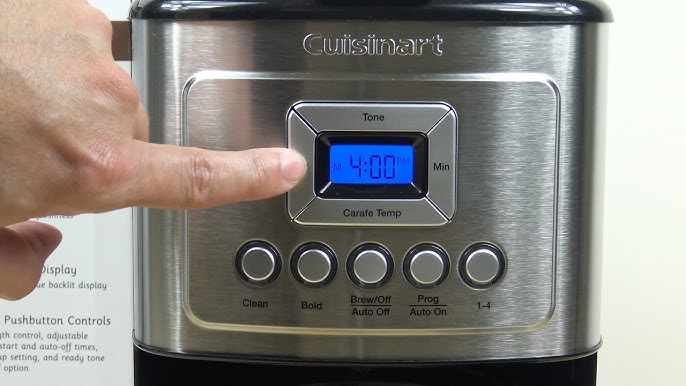
Flashing lights or “X” marks on DCC-3200 displays indicate control board errors—not necessarily hardware failure. Unplug for 15 minutes to reset the system. If moisture caused the error (common near steam wands), dry the panel with a hairdryer on cool setting for 10 minutes. Persistent “X” symbols after reset mean professional service is needed—do not open the control panel.
Fix DGB-850 Grinder Errors Without Tools
When burrs stop grinding but the motor hums, coffee fines jam the chute. Unplug the machine, remove the bean hopper, and vacuum grounds from the grind chamber. Run ¼ cup uncooked rice through the grinder to dislodge oils, then brush out residue. For uneven grind texture, adjust the dial while referencing Cuisinart’s settings: coarse (8-10) for French press, medium (5-7) for drip, fine (2-4) for espresso. Test with 2 tbsp beans before full brewing.
Replace Critical Cuisinart Parts Safely
Water filters impact taste and performance more than most realize. Change them every 60 days or 60 cycles—soak new filters in water for 15 minutes first to prevent carbon dust in your coffee. For heating element failures (machine powers on but won’t heat), do not attempt DIY replacement. These require disassembling sealed compartments and pose electrical risks. Contact Cuisinart at 1-800-726-0190 instead.
Source Genuine Replacement Components
Order reservoirs, seals, and cords only from Cuisinart’s official site or Amazon authorized sellers. Using incompatible parts (e.g., a DCC-1100 reservoir in a DCC-1200) triggers sensor errors. For burr replacements, note that DGB-650 grinders need new burrs after 500-750 cycles—measure usage via the machine’s cycle counter if available.
Prevent Breakdowns With 5-Minute Daily Maintenance
Your Cuisinart coffee repair frequency depends entirely on upkeep. Skip these daily steps and face costly fixes within months:
- Empty the drip tray after every brew—overflow causes base leaks in DCC models
- Rinse the carafe and filter basket immediately to prevent coffee oil buildup
- Wipe steam wands on Veloce EM1000 with a damp cloth to avoid milk residue clogs
Weekly, disassemble and wash the shower head and brew basket in warm, soapy water. Monthly, descale with vinegar solution and clean grinder burrs. Critical: Never run your machine dry—always keep the reservoir above minimum fill lines to prevent heating element damage.
When to Call Cuisinart Instead of Attempting Repair
Warranty coverage voids if you open sealed compartments—Cuisinart’s standard 3-year warranty requires professional service for internal repairs. Keep your receipt and register online at Cuisinart.com. Call 1-800-726-0190 for:
– Heating element failures
– Control board errors persisting after reset
– Steam wand issues on Veloce EM1000 models
Never attempt these repairs if you lack electrical certification: replacing internal fuses, thermostat repairs, or control board soldering. Water damage near circuitry also demands professional attention—unplug immediately and contact support.
Quick-Reference Cuisinart Troubleshooting Flowchart
Facing an urgent issue? Follow this sequence before disassembling anything:
- No power? → Test outlet → Inspect cord → Reset control board (15+ min unplugged)
- Won’t brew? → Verify reservoir click → Clean shower head → Descale → Check filter basket
- Leaks? → Examine reservoir for cracks → Replace carafe seal → Empty drip tray
- Weak coffee? → Replace water filter → Adjust grind setting → Clean brew group
- Grinder stuck? → Vacuum chute → Run rice through → Reset burr alignment
Extend Your Cuisinart’s Life With Two Simple Habits
Most Cuisinart coffee repair emergencies vanish with two non-negotiable routines: descale every 3 months using the vinegar method, and replace water filters every 60 cycles. Set phone reminders labeled “Cuisinart Maintenance” to avoid forgetting. Keep a log of descaling dates—patterns in failure timing often reveal overlooked issues like hard water damage. When in doubt, unplug for 15 minutes and clean thoroughly; 85% of “broken” machines restart after this. Your morning ritual deserves reliability—treat these fixes as essential as your beans, and your Cuisinart will deliver perfect coffee for years.


