

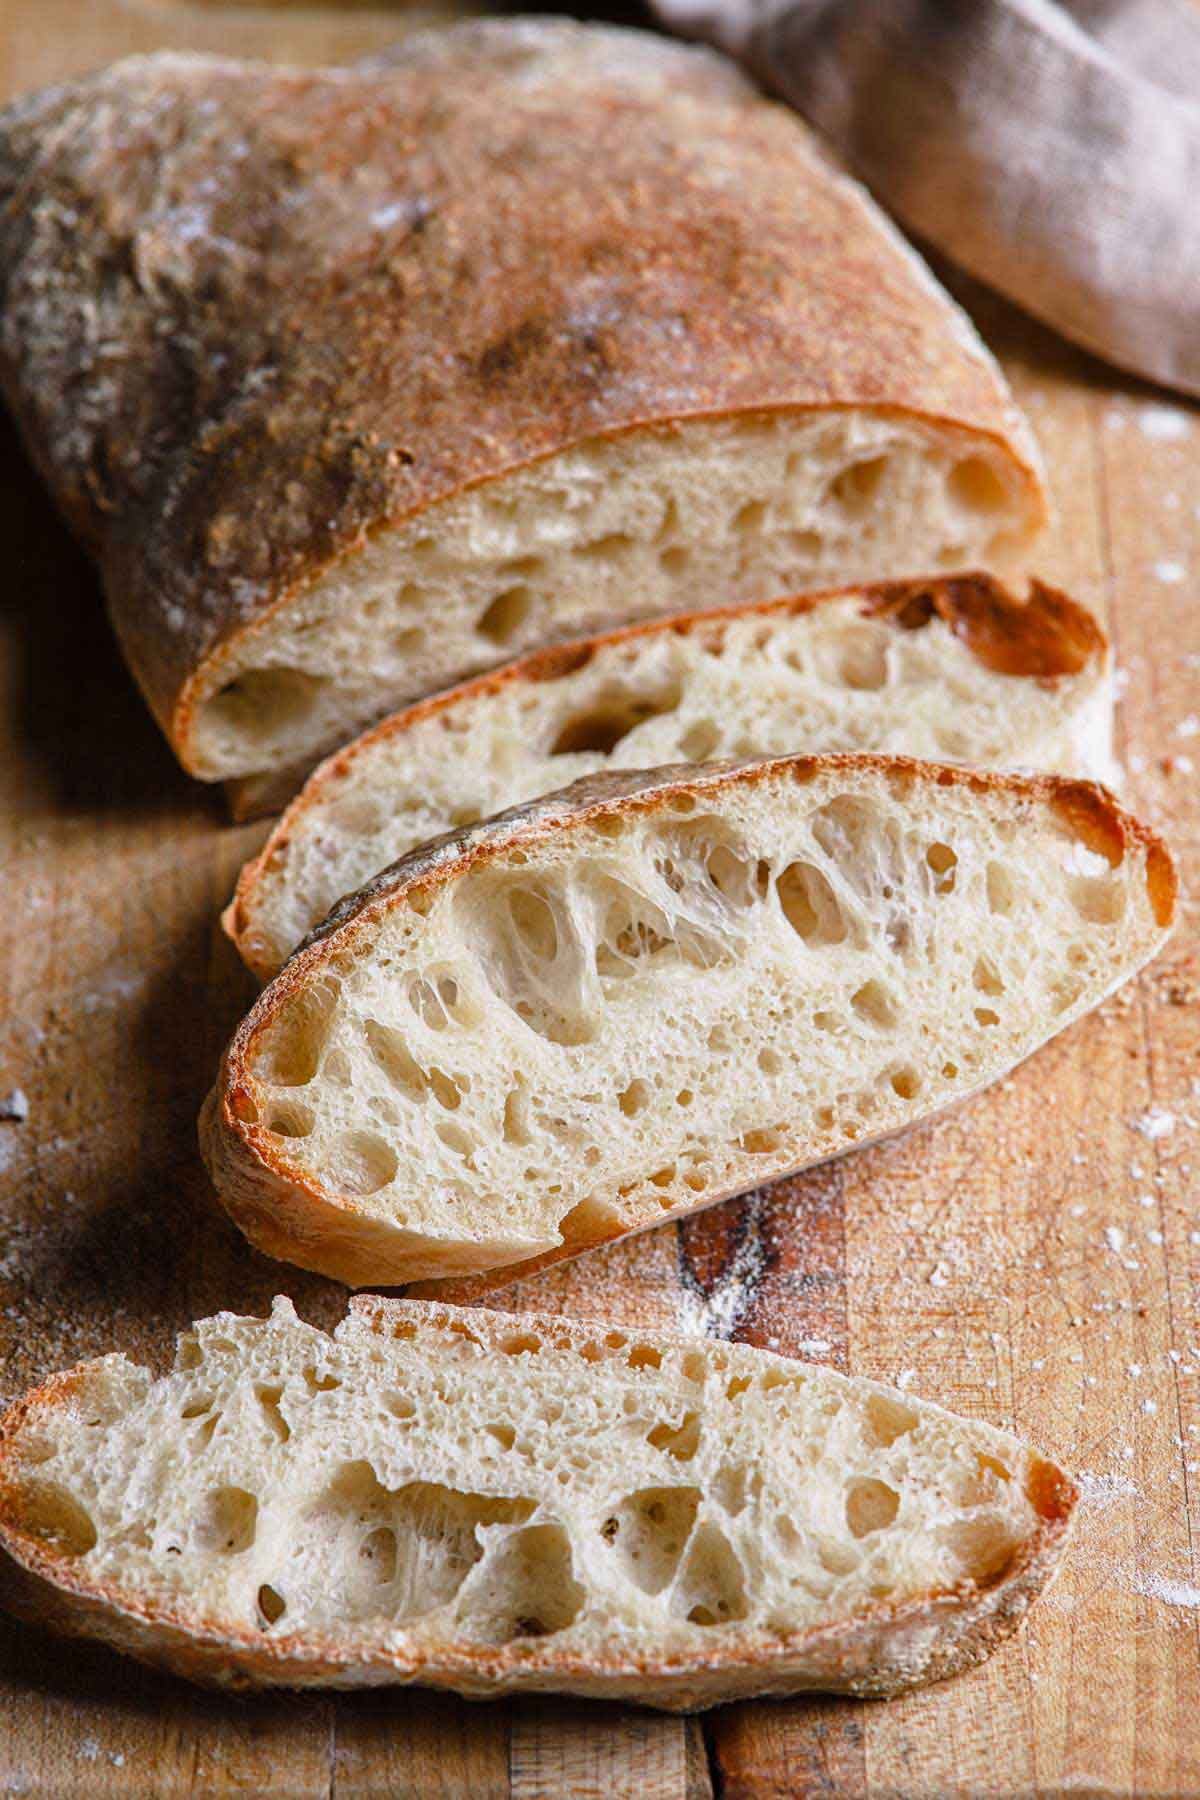
Tired of dense, store-bought ciabatta that lacks authentic texture? Your Cuisinart bread maker holds the secret to creating bakery-quality artisan bread with minimal effort. This Cuisinart bread maker artisan bread recipe transforms simple pantry staples into light, airy ciabatta with that coveted chewy interior and crisp crust—no professional skills required. The magic happens through an overnight sponge technique that develops complex flavors while you sleep, requiring just 20 minutes of active time across two days. By leveraging your machine’s precise Artisan Dough program, you’ll consistently achieve professional results that’ll make your kitchen smell like a Roman bakery.
Unlike standard bread machine cycles, this method uses your Cuisinart exclusively for mixing and kneading, then transfers the dough to your conventional oven for perfect baking. The result? A 1½-pound loaf with the irregular holes and rustic appearance that defines true ciabatta. Whether you’re serving it with olive oil for dinner or slicing it for paninis tomorrow, this recipe delivers authentic Italian texture without the fuss of hand-kneading or constant monitoring.
Essential Ingredients for Artisan Ciabatta Success
Overnight Sponge Components
Your journey to perfect ciabatta begins with a simple three-ingredient sponge that works overnight to develop flavor. Combine ¾ cup bread flour (crucial for superior gluten development), ½ cup water, and just a pinch of active dry yeast in a large bowl. Stir until completely smooth—no lumps should remain—as this mixture will transform into your flavor foundation. Bread flour is non-negotiable here; all-purpose flour lacks the protein content needed for ciabatta’s signature open crumb structure. The resulting batter should resemble thick pancake consistency, thick enough to hold its shape but pourable.
Final Dough Requirements
After your sponge proofs overnight, it joins the remaining ingredients in your Cuisinart bread pan. While exact measurements for the final dough aren’t specified in the resource document, your machine’s manual provides precise guidance. You’ll need additional bread flour, water, salt for flavor enhancement, and a small amount of yeast for the final rise. Always add ingredients in the sequence your Cuisinart model requires—typically liquids first, then dry ingredients, with yeast last to prevent premature activation. Never guess quantities; consult your manual’s 1½-pound loaf guidelines for perfect hydration levels.
Prepare Overnight Sponge Like a Pro
Mix Your Starter Tonight
Start this artisan ciabatta recipe by preparing your sponge in the evening. In a large bowl, combine the bread flour, water, and that minuscule pinch of yeast—literally just enough to see specks on your fingertip (about 1/16 teaspoon). Mix vigorously for 30 seconds until completely smooth and homogenous. The mixture will be quite wet, resembling thick cake batter. This high-hydration starter is essential for creating ciabatta’s characteristic air pockets. Cover the bowl loosely with plastic wrap—never seal airtight, as fermentation gases need to escape—and place it in a warm, draft-free spot away from direct sunlight.
Time Your Fermentation Perfectly
Your sponge requires 8-24 hours at room temperature to develop properly. Check it after 8 hours: ideal proofing shows numerous small bubbles across the entire surface, emits a pleasantly yeasty aroma with subtle tanginess, and has nearly doubled in volume. Under-proofed sponge lacks bubbles and smells floury; over-proofed sponge develops large holes and a strong sour smell. Mark the starting level on your bowl with tape to visually track expansion. For best results, aim for 12-18 hours—this sweet spot develops complex flavors without risking over-fermentation. Never refrigerate the sponge, as cold temperatures halt the yeast activity essential for flavor development.
Master Cuisinart Bread Maker Settings
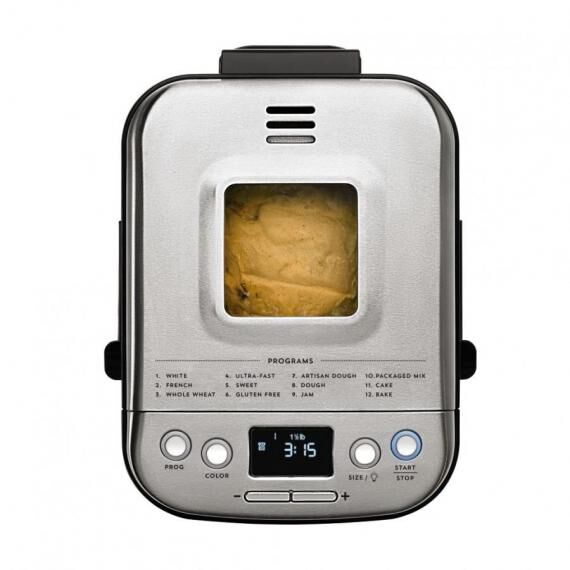
Program Your Artisan Dough Cycle
Once your sponge is perfectly proofed, transfer it directly into your Cuisinart bread pan with the kneading paddle installed. Add the remaining dough ingredients in the exact order specified by your model’s manual. Secure the pan in the machine, press the PROG button to select the Artisan Dough program, then hit START/STOP. This specialized cycle handles both kneading and first rise automatically—typically 45-60 minutes depending on your model. The machine’s precise temperature control creates ideal conditions for gluten development without overworking the high-moisture dough. Never use the standard “Dough” setting; the Artisan program’s slower, cooler kneading is critical for ciabatta’s delicate structure.
Recognize When Dough is Ready
When the cycle completes, your dough should exhibit three key characteristics: smooth, elastic surface (not sticky to the touch), doubled in size from its initial volume, and springing back slowly when gently poked. If the indentation fills in too quickly, the dough needs more time; if it doesn’t spring back at all, it’s over-proofed. Properly developed ciabatta dough will feel airy and pillowy—resist the urge to add extra flour, as this compromises the open crumb. If your machine lacks a viewing window, set a timer based on your manual’s Artisan Dough duration to avoid interrupting the cycle prematurely.
Shape and Bake Your Ciabatta
Transfer Without Deflating
Carefully remove the dough from the bread pan using a silicone spatula to preserve those precious air bubbles. Place it onto a parchment-lined baking sheet generously dusted with bread flour. Never punch down ciabatta dough—this destroys the delicate structure. Using floured hands, gently stretch the dough into a 12-inch oblong oval, being careful not to degas it. The dough will be extremely slack and sticky; this high hydration (75%+) is intentional for authentic texture. If it tears, simply fold edges inward rather than forcing it.
Final Rest Before Baking
Cover the shaped loaf loosely with plastic wrap and let it rest for exactly 20 minutes—this bench rest relaxes the gluten for better oven spring. Meanwhile, preheat your conventional oven to 425°F (220°C) with the rack in the center position. Verify temperature with an oven thermometer; inaccurate heat causes pale crusts. During this rest, the dough should plump up slightly but won’t double. Skipping this step leads to dense bread as the tight gluten restricts expansion during baking.
Achieve Golden-Brown Perfection
Uncover the loaf and dust lightly with bread flour for classic artisan appearance. Slide the parchment directly onto the oven rack and bake for 30 minutes until the crust turns deep golden brown. Test doneness by tapping the bottom—it should sound hollow—and check internal temperature reaches 205°F (96°C). For extra-crisp crust, create steam by placing a metal pan in the oven bottom during preheating, then pouring ½ cup water into it when adding the loaf. Never open the oven during the first 20 minutes, as heat loss prevents proper oven spring.
Cooling and Slicing Secrets
Cool Completely—No Exceptions
Immediately transfer baked ciabatta to a wire rack—never leave it in the pan. Wait full 2 hours before slicing, no matter how tempting the aroma. Cutting warm bread releases trapped steam needed for final crumb setting, resulting in gummy texture and collapsed structure. As it cools, you’ll hear gentle crackling sounds—a sign of perfect crust formation. Patience here makes the difference between bakery-quality results and disappointing, dense slices.
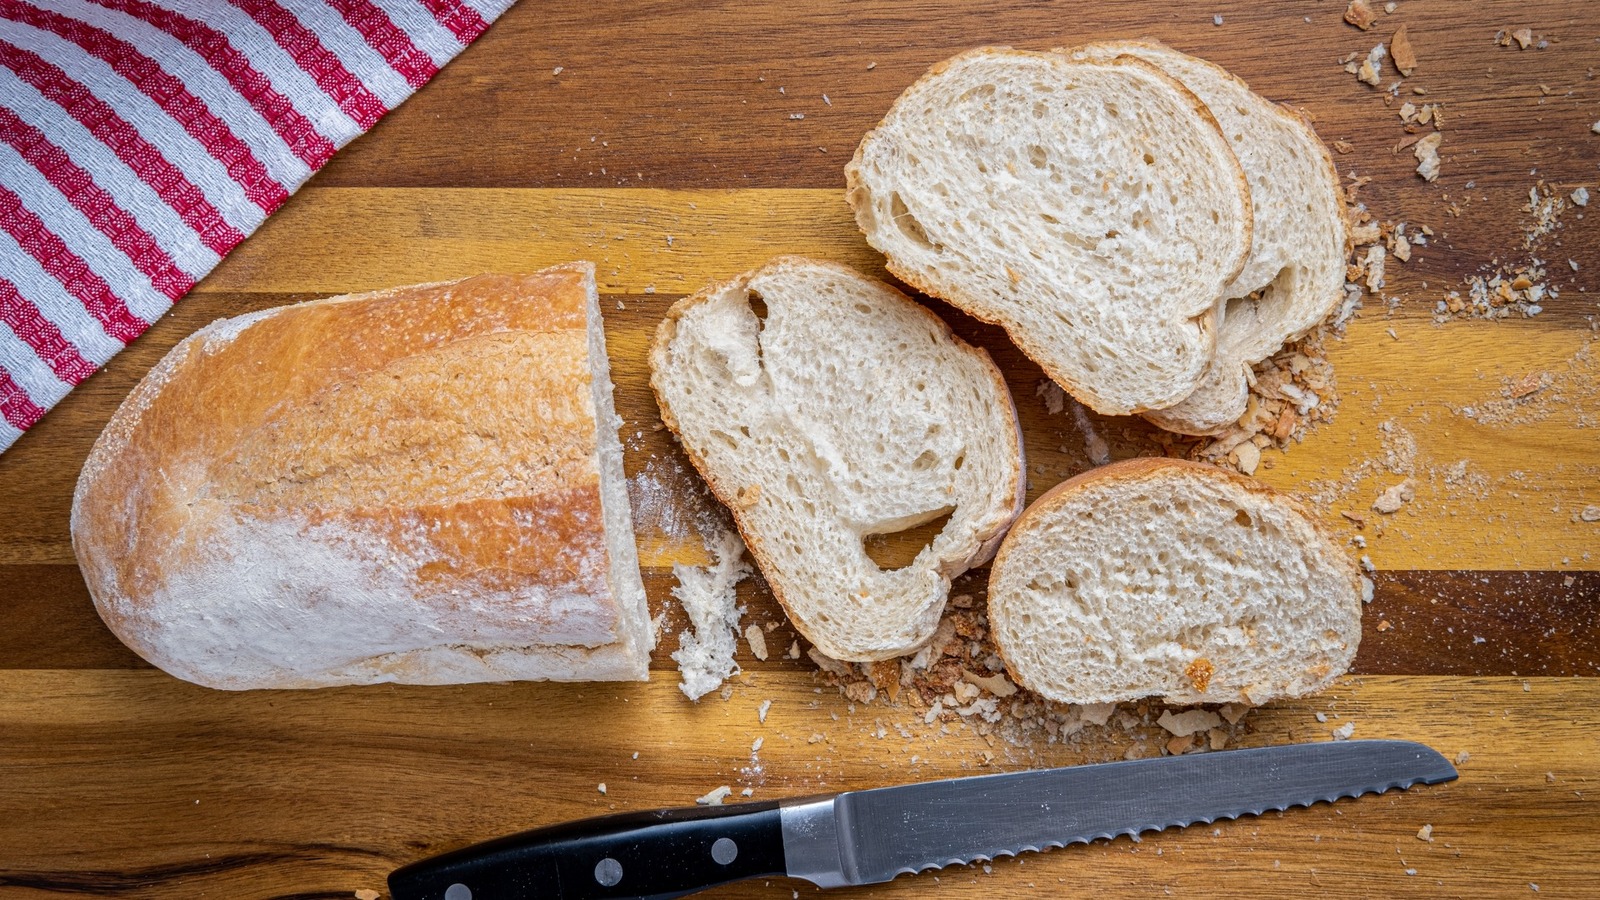
Perfect Slice Every Time
Use a serrated bread knife with long, gentle sawing motions—no downward pressure. Ciabatta’s fragile structure tears easily with standard knives. For clean slices, position the knife vertically and use the blade’s teeth to saw through without compressing. Store leftovers in a paper bag (never plastic) for up to 2 days. For longer storage, slice completely, freeze portions in airtight bags, and toast frozen slices straight from the freezer for instant fresh bread.
Troubleshooting Common Issues
Dense, Heavy Loaf
Cause: Over-proofed sponge or expired yeast. Fix: Reduce sponge fermentation to 8-12 hours and test yeast freshness by dissolving in warm water with sugar—active yeast bubbles within 10 minutes. Always use bread flour; all-purpose won’t provide sufficient structure for this high-hydration dough.
Pale, Soft Crust
Cause: Oven temperature too low or insufficient steam. Fix: Calibrate your oven with a thermometer and preheat 20 minutes beyond indicator light. Create steam using the metal pan method described earlier. Ensure your baking stone or steel is fully preheated if using one.
Flat, Spread-Out Shape
Cause: Over-handled dough or incorrect hydration. Fix: Handle dough minimally during shaping—use flour-dusted bench scrapers instead of hands. Verify you followed your Cuisinart manual’s water measurements precisely; humidity affects absorption.
Next-Level Variations
Herb-Infused Ciabatta
Add 1 tablespoon each finely chopped fresh rosemary and thyme to the final dough ingredients. The Artisan Dough cycle evenly distributes herbs without tearing delicate gluten. Perfect for dipping in garlic-herb oil.
Olive Ciabatta
Fold ½ cup pitted Kalamata olives (patted completely dry) into the dough during final shaping. Excess moisture from olives creates tunnels in the crumb—always dry them thoroughly with paper towels first.
Your Cuisinart bread maker artisan bread recipe delivers authentic Italian results with beginner-friendly precision. The overnight sponge method fits seamlessly into busy schedules—mix tonight, bake tomorrow morning for fresh bread at dinner. Remember that perfect ciabatta should have irregular holes, a crackly crust, and that satisfying chew bakers prize. Once mastered, experiment with seeded versions or sun-dried tomatoes using the same foolproof technique. Nothing compares to the aroma of homemade artisan bread filling your kitchen—start your sponge tonight and join the ranks of home bakers who’ve ditched store-bought loaves forever.


