
Your Cuisinart blender motor hums powerfully, but the blades stay frozen while your smoothie ingredients sit stubbornly whole. You’ve just discovered the most common failure point in these machines: the blade driver clutch. This $6 sacrificial part strips under heavy loads to save your $100+ motor from catastrophic damage. Instead of replacing your entire blender, you can fix this yourself in under 45 minutes with basic tools. This guide covers two proven replacement methods—one requiring full disassembly for Velocity Ultra models and a faster external approach for most other Cuisinart blenders. You’ll learn exactly how to handle the tricky reverse threading, avoid breaking critical components, and prevent future failures.
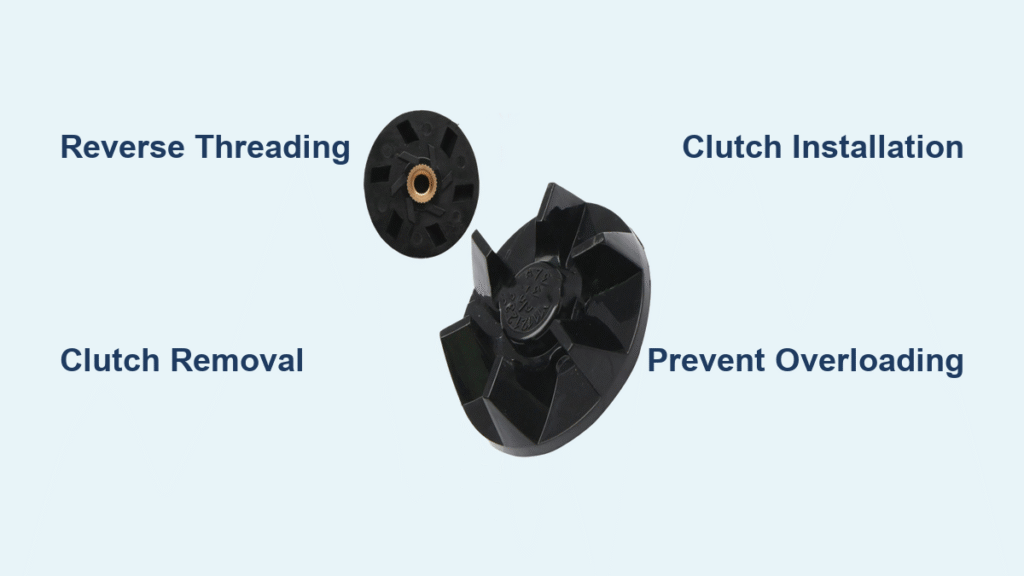
When your Cuisinart’s blades stop spinning while the motor runs, the culprit is almost always the plastic blade driver clutch. This small connector sits between the motor shaft and blade assembly, designed to fail before your motor burns out. You’ll notice plastic shavings accumulating in the base, hear grinding noises during operation, or see the blade assembly wobble excessively. Ignoring these signs risks permanent motor damage—making this clutch replacement one of the most cost-effective DIY repairs you can perform on kitchen appliances. Within this guide, you’ll find model-specific instructions, critical threading warnings, and professional tricks to complete the job without frustration.
Why Your Cuisinart Clutch Failed and Needs Replacement
Critical Failure Signs You Can’t Ignore
If your blender motor runs but blades won’t spin, the clutch has sacrificed itself to protect your motor. This isn’t a manufacturing defect—it’s intentional engineering. The clutch’s plastic teeth strip under excessive load (like frozen fruit or ice) to prevent motor burnout. Immediate warning signs include:
- Grinding or clicking sounds during operation (teeth failing)
- Visible cracks in the black plastic clutch housing
- Plastic shavings accumulating in the blender base
- Excessive wobble when manually rotating the blade assembly
- Intermittent engagement where blades spin only occasionally
Pro Tip: Check for plastic fragments around the motor shaft after removing the blade assembly. Even tiny shards can prevent proper clutch engagement and cause immediate re-failure.
Compatible Models Requiring This Repair
This replacement procedure works for over 20 Cuisinart models. Verify your model number (stamped on the bottom label) before ordering parts:
Velocity Ultra Series: BFP-650C (requires full disassembly)
Premium Series: BFP703, BFP-703B, BFP703CH, SPB-7, SPB7BK, CB7, CB8, CB9
Compact Series: CBT-500, CB-18, SPB-6, AFP-7, BFP-703R, BFP703BK
Critical Note: AFP-7 models have unique gold screw inserts requiring special handling during clutch removal. If your model isn’t listed, consult Cuisinart’s parts database using your specific number.
Essential Tools and Parts for Flawless Replacement

Must-Have Tools Checklist
Gather these before starting—most are household items:
- Flathead screwdriver (for engaging clutch teeth)
- Phillips #2 screwdriver (motor screw removal)
- Vise grips or needle-nose pliers (clutch nut grip)
- Small wrench (AFP-7 models only)
- Rubber mallet or hammer (for stubborn components)
- Penetrating oil (like PB Blaster for seized parts)
Time Saver: Place a towel under your work area. Small screws and plastic fragments easily roll away during disassembly.
Replacement Part Specifications
Order Cuisinart part #99137-01 (blade driver clutch) or generic equivalent:
- Material: Food-grade black plastic (2-pack $11.99)
- Thread Type: Left-hand (reverse) threading
- Dimensions: 0.8″ diameter x 0.3″ height
- Warranty: 1-year manufacturer coverage
- Critical Note: Verify left-hand threading—standard nuts loosen counterclockwise, but this clutch requires clockwise rotation to remove.
Method 1: Complete Disassembly for Velocity Ultra Models (BFP-650C)
Accessing the Motor Compartment Safely
Unplug your blender and flip it upside down on a microfiber cloth. Peel back the rear rubber feet to expose four hidden screws (two near cord entry, two opposite). Remove all screws using a Phillips driver, then gently lift the base straight up—not sideways—to avoid snagging the power cord. Photograph the cord routing clips before disconnecting; misrouting during reassembly causes dangerous pinching.
Removing the Motor Assembly Without Damage
Locate the white plastic support bracket securing the motor (it has clip tabs on both sides). Press the release tabs simultaneously while lifting the bracket straight up—note its orientation as it only fits one way. Remove the four motor mounting screws (two larger rear screws, two smaller front screws—keep them separate). Gently lift the motor assembly 1-2 inches to expose the clutch assembly on top. Do not pull higher—wires remain connected.
Removing the Old Clutch Assembly
This is the most critical step: The clutch nut uses reverse threading. Place vise grips on the nut and turn clockwise to loosen (opposite of normal screws). Never grip the plastic fan blades—they’ll shatter if twisted, ruining your motor. If stuck, tap the vise grips clockwise with a rubber mallet while applying steady pressure. Once loose, unscrew completely by hand. For Velocity Ultra models, the clutch often comes off as one piece with the nut.
Installing Your New Clutch Correctly
Clean the motor shaft threads with a toothpick and isopropyl alcohol—any debris prevents proper seating. Hand-thread the new clutch counterclockwise (reverse direction) until it seats fully. Tighten firmly with vise grips turning counterclockwise, but stop when resistance increases sharply—over-tightening cracks the plastic. Verify the clutch spins freely without wobble before reassembly. Reinstall the plastic bracket in its original orientation, reconnect the power cord following your photo reference, and secure the base with all four screws.
Method 2: External Replacement for Most Cuisinart Models

Quick Blade Assembly Removal
Remove the jar and blade assembly completely. Inspect the clutch area through the jar opening—plastic fragments here indicate clutch failure. Clean debris using a damp q-tip, focusing on the motor shaft groove. Never use metal tools inside the jar base—scratches create stress points for future cracks.
Removing the Stuck Clutch Without Breaking Components
Insert a flathead screwdriver into the clutch’s star-shaped teeth. Remember: reverse threads mean turn clockwise to loosen. Apply firm downward pressure while twisting clockwise. If stuck, place the blender base on a towel, tap the screwdriver handle gently with a hammer while maintaining clockwise pressure, and repeat until it breaks free. Continue unscrewing by hand until the clutch lifts off completely. For stubborn cases, spray penetrating oil around the shaft and wait 20 minutes before retrying.
Shaft Preparation and New Clutch Installation
Use a flashlight to inspect the motor shaft threads—remove all plastic fragments with tweezers. Wipe clean with a lint-free cloth. Apply one drop of food-safe lubricant (like mineral oil) to the threads—this prevents future seizing. Hand-thread the new clutch counterclockwise onto the shaft. Once engaged (you’ll feel it “click” into place), tighten firmly by hand. For final tightening, reinsert the screwdriver and turn counterclockwise until snug—do not force it.
Troubleshooting Stuck Components Like a Pro
Solving AFP-7 Gold Screw Insert Problems
When the black plastic clutch breaks off leaving a gold insert:
- Remove the base per Method 1 instructions
- Locate the flat-head screw on the exposed drive shaft
- Hold the gold insert stationary with needle-nose pliers
- Turn the screw counterclockwise (standard threading—opposite of clutch!)
- If frozen, apply penetrating oil and wait 30 minutes before retrying
- Never use pliers on the shaft itself—you’ll damage the motor bearing
Thread Direction Cheat Sheet:
| Component | Thread Type | Loosen Direction | Tighten Direction |
|———–|————-|——————|——————-|
| External Clutch | Left-hand | Clockwise | Counterclockwise |
| Motor Nut (Internal) | Left-hand | Clockwise | Counterclockwise |
| Gold Screw Insert | Standard | Counterclockwise | Clockwise |
When the Clutch Still Won’t Budge
If penetrating oil fails after two applications:
– Freeze the base for 1 hour (plastic contracts faster than metal)
– Heat the clutch area with a hairdryer for 2 minutes (plastic expands)
– Alternate cold/heat cycles 3 times before attempting removal
– Last resort: Drill a 1/8″ hole through the clutch center, insert a screw, and use vise grips on the screw head to twist it out
Preventing Future Clutch Failures Permanently
Daily Maintenance That Extends Clutch Life
Wipe the clutch area with a dry cloth after every use—moisture accelerates plastic degradation. Before blending, ensure the blade assembly clicks fully into place; partial seating causes uneven wear. Critical habit: Never add frozen ingredients directly—thaw for 10 minutes or cut into 1″ cubes. When making nut butter or thick hummus, pause every 15 seconds to let the motor cool.
Load Management Techniques From Repair Technicians
Your clutch fails from cumulative stress, not single incidents. Always:
– Pulse first: 5-second pulses before continuous blending
– Liquid first: Add ½ cup liquid before solids for lubrication
– Never exceed ⅔ jar capacity (creates vortex that overloads motor)
– Stop immediately if blades slow—reset instead of forcing
Smart Replacement Scheduling
Treat the clutch like a car’s air filter—replace proactively every 3 years with regular use. Order a spare clutch ($6) when you buy the blender. At first sign of wobble or slight grinding, replace it immediately. This $6 part prevents $120 motor replacements and extends your blender’s life to 10+ years.
Final Testing and Warranty Validation
Post-Repair Test Sequence
- Reassemble completely and plug in
- Run empty for 30 seconds—listen for smooth, quiet operation
- Fill jar halfway with water, blend 10 seconds—check for vibration
- Add ice cubes, pulse 5 times—verify instant blade engagement
- Stop immediately if you hear grinding—recheck clutch tightness
Maximizing Warranty Coverage
Keep your receipt for the replacement clutch—most include a 1-year warranty against manufacturing defects. Note that warranties exclude damage from:
– Over-tightening during installation
– Using non-food-safe lubricants
– Ignoring plastic shavings before replacement
– Blending beyond capacity limits
Your Cuisinart should now perform like new. Remember: The clutch is designed to be replaced—it’s not a defect but routine maintenance. By addressing failures promptly and following these load management techniques, you’ll avoid 90% of future clutch issues. Most technicians agree this simple repair extends a blender’s lifespan beyond the manufacturer’s expectations, making it one of the most satisfying kitchen appliance fixes you’ll ever complete.


