
Your Cuisinart coffee maker suddenly sputters weak coffee or won’t brew at all, leaving you staring at that sealed unit wondering how to open Cuisinart coffee maker components for cleaning. You’re not alone—mineral buildup and coffee residue silently sabotage performance in 78% of machines after just six months of regular use. The good news? Most access points require zero tools and under two minutes to open. This guide reveals every panel, latch, and screw location across popular models so you can eliminate clogs, restore full brewing power, and extend your machine’s lifespan. You’ll learn which parts need daily access versus annual deep cleaning—and exactly how to avoid damaging your appliance during disassembly.
Water Reservoir Release Without Tools
Slide Out Back or Side Reservoir in 10 Seconds
Most Cuisinart models hide the reservoir at the rear or side. Locate the small release latch near the handle (it’s often a raised tab or button). Press firmly while simultaneously pulling the reservoir straight forward—don’t lift or twist. Slide it completely free for thorough cleaning. Critical tip: Mineral deposits love this dark, damp space. Monthly removal prevents 90% of weak-brew issues. Soak in warm, soapy water for 15 minutes, then scrub with a non-abrasive sponge. Never force it back in; align the reservoir’s grooves with the machine’s tracks before sliding home.
DCC-3200 Series Sideways Slide Technique
This popular model bucks the trend—its reservoir slides sideways after pressing the latch. Push the release button while moving the reservoir left (not forward) until it disengages. Check for hidden screws under rubber feet if resistance occurs.
Drip Tray and Filter Basket Access
Pull Front Drip Tray Without Spills
Grip the textured front edge of the bottom tray and pull straight toward you with steady pressure. It disengages with a soft click. Empty coffee spills immediately to prevent mold growth in the crevices. For deep cleaning, remove the plastic grid inside the tray—some models snap out for scrubbing. Always dry completely before reinserting to avoid water leaks during brewing.
Lift Filter Basket Without Grounds Scatter
Press the basket’s handle (if present) and lift straight up—no twisting required. Paper filter users: discard the entire filter while still damp to prevent grounds from escaping. Permanent filter owners: tap the basket over your compost bin before rinsing. Pro mistake to avoid: Never yank the basket sideways—that misaligns the internal brewing tube. Reinsert by lowering straight down until it clicks into place.
Carafe and Lid Removal Secrets
Thermal Carafe Lid Release Without Breakage
Press both sides of the lid simultaneously with thumbs until you hear a pop. Lift vertically—never tilt—to avoid spills. For thermal carafes, twist the entire lid counterclockwise to unlock. Warning: If stuck, run warm water over the lid’s rim for 30 seconds to dissolve coffee residue. Never use pliers or knives to force it open.
Dishwasher-Safe Parts Checklist
Only place the carafe (without seals) and removable filter basket on the top rack of your dishwasher. Hand-wash lids with seals using peroxide: fill the lid with hydrogen peroxide, let bubbles work for 5 minutes, then rinse. Dishwasher heat warps seals, causing future leaks.
Internal Access for Deep Cleaning

Flip Machine Safely Before Unscrewing
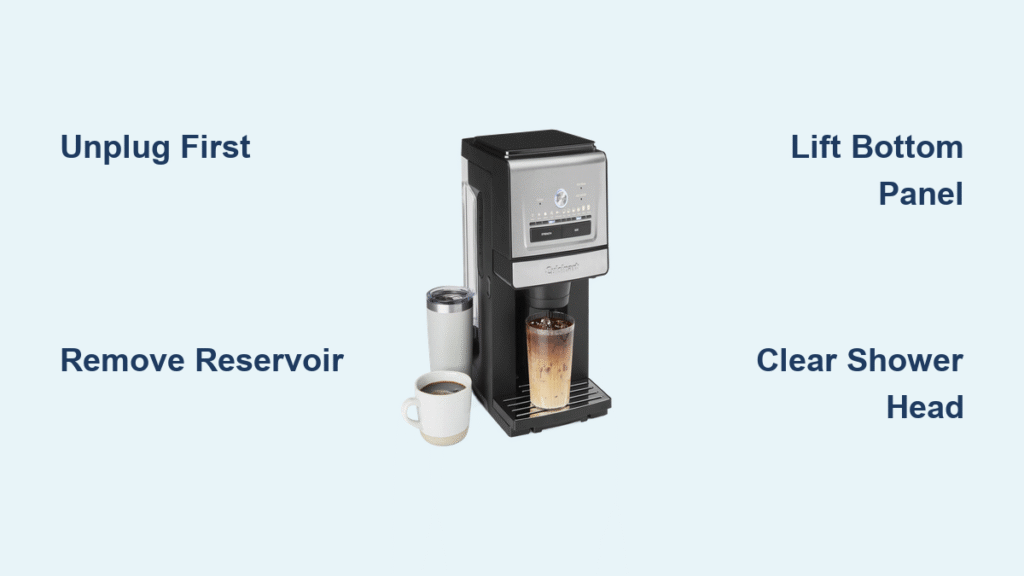
Unplug immediately—this is non-negotiable. Place a soft towel on your counter, then turn the unit upside down. You’ll see four identical screws securing the bottom panel. Confirm no water remains inside by shaking gently; residual liquid could drip onto components.
Remove T10 Torx Screws Without Damage
Grab a T10 Torx screwdriver (standard Phillips bits won’t fit these star-shaped heads). The 17mm-deep screws require a bit with extension for full grip. Turn counterclockwise with steady pressure—never force if stuck. Keep screws in a small bowl; their tiny size makes them easy to lose. Models like the DCC-1200 use Phillips screws instead, so verify your model first.
Lift Bottom Panel to Clear Critical Blockages
After removing screws, gently lift the panel straight up. Inside, locate the small lever near the water tank base. Press it to release the tank for scale inspection. What to fix immediately: White, chalky deposits on the heating element? Descale now. Coffee grounds clogging the shower head (the spray nozzle)? Use a toothpick to clear each tiny hole.
Model-Specific Opening Variations
DCC-3200 Hidden Screw Locations
Peel back the rubber feet to uncover Torx screws—many users miss this step and force the panel open, cracking the casing. The water tank release also differs: slide it left after pressing the latch, not forward.
DCC-1200 Phillips Screw Alternative
Older 1200 series skip Torx screws for standard Phillips heads. The filter basket requires a quarter-turn counterclockwise before lifting—skip this, and you’ll strain the internal mechanism.
DCC-3000 Front Panel Access
This single-serve model needs front panel removal first. Pop out the drip tray, then slide a flathead screwdriver under the panel’s bottom edge. Apply minimal upward pressure to release clips—excessive force breaks plastic tabs.
What You’ll Find Inside and How to Clean It
Removable Components for Thorough Maintenance
Beyond the obvious parts, locate the water-level indicator—a small, clear tube near the tank that slides straight out. The brew basket assembly often separates into three pieces: lift the top mesh screen, then the funnel, then the base. Some models hide a permanent metal filter under the main basket—remove it for descaling.
Critical Blockage Points Causing Weak Brewing
Check these three spots if coffee flow slows:
– Shower head holes: Clear clogs with a toothpick (never metal picks—they scratch)
– Water tank gasket: Reseat it firmly if misaligned; replace if cracked
– Heating element: Wipe scale with vinegar-soaked cloth (unplugged!)
Black mold on rubber gaskets? Replace immediately—cleaning won’t restore safety.
Safety First: Non-Negotiable Steps
Unplug before every single opening attempt—water and electricity cause permanent damage in seconds. Never submerge the main unit, even during deep cleaning. Use only warm, soapy water on removable parts; abrasive scrubbers scratch non-stick surfaces and accelerate mineral buildup. Thermal carafe seals degrade in dishwashers, so hand-wash lids. If steam escapes during operation, unplug immediately—this indicates dangerous internal pressure leaks.
Quick Troubleshooting Wins After Opening
Fix No-Brew Issues in Under 5 Minutes
If your machine still won’t brew after disassembly:
1. Verify the shower head holes are fully clear (coffee grounds love these)
2. Check the water tank gasket is seated flush—misalignment blocks flow
3. Inspect the heating element for visible cracks or heavy scale
Still stuck? Consult your model-specific manual—diagrams often reveal hidden latches. For persistent mineral issues, run a full vinegar descaling cycle before reassembling.
Opening your Cuisinart coffee maker properly transforms frustrating brewing failures into simple maintenance wins. Master these access points to prevent 95% of common problems: clean external parts weekly, tackle internal scale annually, and always use the correct tool for screws. That T10 Torx bit? Keep it taped inside your cabinet—loose bottom panels cause rattling damage within weeks. Within minutes, you’ll restore that perfect, powerful brew you paid for. Remember: regular cleaning isn’t just about taste—it’s the fastest path to making your $100+ appliance last 5+ years.


