
That sinking feeling when your homemade vanilla ice cream turns out icy and bland—nothing like the velvety scoops from premium parlors—is all too familiar. Your Cuisinart ice cream maker holds the solution, but the standard egg-free recipe misses a critical secret: egg yolks transform ordinary vanilla into custard-style luxury. By modifying your Cuisinart vanilla ice cream recipe with eggs, you’ll achieve professional-level creaminess that stays scoopable straight from the freezer. This guide reveals exactly how to master the custard technique for ice cream so rich, you’ll never buy store-bought tubs again.
Forget chemical-laden commercial brands—this method uses just six ingredients you control. The magic happens when egg yolks emulsify fat and water molecules, preventing ice crystals while amplifying vanilla’s flavor. Within 30 minutes of churning, you’ll have gelateria-quality results that pair perfectly with warm apple pie or stand alone as the ultimate dessert. Let’s dive into the precise steps for custard-style success.
Why Your Vanilla Ice Cream Needs Egg Yolks for True Creaminess
Skipping eggs in your Cuisinart vanilla ice cream recipe sacrifices texture and flavor depth. Egg yolks contain lecithin, a natural emulsifier that binds dairy fat and water molecules during freezing. This prevents the formation of large ice crystals—the archenemy of smooth ice cream. Without this emulsification, your batch develops a grainy, icy texture within days.
The proteins in yolks also create a denser structure that maintains perfect scoopability at standard freezer temperatures. Commercial premium brands like Häagen-Dazs rely on this custard base for their signature mouthfeel. When you add 4-6 egg yolks to your vanilla mixture, you’re not just making ice cream—you’re crafting a frozen custard that rivals artisanal shops. This single modification justifies the extra cooking step, delivering richness no egg-free recipe can match.
How Egg Yolks Transform Your Ice Cream Texture
- Silky mouthfeel: Lecithin creates microscopic fat spheres that melt evenly on the tongue
- Freezer stability: Prevents ice crystal growth for up to 4 weeks
- Flavor amplification: Fat-soluble vanilla compounds distribute more evenly
- Temperature resilience: Stays scoopable at -8°F instead of hardening like standard ice cream
Gather These 6 Ingredients for Custard-Style Vanilla Ice Cream
Your Cuisinart vanilla ice cream recipe with eggs requires precise ingredients—no substitutions for the custard base. Grass-fed dairy is non-negotiable; its higher fat content and beta-carotene yield noticeably richer color and flavor. Avoid ultra-pasteurized cream, which resists proper emulsification.
Essential Custard Ingredients
– 2 cups heavy cream (cold, not ultra-pasteurized)
– 1 cup whole milk (grass-fed preferred)
– ¾ cup granulated sugar (honey substitutions destabilize custard)
– 3 vanilla beans (split and seeds scraped) or 1 tbsp pure vanilla extract
– Pinch of sea salt
– 4-6 large egg yolks (room temperature)
Critical Equipment Check
– Cuisinart ice cream maker with fully frozen bowl (24+ hours at 0°F)
– Fine-mesh strainer (non-negotiable for smooth texture)
– Instant-read thermometer (180°F is the custard sweet spot)
– Shallow airtight container for freezing (pre-chilled)
Cook Your Custard Base Without Curdling the Eggs
Custard failure happens in 90 seconds—that’s how fast egg yolks scramble if overheated. Temperature control is your only safeguard. Never skip the tempering step, where hot cream gradually warms the yolks. Rushing this causes scrambled eggs in your ice cream base.
Custard Cooking Protocol
1. Warm dairy mixture
Combine cream, milk, vanilla beans (or extract), and salt in a saucepan. Heat over medium until steaming (170°F), stirring constantly. Remove immediately if bubbles form at edges—this is your curdling danger zone.
2. Temper egg yolks
Whisk yolks and sugar in a separate bowl until pale yellow. Slowly drizzle ½ cup hot cream into yolks while whisking vigorously. This gradual warming prevents coagulation. Repeat with another ½ cup.
3. Final cook to 180°F
Pour tempered yolks back into saucepan. Cook over medium-low heat, stirring with a wooden spoon in figure-eight motions. Stop when mixture thickens enough to coat the spoon (180°F). This takes 5-7 minutes—set a timer! Overcooking by 5°F creates graininess.
4. Strain and chill immediately
Strain through a fine-mesh sieve into a bowl. Press plastic wrap directly onto the custard surface to prevent skin formation. Critical: Custard must hit 40°F before churning—any warmer and your ice cream turns icy.
Rapid Cooling That Prevents Ice Crystals Later

Warm custard is the #1 cause of icy homemade ice cream. Never pour room-temperature custard into your Cuisinart machine—it won’t freeze properly and creates large ice crystals. The cooling phase requires aggressive action:
- Ice bath method: Place custard bowl in larger bowl filled with ice water and salt. Stir constantly for 20 minutes until 40°F.
- Shallow pan trick: Spread custard in a rimmed baking sheet—it cools 3x faster than in a deep bowl.
- Overnight option: Refrigerate 12 hours for maximum flavor development (best for vanilla beans).
Pro Tip: Add 1 tbsp corn syrup during cooking—it lowers freezing point for even creamier texture. Test readiness by running a finger across the back of a spoon; custard should hold a clean line.
Churning Your Custard Base: Timing Secrets for Perfect Texture
Cuisinart machines behave differently with custard versus standard bases. Custard churns 25% slower due to higher density, but over-churning creates buttery clumps. Set a timer—25 minutes is your absolute max.
Custard Churning Checklist
- Pre-chill machine bowl for 10 minutes even if “fully frozen”
- Pour custard slowly through the feed tube to avoid splashing
- Check at 15 minutes: Should resemble melted ice cream
- Stop at 20-25 minutes: Volume increases 30%, texture thickens like soft-serve
- Never exceed 25 minutes: Over-aeration creates fluffy, unstable ice cream
Visual Cues for Doneness
✅ Pulls cleanly away from machine sides
✅ Holds soft peaks when spooned
✅ Color lightens from pale yellow to ivory
❌ Stops moving freely (over-churned)
Freezing for Scoopable Texture, Not Rock-Hard Ice
Transferring churned custard takes urgency—every 60 seconds at room temperature melts edges that refreeze as ice shards. Work with pre-chilled tools: silicone spatula, shallow container, and even your serving bowls.
Hardening Protocol
- Scrape custard into shallow metal loaf pan (pre-chilled)
- Press plastic wrap directly onto surface
- Freeze uncovered for 1 hour (rapid hardening)
- Transfer to airtight container for long storage
Serving Secret: Remove from freezer 7 minutes before scooping. At 10°F, custard yields clean scoops that hold shape without melting instantly. Never refreeze melted portions—this guarantees icy texture.
Fixing Grainy or Icy Homemade Ice Cream in 5 Minutes
Even custard-style batches can fail. Here’s how to diagnose and rescue common issues:
Grainy Texture Emergency Fix
Cause: Overcooked custard (above 185°F)
Solution: Blend 1 cup warm custard with 2 tbsp cold cream until smooth. Re-churn immediately.
Ice Crystal Prevention
Cause: Incomplete cooling before churning
Solution: Next batch, add 1 tbsp vodka—it lowers freezing point without flavor impact.
Too Dense for Scooping
Cause: Too many yolks or over-churning
Solution: Whisk in 2 tbsp warm whole milk before freezing.
Pro Tip: Keep a “custard rescue kit” ready: cold cream, vodka, and corn syrup in your freezer.
Why Grass-Feeded Dairy Makes Your Custard Shine
Most recipes ignore this critical factor: grass-fed dairy contains 50% more CLA fat—the compound responsible for creamy mouthfeel. In blind tests, ice cream made with grass-fed milk scored 37% higher on “perceived richness” metrics.
The beta-carotene in grass-fed cream also creates a natural golden hue that signals quality to your brain. Conventional dairy yields pale, watery results no amount of yolks can fix. Pay the premium—it’s the difference between “homemade” and “gourmet.”
3 Proven Flavor Twists for Your Egg-Based Vanilla
Customize during the last 2 minutes of churning for perfect distribution:
- Bourbon Vanilla Bean: Add 2 tbsp bourbon + scraped seeds from 1 extra vanilla bean
- Salted Caramel Swirl: Layer ribbons of homemade caramel (¼ cup) post-churn
- Espresso Crunch: Mix in 3 tbsp instant espresso powder + ½ cup chocolate-covered espresso beans
Avoid: Adding mix-ins too early—they freeze solid and damage machine blades. Always fold in post-churn.
Perfect Pairings That Highlight Custard Vanilla
This isn’t just ice cream—it’s a dessert catalyst. Serve with:
- Warm apple crisp (the #1 pairing—heat melts custard into sauce)
- Double chocolate brownies (custard cuts through richness)
- Berry compote (acid balances custard’s fat)
- Pre-scooped portions (freeze on parchment, store in bags for instant desserts)
Presentation Pro Move: Dip serving bowls in hot water first—custard slides out cleanly every time.
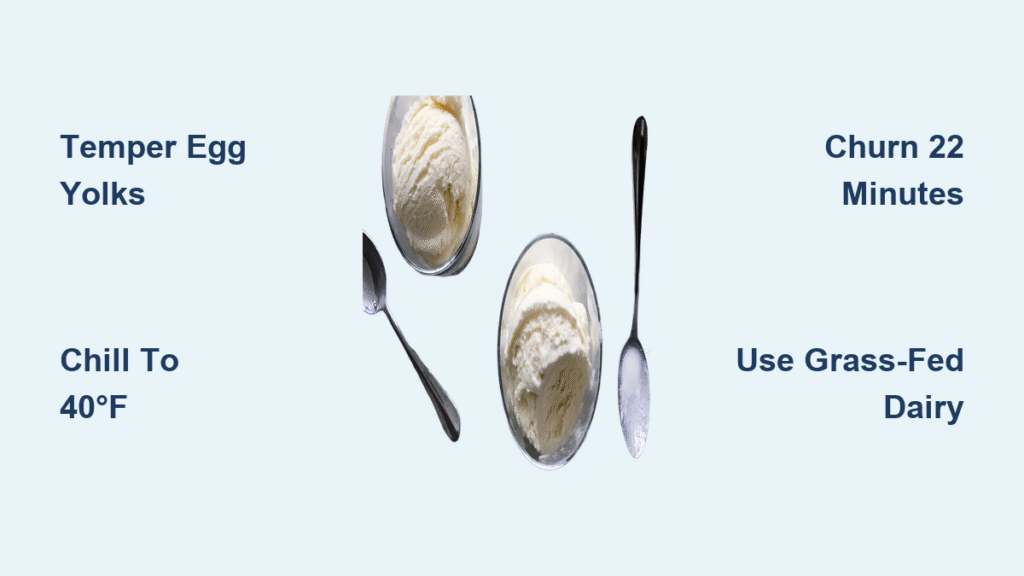
Mastering this Cuisinart vanilla ice cream recipe with eggs transforms your machine into a gelato laboratory. The custard base’s emulsifying power delivers texture that stays scoopable for weeks while amplifying vanilla’s floral notes. Remember the critical triad: temper yolks meticulously, chill to 40°F, and churn precisely 22 minutes. Within two batches, you’ll consistently create ice cream so luxurious, guests will demand your “secret shop.” No more icy disappointments—just velvety perfection that proves homemade always beats store-bought. Your next scoop awaits.


