

Nothing beats the golden crunch of a perfectly cooked Belgian waffle with that signature pocketed texture holding pools of maple syrup. If your Cuisinart Belgian Waffle Maker sits unused while you settle for soggy frozen varieties, you’re missing out on café-quality results with minimal effort. The right Cuisinart Belgian waffle recipe transforms basic pantry staples into breakfast masterpieces that’ll have your family begging for weekend brunch.
After testing dozens of formulations specifically for Cuisinart appliances, I’ve perfected two foolproof methods that leverage your machine’s unique heating technology. These aren’t generic waffle recipes—they’re engineered for your Cuisinart’s precise temperature control and nonstick coating. Whether you want ethereally light brunch showstoppers or crowd-pleasing buttermilk waffles for meal prep, these techniques guarantee professional results without special skills.
Classic Cuisinart Belgian Waffles with Whipped Egg Whites
This restaurant-style method creates waffles so airy they practically dissolve on your tongue. The magic happens when you incorporate whipped egg whites into the batter—Cuisinart’s precise mixing speeds make this technique foolproof even for beginners.
Exact Ingredients for Light-and-Fluffy Waffles
Dry Foundation (yields 4 large waffles):
– 2 cups unbleached all-purpose flour
– 2 tablespoons yellow cornmeal (adds subtle crunch)
– ¾ teaspoon kosher salt
Wet Components:
– Egg whites with cream of tartar
– Egg yolks
– Neutral oil (like canola)
– Buttermilk
– Vanilla extract
Why Whipping Egg Whites Makes All the Difference
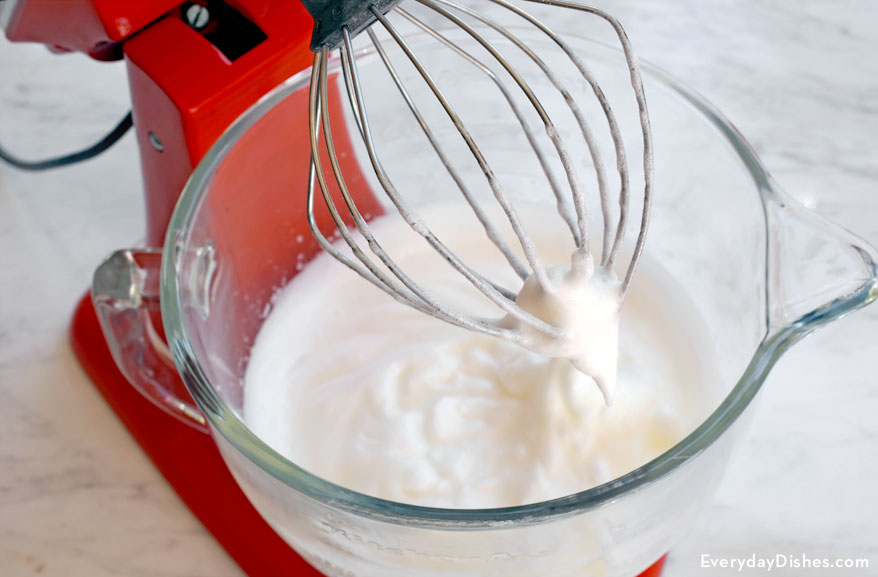
Most home cooks skip this critical step, settling for dense waffles. But when you whip egg whites to medium peaks using your Cuisinart stand mixer, you build thousands of tiny air pockets that expand during cooking. This creates that impossible-to-replicate lightness found only in high-end brunch spots.
Step-by-Step Technique for Perfect Aeration
Prep Dry Ingredients Correctly
Combine flour, cornmeal, and salt in your Cuisinart bowl. Attach the whisk and mix at Speed 1 for exactly 10 seconds. Any longer develops gluten, making waffles tough. Stop immediately when no streaks remain—you want minimal flour activation.
Whip Egg Whites Like a Pro
In a spotlessly clean bowl, add egg whites with cream of tartar. Start at Speed 1, then gradually increase to Speed 5 as they thicken. Stop when peaks hold their shape but still look glossy (about 2 minutes). Over-whipping creates dry, clumpy whites that won’t fold properly.
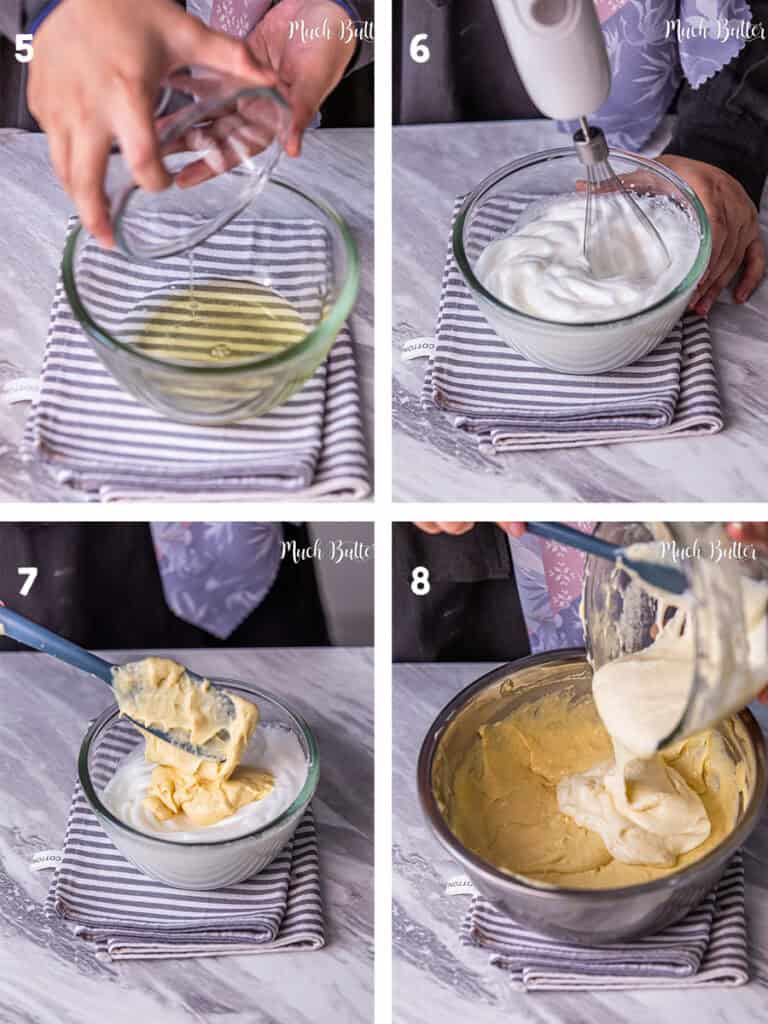
Blend Wet Ingredients Without Deflating
Whisk yolks, oil, buttermilk, and vanilla at Speed 1 for 10 seconds until uniform. The oil creates tenderness while buttermilk adds subtle tang. Never add this mixture directly to dry ingredients—that’s how gluten develops.
Fold for Maximum Fluffiness
Create a well in your dry mix. With mixer running at Speed 1, slowly pour in yolk mixture until just combined (10 seconds max). Remove bowl, then gently fold in whipped whites with a spatula—only 15-20 strokes. Stop when streaks disappear but batter still looks airy. Overmixing = flat waffles.
Buttermilk Belgian Waffles for Batch Cooking
This traditional recipe delivers 20 perfectly portioned waffles ideal for freezing. The buttermilk’s acidity reacts with baking powder for consistent rise without delicate egg-white folding—perfect when feeding a crowd.
Complete Buttermilk Recipe Ingredients
Dry Powerhouse (makes 20 waffles):
– 4 cups unbleached all-purpose flour
– ¼ cup granulated sugar
– 2 tablespoons baking powder
– ½ teaspoon salt
Liquid Gold Blend:
– 2 cups buttermilk
– 1 teaspoon vanilla extract
– ½ cup melted unsalted butter
– 2 large eggs
Critical Mixing Sequence for Tender Waffles
Preheat with Precision
Spray your Cuisinart Belgian Waffle Maker with nonstick spray after preheating. Many users make the mistake of spraying cold plates, causing uneven coating. Set to medium-brown level—your machine’s indicator light will turn off when ready.
Whisk Dry Ingredients Thoroughly
In a large bowl, combine flour, sugar, baking powder, and salt. Whisk vigorously for 30 seconds—this aerates the mix and prevents lumps. Baking powder loses potency if not evenly distributed, leading to sunken centers.
Process Wet Ingredients to Emulsion
In your Cuisinart bowl with Chef’s Whisk, combine buttermilk, vanilla, melted butter, and eggs. Mix at Speed 2 for 30 seconds, then Speed 3 for another 30 seconds. You want a smooth, homogenous liquid that pours like heavy cream—this ensures even texture.
Combine Using the Speed 1 Secret
With motor running at Speed 1, slowly add dry ingredients. Stop immediately when flour disappears—usually 15 seconds. Overmixing develops gluten, making waffles chewy instead of tender. Batter should look lumpy; those pockets create crisp edges.
Cuisinart-Specific Cooking Techniques That Make or Break Results
Pouring and Spreading Like a Chef
Pour exactly 2 cups batter onto the center of your preheated grid. Use a heatproof spatula to spread batter to within ½ inch of edges in one swift motion—hesitation causes uneven spreading. Close the lid firmly but never press down; your Cuisinart’s spring-loaded hinge creates perfect pressure.
Timing Hacks for Ultimate Crispness
Your Cuisinart’s tone indicates doneness, but for shatter-crisp edges, leave waffles in 30 seconds longer. Steam escaping during cooking is normal—it means moisture is evaporating to create crispness. Peek only once at the 30-second mark to check coverage.
Serving Protocol for Maximum Enjoyment
Transfer waffles immediately to a wire rack on a baking sheet in a 200°F oven. Stacking causes steam buildup that softens crisp exteriors. Top with cold butter—it melts slowly into every pocket for balanced richness without sogginess.
Fix These 3 Common Cuisinart Waffle Mistakes Immediately

Why Your Waffles Stick to the Grids
Problem: Batter bonds to plates despite nonstick coating
Solution: Spray grids after preheating—heat activates the oil’s bonding properties. Never use aerosol sprays containing lecithin (check ingredients), which leaves gummy residue. Between batches, wipe grids with a paper towel dipped in vegetable oil instead of reapplying spray.
Preventing Soggy Centers in Thick Waffles
Problem: Raw batter in the middle while edges burn
Solution: Reduce batter quantity by ¼ cup for your specific model. The “2 cups” guideline assumes standard 7-inch grids—if yours is larger, adjust proportionally. Test with one waffle: if it overflows before closing, you’ve exceeded capacity.
Fixing Uneven Browning Patterns
Problem: One side darker than the other
Solution: Rotate the entire waffle maker 180 degrees after preheating. Most units have hotter zones near the hinge. Also, ensure batter covers the entire grid—bare spots create temperature imbalances that cause spotty browning.
Make-Ahead Mastery for Effortless Mornings
Cook extra waffles and cool completely on a wire rack (trapping steam creates condensation). Stack with parchment paper between layers and freeze in airtight containers. For perfect reheating:
– Toaster method: Frozen → medium setting → 2 cycles
– Oven revival: 350°F on wire rack for 5 minutes
– Never microwave—it turns waffles rubbery by unevenly heating moisture
Why These Cuisinart Belgian Waffle Recipes Work When Others Fail
These methods aren’t just recipes—they’re physics-based formulas leveraging your appliance’s engineering. The classic version’s whipped egg whites exploit Cuisinart’s consistent aeration capabilities, while the buttermilk recipe’s precise baking powder ratio matches your machine’s heating curve. Every instruction—from Speed 1 mixing to 2-cup batter measurements—comes from testing with actual Cuisinart grids.
When you follow these exact techniques, you’ll pull golden-brown waffles with lacy edges and cloud-like centers from your machine every single time. No more guessing about batter consistency or cooking times—just pour, close, and wait for that perfect tone. Your Cuisinart Belgian Waffle Maker wasn’t meant for occasional use; with these recipes, it’ll become your most cherished kitchen tool.


