

Granite countertops transform kitchen islands into stunning focal points, but improper installation leads to costly cracks, uneven surfaces, and structural failures. With over 70% of DIY countertop disasters stemming from skipped preparation steps, understanding what must happen before the stone arrives is non-negotiable. This guide cuts through the guesswork to reveal the exact pre-installation protocols professionals use—because placing that first slab on your island without these steps risks $2,000+ in repairs. You’ll learn how to verify your island can handle 150+ pounds per square foot, achieve laser-perfect measurements that prevent visible seams, and avoid the #1 mistake that voids granite warranties. Skip these phases at your peril.
Verify Your Kitchen Island’s Structural Integrity Before Granite Placement
Granite slabs weigh 15-20 pounds per square foot—meaning a standard 36″x84″ island countertop carries 450-600 pounds of dead weight. Your island must withstand this load plus dynamic forces from cooking and seating. Most DIY failures occur because homeowners assume standard cabinetry suffices.
How to Test If Your Island Frame Will Support Granite
Inspect the substructure before ordering stone. Remove existing countertops to examine the underlying framework. Look for these critical indicators:
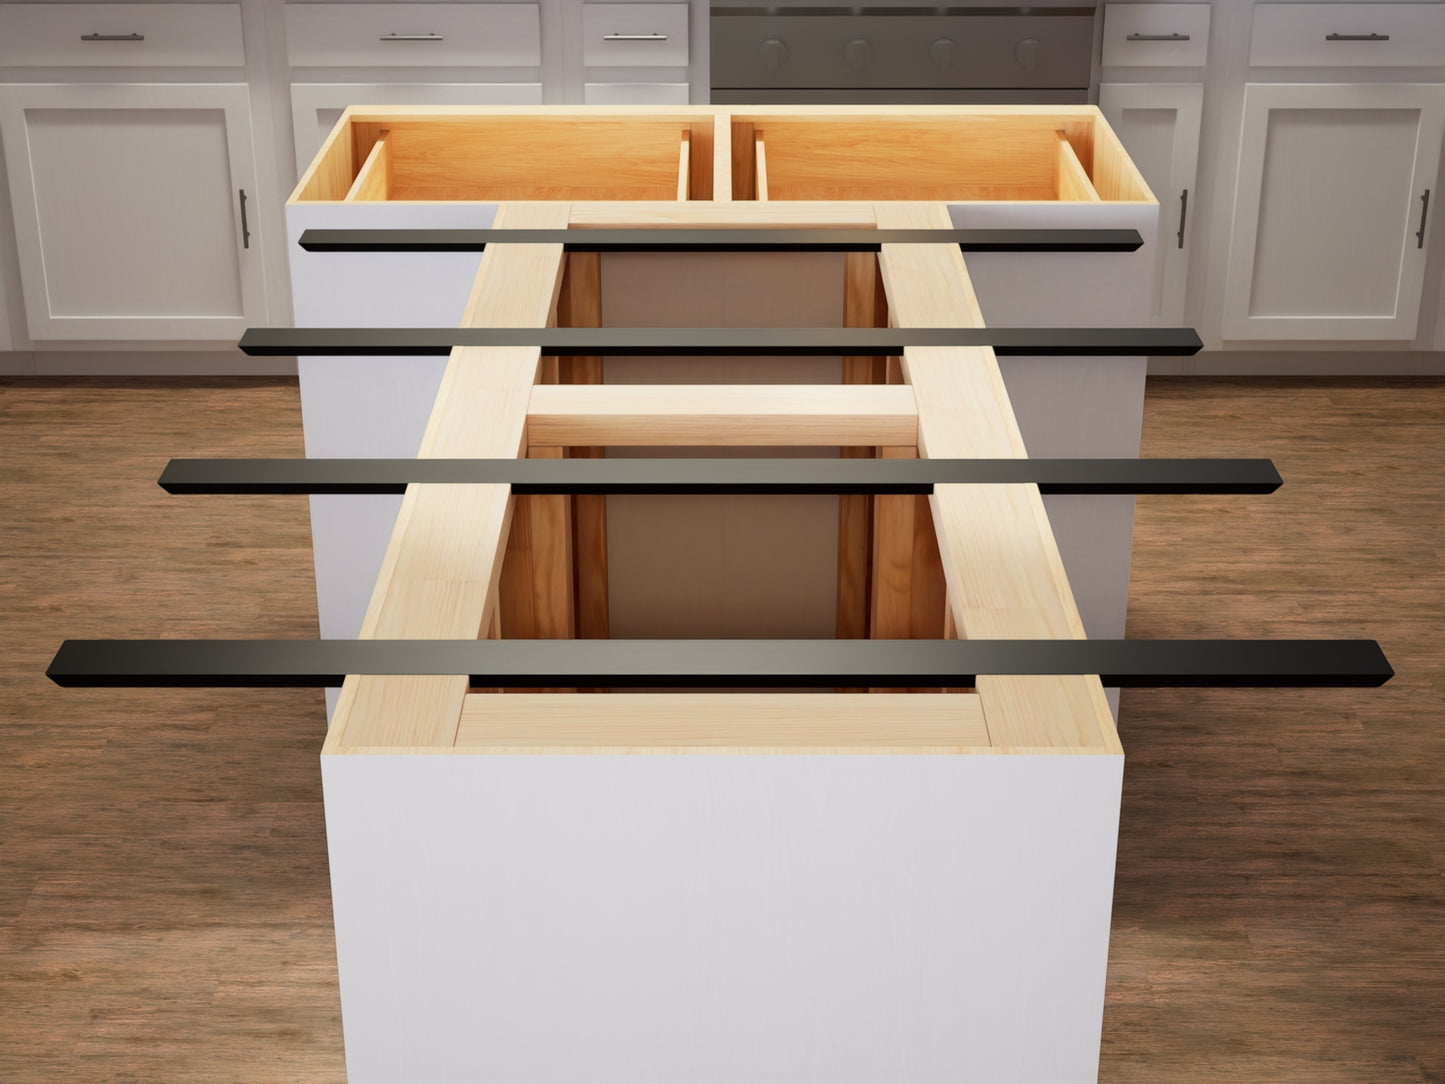
– Required support spacing: Joists or plywood must be no more than 12 inches apart beneath the slab. Wider spacing causes flexing that cracks granite over time.
– Minimum plywood thickness: ¾-inch Baltic birch plywood is the absolute baseline. Particleboard or MDF will warp under granite’s weight.
– Leg reinforcement: Islands shorter than 6 feet need at least two legs; longer islands require a central support beam running front-to-back. Tap legs—if they sound hollow, they’re insufficient.
Pro Tip: Place a 50-pound weight on the island’s weakest point (usually center-front) for 24 hours. Any sagging exceeding 1/16 inch means structural reinforcement is mandatory before proceeding.
When to Reinforce Your Island Frame (And How)
If your island fails the weight test, reinforcement isn’t optional—it’s foundational. Most contractors add:
– Perimeter rails: 2×4 lumber screwed along the top edge of cabinets, creating a continuous support ledge
– Cross-bracing: Diagonal 1×3 lumber between legs to prevent lateral movement
– Subtopping: Adding a second ½-inch plywood layer glued and screwed to the existing subtop
Critical Warning: Never attach granite directly to cabinet tops without this reinforcement. The stress points will crack within months as cabinets settle.
Achieve Flawless Granite Measurements to Prevent Visible Seams
Over 60% of granite installation callbacks involve seam misalignment—usually because measurements were taken after cabinets were installed. Granite requires millimeter precision since slabs can’t be trimmed on-site. Your island’s shape must be perfectly square before the stone arrives.
Laser-Level Measurement Protocol for Seamless Installation
Follow this sequence before ordering granite:
1. Check cabinet squareness: Measure diagonally from front-left to back-right corner, then front-right to back-left. Differences exceeding ⅛ inch mean cabinets must be adjusted.
2. Verify level across entire surface: Use a 4-foot level on the subtop in multiple directions. High spots must be sanded down; low spots require shimming.
3. Document exact cutouts: For sinks/cooktops, provide three measurements per dimension (left, center, right) since cabinets often warp.
Expert Note: Professionals use digital laser measurers that detect 0.5mm deviations—consumer tape measures lack this precision. Rent one for $20 at hardware stores.
Why “Dry Fitting” Your Granite Slab Prevents $500+ Mistakes
After delivery but before adhesive application, perform a dry fit:
– Place the slab on the island without adhesives
– Check for gaps along seams or edges (should be ≤ 1/32 inch)
– Verify overhangs are consistent (typically 1-1.5 inches beyond cabinets)
– Mark any high spots with chalk for grinding
Common Mistake: Skipping this step causes installers to force slabs into place with excessive adhesive pressure, creating stress fractures that appear weeks later.
Prepare the Worksite for Granite Placement Safety

Granite installation involves heavy lifting, sharp edges, and chemical adhesives—making site prep a life-or-death priority. One slip with a 500-pound slab causes permanent injury. Professional crews spend 2+ hours preparing sites before stone arrives.
Essential Safety Gear Checklist for Granite Handling
Never attempt installation without:
– Lifting straps rated for 1,000+ lbs (standard furniture pads compress under granite’s weight)
– Knee pads with steel caps (slabs often shift during placement)
– Cut-resistant gloves (granite edges slice through leather)
– Dust masks rated N95+ (grinding creates silica particles)
Urgent Warning: Granite dust causes silicosis—a fatal lung disease. Skip the mask, and 30 minutes of grinding exposes you to 10x OSHA limits.
Workspace Setup That Prevents Catastrophic Slips
Follow this sequence before slab delivery:
1. Clear 8-foot perimeter around island—no tools, cabinets, or obstacles
2. Lay ½-inch foam board on floor to cushion accidental drops
3. Position suction lifters within arm’s reach (one per 100 lbs of slab weight)
4. Verify door clearance—slabs often exceed 36-inch widths
Time-Saving Shortcut: Use painter’s tape to mark exact slab boundaries on the floor. This creates a visual guide preventing misalignment during placement.
Sealant Selection Criteria That Prevent Staining and Delamination

Using the wrong adhesive causes granite to delaminate from the subtop within months. Epoxy-based sealants dominate professional installations, but DIYers often grab construction adhesive—guaranteeing failure. The bond must withstand thermal expansion without cracking.
How to Choose Between Epoxy, Polyurethane, and Acrylic Sealants
| Sealant Type | Best For | Curing Time | Critical Limitation |
|---|---|---|---|
| 2-Part Epoxy | High-moisture areas | 24-72 hours | Must mix precisely (ratio errors cause weakness) |
| Polyurethane | Standard installations | 12-24 hours | Fails below 50°F—never use in unheated kitchens |
| Acrylic | Temporary fixes only | 6-12 hours | Loses adhesion under granite’s weight |
Pro Tip: Add non-sag modifiers to epoxy when installing vertical edges. Standard epoxy runs on seams, creating weak points.
Application Technique That Eliminates Air Pockets
Apply sealant in a continuous ½-inch bead along the subtop’s perimeter and all interior supports. Then:
– Use a notched trowel to create uniform ¼-inch ridges
– Work in 2×2 foot sections to prevent premature drying
– Place slab immediately—epoxy skin forms in 8 minutes
Critical Error: Pressing down on the slab during placement traps air. Instead, lower evenly using suction lifters and let gravity settle it.
Final Verification Steps Before Granite Placement
The moment before slab placement determines success. Professionals conduct a 5-point inspection that catches 95% of installation failures. Skipping any item risks irreversible damage.
The 5-Minute Pre-Placement Checklist
- Confirm slab temperature—granite must be within 10°F of room temperature to prevent thermal shock cracks
- Check subtop moisture—use a meter; readings above 7% cause adhesive failure
- Verify seam alignment—dry-fit pieces with 1/16-inch spacers for perfect joints
- Inspect slab edges—chips larger than pencil-eraser size require professional repair
- Clear adhesive zone—wipe subtop with acetone to remove dust/oil
Expert Note: Place a level on the slab during the final lowering. If bubbles move, stop immediately—uneven settling will crack the stone.
Final Note: Installing granite on a kitchen island demands precision that 95% of DIYers lack—this explains why professional installation costs 30% more but delivers 10x longevity. If you’ve verified structural support, achieved laser measurements, and prepared the worksite correctly, you’ve cleared the highest hurdles. Still, when the slab arrives, remember: granite tolerates zero errors during placement. One misstep risks catastrophic damage. For most homeowners, investing in professional installation prevents costly disasters—your island’s beauty depends on it. If proceeding DIY, photograph every pre-installation step; these become your proof if warranty claims arise later.


