
Tired of worn-out laminate countertops but intimidated by the cost of granite? Installing a ceramic tile kitchen countertop delivers stunning results at a fraction of the price while providing exceptional heat resistance for everyday cooking demands. This DIY-friendly project transforms dated cabinets into a showstopper that handles hot pans, chopping, and daily wear with ease. Whether you’re updating a rental property or preparing your home for sale, ceramic tile offers the perfect balance of affordability and durability for kitchen surfaces.
Before grabbing your tools, understand that ceramic tile countertop installation requires patience—rushing through critical drying phases guarantees future problems. A properly executed installation spans seven to ten days, with curing times between stages being non-negotiable for long-term performance. This guide reveals exactly how to install ceramic tile kitchen countertop surfaces that look professionally done while avoiding the costly mistakes that plague most DIY attempts.
You’ll discover precise techniques for preparing your base, laying tiles with professional alignment, cutting around sinks perfectly, and sealing grout for lasting protection. Follow these steps methodically, and you’ll create a kitchen centerpiece that withstands daily kitchen chaos while adding value to your home.
Gather Essential Tools Before Starting Your Installation
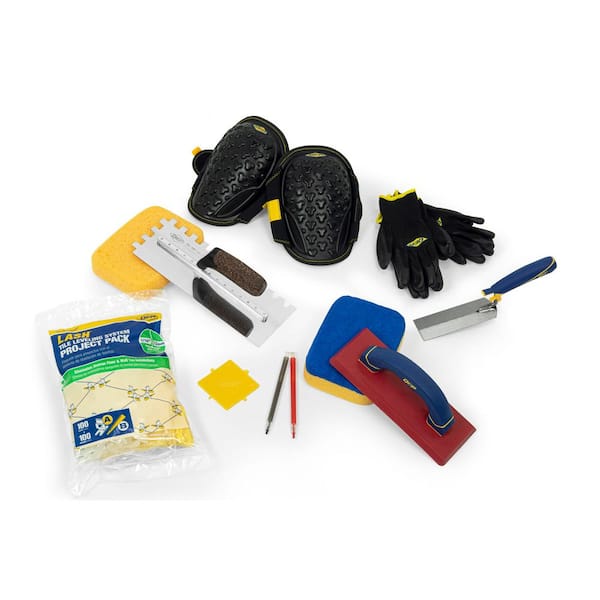
Skipping proper tool preparation guarantees mid-project delays that compromise your ceramic tile countertop installation. Assemble every item before removing your old countertop to maintain momentum through each critical phase.
Your tile selection directly impacts both appearance and longevity. Ceramic tiles offer the most budget-friendly option with reliable durability, while porcelain tiles provide superior moisture resistance for busy kitchens. For natural stone’s unique beauty, be prepared for additional sealing requirements—each material demands specific installation techniques you must understand before purchasing.
Thin-set mortar outperforms pre-mixed adhesives for ceramic tile kitchen countertop installations due to its superior bonding strength. Mix it to a peanut butter consistency according to package instructions, working in small batches you can use within 30-60 minutes before it hardens. Never add water to set mortar—this destroys its adhesive properties.
Your critical tool checklist includes:
– 1/4″ or 3/8″ notched trowel for proper adhesive application
– Tile spacers (1/8″ or 1/16″ depending on your design)
– Wet saw with diamond blade for precise cuts
– Rubber grout float for professional joint filling
– Cement backer board and waterproof adhesive
– Level, tape measure, and safety gear (goggles, gloves)
Warning: Using standard plywood instead of cement backer board invites moisture damage that destroys your installation within months. This isn’t a place to cut corners.
Prepare Your Cabinet Structure for Tile Installation

Surface preparation makes or breaks your ceramic tile countertop installation—skipping these steps guarantees cracks and loose tiles within months. Begin by removing existing countertops carefully, disconnecting plumbing fixtures if necessary while preserving cabinet integrity.
Inspect your cabinet structure thoroughly before proceeding. Cabinets must support 15-20 pounds per square foot of tile weight without flexing. Test for levelness across the entire surface—any variation greater than 1/8″ over 10 feet requires shimming. Weak or uneven cabinets transfer movement to tiles, creating inevitable cracks.
Install cement backer board cut precisely to your countertop dimensions using special backer board screws every 6-8 inches plus waterproof adhesive. This dual attachment method prevents subtle movement that destroys tile bonds over time. Seal all seams and screw heads with thin-set mortar or waterproofing membrane—unsealed joints allow moisture penetration that rots underlying structures.
Pro Tip: Allow 24 hours minimum for backer board adhesive to cure before tile installation. Rushing this phase is the #1 cause of premature installation failure. Mark the area clearly to prevent accidental disturbance during this critical period.
Plan Your Tile Layout to Avoid Costly Mistakes

A thoughtful dry-fit layout prevents the most common ceramic tile countertop installation errors that force beginners to tear out completed sections. Measure your countertop dimensions at multiple points—cabinets often shift slightly, creating inconsistent widths.
Calculate tile quantities by determining total square footage, then adding 15% for waste from cuts and breakage. Account for grout joint width in your calculations—1/8″ joints consume significant space across large surfaces. Purchase slightly more tiles than calculated to have spares for future repairs.
Perform a complete dry-fit layout with spacers before applying any adhesive:
1. Lay tiles across the entire surface without adhesive
2. Mark center lines on backer board for symmetrical placement
3. Identify where cut tiles will appear and adjust layout to hide cuts in less visible areas
4. Verify consistent edge widths at all exposed sides
Warning: Starting from one edge and working across guarantees uneven cuts at the opposite end. Always begin layout from the center point for balanced results.
Apply Thin-Set Mortar and Set Tiles Correctly
The adhesive application phase separates professional results from DIY disasters in ceramic tile countertop installation. Mix thin-set mortar to a smooth, lump-free consistency—too watery weakens the bond, while too thick prevents proper adhesion.
Spread mortar in 2-3 square foot sections using your notched trowel held at a 45-degree angle. This creates uniform ridges that collapse when tiles are pressed into place, ensuring complete coverage. Work systematically across the countertop, never returning to areas where adhesive has begun to skin over.
Press each tile firmly with a slight twist to ensure full contact, inserting spacers immediately at corners. Check alignment every 3-4 tiles with your level—correcting minor misalignments early prevents major problems later. For cut tiles around sinks, apply mortar to both the backer board and tile back for maximum adhesion.
Pro Tip: Keep a damp sponge nearby to clean excess adhesive from tile edges before it hardens. Removing dried adhesive requires harsh chemicals that damage tile glaze.
Master Precision Tile Cutting for Sink Openings
Cutting tiles around sinks and edges represents the most challenging aspect of ceramic tile countertop installation for beginners. Create a paper template of sink cutouts first—measure twice, cut once prevents wasted tiles.
Mark cut lines clearly with a pencil and straight edge, connecting points with light pressure to avoid scratching the tile surface. For straight cuts, a manual tile cutter works for ceramic but often chips porcelain—reserve your wet saw for complex cuts and harder materials.
When using a wet saw:
– Cut slowly with steady pressure
– Keep the water reservoir full to cool the blade
– Support both sides of the tile during cutting to prevent breakage
– Test fit cut pieces before adhesive application
Warning: Never place cut edges facing prominent areas—position them against walls where imperfections remain hidden. Sand minor rough edges with 120-grit sandpaper for smooth transitions.
Apply Grout for Professional-Looking Joints
Grouting transforms individual tiles into a unified ceramic tile countertop surface, but improper technique creates weak joints that stain easily. Mix grout to a smooth paste consistency, allowing it to slake for 5-10 minutes before remixing for optimal performance.
Work in 10-15 square foot sections, pressing grout diagonally across joints with your float held at 45 degrees. Apply firm pressure to ensure complete joint filling without pulling material out. Remove excess grout immediately with your float held perpendicular to joints.
Clean tile surfaces 15-30 minutes after application using a damp sponge wiped diagonally across tiles. Rinse frequently in clean water and change water when cloudy. Avoid excessive pressure that removes grout from joints—this creates weak spots prone to staining.
Pro Tip: For darker grout colors, add a small amount of water to create a “grout haze” that enhances color depth before final cleaning.
Seal Grout and Maintain Your Tile Countertop
Sealing grout represents the final critical step in ceramic tile countertop installation that most DIYers skip to their regret. Unsealed grout acts like a sponge, absorbing spills that cause permanent staining and potential mold growth.
Apply grout sealer with a small brush, ensuring even coverage without oversaturation. Wipe excess from tile surfaces immediately to prevent hazing. Allow 24-48 hours for complete curing before regular use—using the countertop too soon compromises sealer effectiveness.
Maintain your new countertop with:
– Daily cleaning using mild soap and water
– Immediate spill cleanup, especially colored liquids
– Annual grout sealer reapplication
– Cutting boards for food preparation
– Trivets for hot cookware
Warning: Avoid vinegar-based cleaners—they degrade grout over time. Stick with pH-neutral cleaners specifically formulated for tile surfaces.
Installing a ceramic tile kitchen countertop delivers professional results when you follow these precise techniques. The key to success lies in proper surface preparation, patient adherence to curing times, and meticulous attention to detail throughout each phase. Your beautifully tiled countertop will withstand daily kitchen demands while adding significant value to your home for years to come. Start planning your project today—your dream kitchen transformation awaits.


