
Your kitchen floor takes a beating from cooking spills, heavy appliances, and constant foot traffic, making porcelain tile the perfect solution for a durable, water-resistant surface that maintains its beauty for decades. Installing porcelain tile floor in kitchen spaces transforms this high-traffic area with a material that resists stains, moisture, and scratches better than virtually any other flooring option. This guide provides the specific techniques and critical insights you need to achieve professional results as a DIY homeowner, avoiding the common pitfalls that turn what should be a beautiful upgrade into a costly rework.
Before you lay your first tile, understand that successful porcelain tile floor installation depends on three non-negotiable factors: perfect substrate preparation, precise layout planning, and strict adherence to adhesive working times. Most installation failures happen not from poor tile placement but from rushing the preparation phase. The adhesive working window is only about 30 minutes, and spreading more than you can tile within 15 minutes creates hollow spots that lead to cracked tiles. Work when temperatures are between 50-90°F for optimal curing, and always mix tiles from multiple boxes to blend natural shade variations—this simple step prevents obvious color bands that make DIY installations look amateurish.
Prepare Your Substrate Thoroughly

A flawless porcelain tile floor begins with a perfectly prepared substrate—any imperfection will telegraph through your finished installation. Your kitchen floor must be clean, smooth, dry, and completely free of wax, grease, or soap scum before you apply adhesive. Start by removing baseboards, cabinets if possible, and appliances, then thoroughly clean the entire surface with a TSP (trisodium phosphate) solution to eliminate any hidden contaminants that could compromise adhesion.
Critical inspection points:
– Check for squeaks, soft spots, or movement in wood subfloors
– Fill cracks in concrete with appropriate patching compound
– Sand down high spots and build up low areas with leveling compound
– Ensure the floor is flat within 1/8 inch over 10 feet
For wood subfloors, install 1/4-inch cement backer board over the existing plywood using thin-set mortar and corrosion-resistant screws spaced every 6 inches. This creates a stable, moisture-resistant foundation that won’t flex underfoot. When working around doorways, use an undercut saw to cut door jambs 1/4 inch deeper than your tile thickness plus adhesive layer—this allows tiles to slide completely underneath for seamless transitions. Never skip this step; visible gaps between tile and door frames are one of the most common DIY installation flaws.
Plan Your Tile Layout Strategically
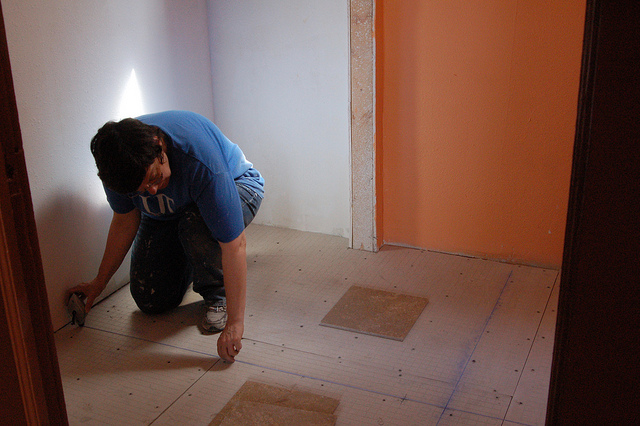
Proper layout planning prevents the frustration of tiny, unstable tile pieces along your kitchen walls. Start by finding the true center of your kitchen: measure and mark the midpoint of all four walls, then snap chalk lines connecting opposite midpoints. Verify these lines form perfect right angles using the 3-4-5 triangle method—measure 3 feet along one line, 4 feet along the other, and confirm the diagonal between these points measures exactly 5 feet.
Before applying any adhesive, perform a dry layout with actual tiles and spacers along both center lines. This reveals whether your layout will produce cuts smaller than half a tile at any wall—unacceptable in professional installations. If you spot problematic small cuts, shift your entire layout by half a tile toward that wall and snap new reference lines. Divide your kitchen into 2×3 foot grid sections using additional chalk lines; these smaller work areas prevent layout errors as you progress through the space.
Layout red flags to address:
– Asymmetrical patterns around kitchen islands
– Visible small cuts near high-visibility areas
– Misaligned tiles with cabinet edges
– Inconsistent spacing around doorways
Select and Apply Adhesive Correctly
Choosing the right adhesive for your specific kitchen substrate prevents costly failures down the road. For concrete subfloors, use a polymer-modified thin-set mortar rated for porcelain tile. Over wood subfloors with cement backer board, select a flexible adhesive specifically designed for wood substrates. Never use premixed “mastic” adhesives for porcelain tile—they lack the strength needed for dense porcelain and can cause tiles to debond over time.
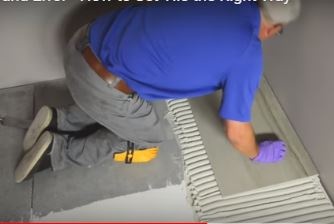
Mix only enough adhesive to cover a 2×3 foot section—typically about 1/4 bucket—using a margin trowel in a clean 5-gallon bucket. Apply adhesive with the flat side of your trowel first to create an even base layer, then comb it with the notched side held at a consistent 45-degree angle. The ridges should stand uniformly without collapsing. Critical mistake to avoid: spreading more adhesive than you can tile within 15 minutes. As the adhesive skins over, its bonding strength plummets, creating hollow spots that lead to cracked tiles. Work methodically from the center outward, completing one grid section before moving to the next.
Cut Tiles with Precision
Kitchen installations require numerous precise cuts around cabinets, pipes, and irregular spaces. For straight cuts, score porcelain tile with a manual tile cutter, applying firm, consistent pressure across the entire tile surface. Snap the tile by pressing down on the extended portion—don’t hammer it, as this creates microfractures. For L-shaped cuts around cabinets, make two perpendicular scores and snap carefully in sequence.
Cutting tools by situation:
– Wet saw: Best for multiple straight cuts (rent for $25/day)
– Tile nipper: For small curves and edge adjustments
– Hole saw with diamond core bit: For plumbing penetrations
– Oscillating tool: For intricate under-cabinet cuts
After cutting, smooth sharp porcelain edges with a carborundum stone or diamond hand pad—this prevents injury during installation and creates a more professional finished edge. Always measure twice and cut once; porcelain tile can’t be reused once cut incorrectly.
Set Tiles Methodically for Flawless Results
Begin installing your porcelain tile floor in the center intersection of your layout lines, working outward in one grid section at a time. Crucially, mix tiles from at least four different boxes as you work—porcelain has natural shade variations, and blending tiles prevents obvious color bands that ruin the aesthetic. Place each tile with a slight twisting motion (not sliding) to ensure full adhesive contact and eliminate air pockets.
Insert plastic spacers immediately after setting each tile to maintain consistent joint widths. For kitchen floors, 1/8-inch spacers create the ideal balance between grout durability and clean appearance. After completing each grid section, tap all tiles with a rubber mallet to ensure proper contact with the adhesive bed and create a perfectly level surface. Remove excess adhesive from joints with a putty knife before it hardens, and clean surface residue with a damp sponge. Allow tiles to set undisturbed for 24 hours before walking on them—rushing this step causes tiles to shift and creates hollow spots.
Grout Joints for Water Resistance
After 24 hours of curing time, remove all spacers and prepare your grout. Use sanded grout for joints wider than 1/8 inch (most kitchen installations) as it provides superior strength in floor applications. Mix only enough grout for a 3×3 foot area at a time—about 1/2 cup powder to 2 tablespoons water—and let it slake for 5-10 minutes before remixing.
Apply grout with a rubber float held at 45 degrees, forcing material deep into joints with firm pressure. Work diagonally across tile seams to prevent pulling grout out of joints. After 15-20 minutes, when grout has firmed slightly, clean excess with a damp sponge using light pressure and frequent water changes. Polish the surface with a soft cloth after 2-3 hours to remove haze. Allow grout to cure for 72 hours before light foot traffic, and wait three weeks before applying sealer to ensure complete moisture evaporation.
Maintain Your Porcelain Tile Kitchen Floor for Decades
The quarter-inch expansion gap you left around perimeter walls serves a critical purpose—it accommodates natural movement from temperature and humidity changes. Never fill this gap with grout; cover it with baseboard or quarter-round molding instead. For long-term durability, clean your new porcelain tile floor with pH-neutral cleaners and avoid abrasive scrubbers that can damage the surface over time.
Schedule annual inspections of grout lines, resealing if necessary with a penetrating sealer designed specifically for porcelain tile. Address any cracked tiles immediately by removing the damaged piece, cleaning the adhesive bed, and replacing with a spare—waiting allows moisture to penetrate beneath surrounding tiles. With proper installation and maintenance, your porcelain tile floor will withstand your kitchen’s demands for 25+ years, maintaining both beauty and functionality through daily cooking, spills, and heavy use.


