
Tired of outdated or damaged kitchen tiles? Knowing how to change kitchen tiles yourself unlocks incredible potential to refresh your most-used room without breaking the bank. A tile renovation transforms your kitchen’s entire aesthetic while adding long-term value to your home. Whether you’re dealing with cracked floor tiles, stained backsplash grout, or simply want to modernize your space, this guide delivers everything you need for professional results. You’ll discover precise techniques for removing old tiles safely, preparing surfaces properly, and installing beautiful new tiles that stand the test of time.
Most homeowners spend thousands hiring professionals for tile replacement, but with the right approach, you can achieve equally impressive results. This comprehensive walkthrough covers every critical step—from assessing your current tile condition to applying the perfect grout finish. By the end, you’ll gain the confidence to tackle this project successfully while avoiding common pitfalls that lead to costly mistakes and rework. Let’s transform your kitchen into the stunning space you’ve always wanted.
Identify Your Tile Replacement Needs Before Starting
Before swinging a hammer, determine exactly what you’re working with to create a realistic plan. Kitchen tile issues vary dramatically in scope and complexity, so proper assessment prevents mid-project surprises that derail your timeline and budget. Examine each tile surface thoroughly, pressing firmly to detect looseness that indicates failing adhesive beneath. Check grout lines for crumbling, discoloration, or moisture penetration that often signals deeper structural problems requiring attention before new tile installation.
Determine your tile type and installation method by inspecting a small inconspicuous area. Most kitchen floors feature ceramic, porcelain, or natural stone tiles, each demanding different removal approaches and preparation techniques. Identify whether your tiles were installed directly over concrete backer board, plywood subflooring, or existing vinyl—this knowledge affects your removal strategy and potentially whether you need additional substrate preparation. Consider whether you’re tackling a complete floor replacement, refreshing just the backsplash, or addressing specific damaged sections, as project scope dramatically impacts time requirements and material costs.
How to Determine Tile Material and Installation Method
Examine tile edges where they meet cabinets or appliances to identify material composition without damaging visible surfaces. Ceramic tiles typically have white or tan backing with a glazed surface, while porcelain shows consistent color throughout the tile body. Natural stone tiles like marble or granite feature distinctive veining patterns and weight that sets them apart from manufactured options.
Check installation method by removing an outlet cover plate on your backsplash or baseboard near floor tiles. This reveals whether tiles were applied directly to wall studs with backer board or over existing surfaces. For kitchen floors, inspect where tiles meet appliances—refrigerators or dishwashers often conceal the tile edge where you can see substrate materials. Knowing these details prevents tool selection mistakes and ensures you prepare surfaces correctly for new tile installation.
Gather Essential Tools for Successful Tile Replacement
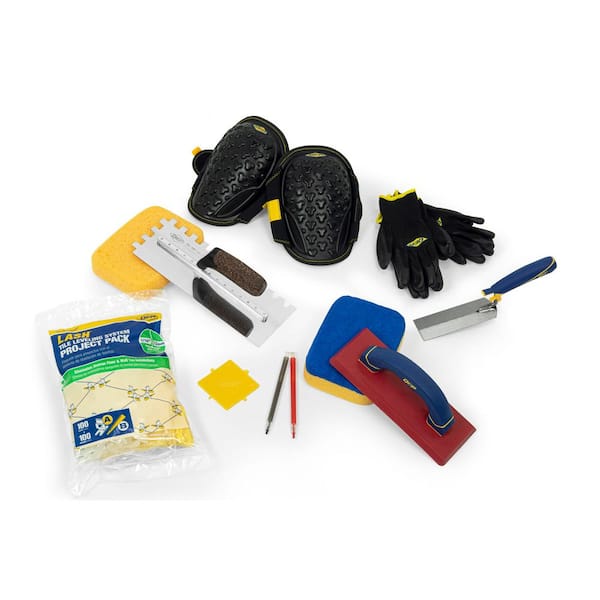
Your project’s success hinges on having the right tools before demolition begins. Investing in quality equipment saves time, prevents frustration, and dramatically improves final results. A heavy-duty putty knife or pry bar handles most residential tile removal tasks, but a rotary hammer with chisel attachment makes quick work of stubborn installations. Safety equipment proves equally critical—protect your eyes with safety glasses, your hands with work gloves, and your lungs with an N95 respirator since tile dust contains harmful silica particles.
Must-Have Installation Supplies Checklist
- Notched trowel matching your tile dimensions (1/4″ x 3/8″ for most wall tiles)
- High-quality thin-set mortar appropriate for your tile type
- Tile spacers (1/16″ for walls, 1/8″ to 1/4″ for floors)
- Rubber grout float for professional-looking joints
- Quality unsanded or sanded grout based on joint width
- Tile cutter or wet saw depending on material hardness
- 4-foot level for ensuring perfectly straight installations
- Cement backer board and screws for wood subfloor preparation
Calculate material quantities accurately by measuring your installation area precisely, then adding 10-15% for cuts and breakage. Purchase all tiles from the same manufacturing lot to avoid subtle color variations between batches. Having everything ready before starting prevents mid-project delays and keeps momentum going when you’re in the workflow.
Execute Safe Tile Removal Without Damaging Substrate
Proper tile removal protects your underlying structure and prevents costly repairs that derail your entire project. Begin by protecting surrounding surfaces with drop cloths or cardboard and turning off electricity to outlets in the work area. Start demolition from an inconspicuous corner or existing broken tile, positioning your putty knife at a 45-degree angle to grout lines before striking firmly with a hammer. Once initial separation occurs, work the tool beneath the tile and apply steady upward pressure to minimize substrate damage.
Work methodically across the installation area in manageable sections, keeping your workspace organized by sorting debris into heavy construction bags. Address adhesive residue immediately while the material remains somewhat pliable—floor scrapers and low-heat settings on heat guns remove stubborn mastic without damaging the substrate. Remember that the surface must be completely clean, smooth, and dry before proceeding, as any remaining adhesive prevents proper bonding of new tiles and creates future failure points.
Avoid These Common Tile Removal Mistakes
Many DIYers rush through tile removal, causing unnecessary damage that complicates the entire project. Never use excessive force that cracks or damages the underlying substrate—this creates expensive repairs requiring materials and time you didn’t budget. Avoid removing tiles in large sections that risk gouging the substrate surface. Don’t neglect safety precautions—inhaling tile dust causes serious respiratory issues over time. Most importantly, resist the temptation to skip thorough cleaning of the substrate; leftover adhesive creates uneven surfaces that lead to cracked tiles and failed installations down the road.
Prepare Your Surface for Long-Lasting Tile Installation
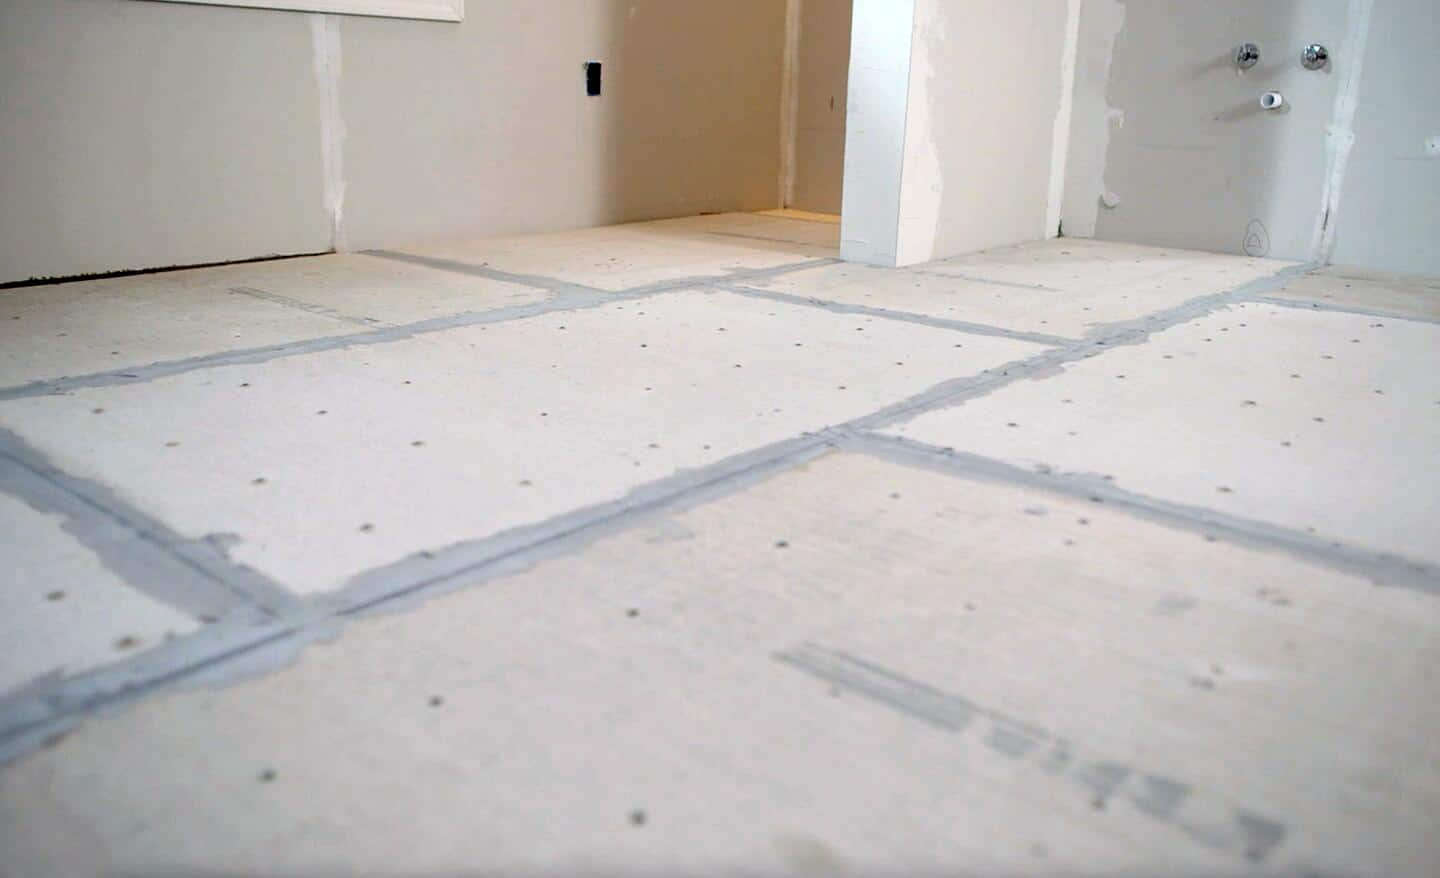
Surface preparation determines whether your new tile installation lasts decades or fails within months. Inspect your substrate carefully for damage, irregularities, or contamination before proceeding. Concrete slabs should be solid without cracks wider than 1/8 inch, while wooden subfloors must be rigid without noticeable flexing. Level the surface systematically using a long straightedge, marking high spots for grinding and low spots for filler compound application.
Install cement backer board when working with wood substrates or in moisture-prone areas like kitchen backsplashes. This stable, inorganic surface resists moisture damage and provides ideal bonding characteristics for thin-set mortar. Secure backer board with appropriate screws at 6-inch intervals along edges and 8-inch intervals across the field, staggering joints and filling seams with alkali-resistant mesh tape and thin-set. Allow any leveling compound or primer to cure completely according to manufacturer specifications before applying adhesive—rushing this step guarantees future problems.
Perfect Your Tile Layout Before Applying Adhesive
Strategic tile layout minimizes cuts, maximizes visual impact, and ensures professional results. Establish reference lines by finding the room’s center point through measuring opposite walls and snapping intersecting chalk lines. Dry-fit tiles along these lines without adhesive to test your layout, revealing where cuts become necessary and allowing adjustments for optimal visual balance. Aim to keep cut tiles at room edges rather than in prominent center areas where narrow slivers look unprofessional.
Consider visual priorities when finalizing your layout—large-format tiles create contemporary streamlined appearances with fewer grout lines, while smaller mosaic tiles add visual interest in irregular spaces. Directional tiles like wood-look planks should run perpendicular to primary light sources for best appearance. Mark your layout with pencil lines that remain visible during installation, and double-check measurements before mixing any thin-set mortar—corrections are simple during planning but impossible once adhesive cures.
Install Tiles with Professional Technique and Precision
Mix thin-set to a consistency resembling thick peanut butter—the material should hold its shape when spread but not slump or run. Apply adhesive using the notched trowel held at a 45-degree angle, creating even ridges across the substrate in sections small enough to complete before the adhesive skins over. Press each tile firmly into place with a slight twisting motion, ensuring full contact with the adhesive bed while using spacers to maintain consistent joint width.
Complete cuts before adhesive application during natural breaks in installation. Measure each cut carefully, mark with a pencil, and execute with your tile cutter or wet saw. Work systematically from your reference lines toward boundaries, maintaining layout alignment throughout. Avoid walking on freshly laid tiles for at least 24 hours, and check periodically that tiles remain level as you work—address any shifts immediately before adhesive cures.
Apply Grout for Flawless, Long-Lasting Results
Wait 24-48 hours for thin-set to fully cure before grouting—premature application can dislodge tiles or create weak spots. Mix grout to a workable paste consistency and apply using the rubber grout float held at a 45-degree angle, forcing grout into joints by pushing diagonally across tile surfaces. Begin cleanup within 15-30 minutes when grout has begun to set but hasn’t hardened, using a damp (not soaking) sponge in light circular motions.
Rinse the sponge frequently in clean water and wring thoroughly—excess water dilutes grout in joints causing uneven coloring. Multiple passes with a clean sponge may be necessary as haze becomes more difficult to remove over time. Seal grout lines after 72 hours of complete curing to protect against moisture, staining, and discoloration. Quality grout sealers penetrate the grout matrix, creating invisible protection without altering appearance.
Transforming your kitchen by changing tiles yourself delivers incredible satisfaction and value when approached methodically. By following these proven techniques for assessment, removal, preparation, installation, and finishing, you’ll achieve results that rival professional work. Remember that patience during surface preparation and layout pays dividends in the final appearance and longevity of your installation. Your beautifully renewed kitchen tiles will enhance every meal preparation experience and become a conversation piece for years to come—proving that sometimes the most valuable home improvements are the ones you complete with your own hands.


