
That mountain of vegetables won’t shred itself, but your Cuisinart food processor can turn 30 minutes of hand-grating into mere seconds. Whether you’re prepping potatoes for hash browns or cabbage for coleslaw, the shredding disc transforms dense ingredients into perfect, uniform cuts every time. This guide walks you through everything from first-time setup to advanced techniques that’ll make you wonder how you ever cooked without it. Mastering how to use shredding disc on food processor Cuisinart properly will revolutionize your kitchen workflow and deliver restaurant-quality results with minimal effort.
Identifying Your Cuisinart Shredding Disc Correctly

Before you start shredding, you need to locate the right disc in your Cuisinart food processor accessories. Most Cuisinart models come with two primary shredding discs designed for specific culinary tasks, and using the wrong one can ruin your results.
Fine vs Medium Shredding Discs Explained
Your Cuisinart likely includes both fine and medium shredding discs nestled in the accessory drawer. The fine disc creates delicate shreds perfect for hard cheeses like Parmesan or carrots for salads—the kind you’d use in a sophisticated dish where texture matters. The medium disc produces heartier cuts ideal for potatoes, cabbage, or cheese for tacos that need to hold their shape during cooking. Both discs feature sharp, raised teeth arranged in a precise circular pattern that’s the secret to their consistent shredding power. Look for the size indicator stamped on the plastic hub—fine discs typically have smaller openings between the teeth.
Critical Safety Features Every User Must Know
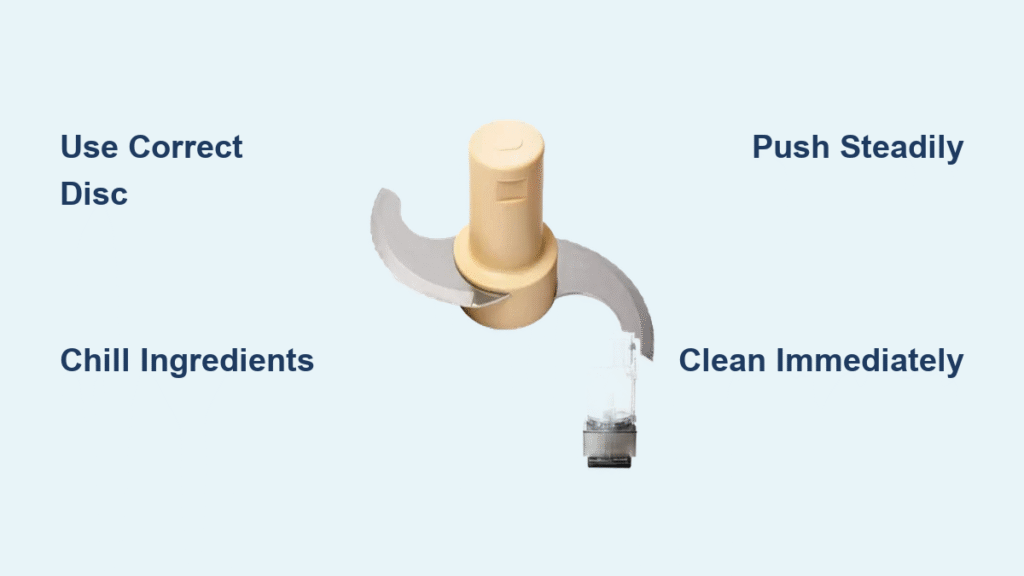
Every authentic Cuisinart shredding disc includes essential safety components that prevent injury during use. The central plastic hub isn’t just for show—it securely locks onto the processor’s drive shaft to prevent wobbling during operation. More importantly, the finger grips molded into the hub let you safely remove the disc without touching the razor-sharp metal surface. Never attempt to handle the disc by its teeth—these cutting edges remain dangerously sharp even after multiple uses. If your disc lacks these safety features, it may not be an official Cuisinart accessory and could pose serious injury risks.
Perfect Setup Process for Flawless Shredding Results
Proper setup takes just two minutes but prevents frustration and ensures optimal results every time you use your Cuisinart food processor. Skipping these steps leads to uneven shreds, motor strain, and potential safety hazards.
Step-by-Step Disc Installation
Begin by removing the processing bowl from the base unit. Hold the shredding disc firmly by its plastic hub—never the metal teeth—and align it with the drive shaft protruding from the bowl bottom. Push down firmly until you hear a distinct click—the disc should sit perfectly level and spin freely when you test it by hand. Replace the bowl on the base unit, rotating it clockwise until it locks securely into place with an audible snap. A properly installed disc won’t wobble during operation, which is crucial for consistent shredding.
Food Preparation Essentials
Cut your ingredients into pieces that fit easily through the feed tube without forcing them. For round vegetables like potatoes or apples, halve or quarter them first to create flat surfaces that feed smoothly. Remove any hard stems, seeds, or tough cores that could damage the disc or create uneven shreds—these obstructions are the most common cause of shredded food clumping together. Pat ingredients dry with a paper towel if they’re wet, as moisture creates sticking issues that disrupt the shredding process.
Feed Tube Mastery for Professional-Quality Shreds

The feed tube isn’t just an opening—it’s your control center for perfect shredding results. Most home cooks underestimate how much technique affects their final product.
Proper Pusher Technique
Always use the provided food pusher—never your fingers or other utensils. The pusher keeps your hands safely away from the spinning disc while applying consistent, downward pressure. Insert food with the cut side facing the disc for the cleanest cuts; placing rounded surfaces against the disc causes slipping and uneven shredding. Apply steady pressure without forcing—it should take 2-3 seconds per food piece for optimal results. If you hear the motor straining, you’re pushing too hard.
Controlling Shred Length and Texture
For longer, elegant shreds like those in Asian salads, feed ingredients vertically through the tube. For shorter pieces perfect for casseroles or baked dishes, lay them horizontally in the feed tube. The angle and direction you insert food directly affects your final shred size and texture—this simple technique gives you complete control without changing discs. Experiment with different angles on your first few pieces to dial in the exact shred length your recipe requires.
Avoiding Costly Shredding Mistakes That Ruin Results
Even experienced cooks make these errors that turn potential culinary triumphs into kitchen disasters. Avoid them for professional results every time.
Feed Tube Overloading Dangers
Cramming too much food at once creates uneven shreds and strains your motor—this is the #1 mistake beginners make. Fill the tube only 3/4 full and let the processor work at its own pace. For best results with dense vegetables like sweet potatoes, feed ingredients one piece at a time with consistent pressure. Overloading forces food around the disc instead of through it, creating a pulpy mess rather than clean shreds.
Critical Disc Selection Errors
Using the fine disc for potatoes creates mush instead of defined shreds—many users don’t realize disc selection makes or breaks their results. Match your disc to your ingredient’s density: fine for hard cheeses and carrots, medium for potatoes, cabbage, and softer cheeses. When in doubt, start with the medium disc—you can always re-shred if needed, but you can’t fix mushy over-processed food. Never use the slicing disc for shredding tasks—this damages both the food and the disc.
Pro Shredding Techniques for Restaurant-Quality Results
Once you’ve mastered the basics, these advanced techniques elevate your results from good to extraordinary. These insider methods separate casual users from true Cuisinart masters.
Cheese Shredding Secrets Restaurants Use
Chill hard cheeses like cheddar for 15 minutes before shredding for cleaner cuts that don’t clump. Soft cheeses like mozzarella require freezing for 10 minutes to prevent gumming on the disc. Spray the disc lightly with cooking spray before starting with high-fat cheeses—this creates a non-stick barrier without affecting flavor. For Parmesan, freeze small chunks first—this hardens the cheese enough to shred finely without turning to powder.
Vegetable Prep Shortcuts That Save Time
For perfect hash browns, shred potatoes directly into a bowl of cold water to prevent browning and remove excess starch. When shredding onions, use the pulse function for better control and significantly reduced tears—continuous operation creates fine particles that intensify eye irritation. Stack leafy greens like cabbage tightly and roll them before shredding for restaurant-quality coleslaw with uniform texture. For carrots, peel them but leave the tapered ends intact—they feed through the tube more smoothly.
Cleaning and Maintenance for Long-Lasting Performance
Proper care keeps your shredding disc sharp and safe for years of reliable use—neglecting this step is the fastest way to ruin an expensive kitchen tool.
Immediate Post-Use Cleaning Protocol
Rinse the disc under warm water immediately after use—food particles left to dry become nearly impossible to remove without damaging the disc. Use the included cleaning tool or a soft brush (never steel wool) to gently clear debris from between the teeth. Hold the disc by its plastic hub under running water while brushing in the direction of the teeth to avoid injury. This simple 30-second routine prevents hours of scrubbing later.
Deep Cleaning Method for Stubborn Residue
For cheese or potato residue that’s dried on, soak the disc in warm, soapy water for 10 minutes before gentle brushing. Never use abrasive cleaners or scouring pads—they’ll dull the cutting surface permanently. For extreme cases, a paste of baking soda and water applied with a soft toothbrush works wonders without damage. Always dry thoroughly with a soft towel before storage—leaving moisture on the disc invites rust and corrosion, especially near the hub mechanism.
Troubleshooting Common Shredding Problems
When results don’t meet expectations, these quick fixes solve 90% of issues without requiring professional service.
Fixing Uneven Shredding Patterns
Check that your disc sits perfectly level on the drive shaft—wobbly discs create inconsistent cuts that ruin presentation. Ensure ingredients are firmly pressed against the disc with steady pressure throughout the process; uneven pressure creates alternating thick and thin shreds. If problems persist, remove and reinstall the disc—sometimes it doesn’t seat properly on the first try. For dense vegetables, try chilling them first as cold ingredients shred more uniformly.
Solving Food Sticking Issues
Wet ingredients like potatoes or cheese may stick to the disc surface. Try chilling them for 10 minutes before shredding to reduce moisture content. Alternate between firm and soft ingredients—shred a carrot after cheese pieces to clear the disc naturally. If sticking persists, lightly coat the disc with non-stick spray before starting, but avoid getting spray near the drive mechanism. Never force stuck food—stop the processor and clear obstructions properly.
Safe Storage Practices to Protect Your Investment
Protect your Cuisinart shredding disc from damage and prevent accidents with these essential storage habits that many users overlook.
Organized Storage Solutions
Store discs in their original protective sleeves or a dedicated container with individual slots. Keep them away from other metal utensils in drawers that could dull the cutting edges through contact. The disc drawer built into your processor base keeps everything organized and protected—never toss discs loose into a utensil drawer. For frequent users, consider a magnetic strip mounted inside a cabinet door to keep discs visible and safely separated.
Critical Sharp Edge Awareness
Always remember—these discs are razor-sharp, not blunt tools. Store them completely out of children’s reach, preferably in a locked drawer. When removing from storage, grip only the plastic hub and finger grips with deliberate care. Never stack discs directly on top of each other—this damages the cutting edges. If you drop a disc, don’t attempt to catch it mid-air; let it fall and retrieve it safely once stationary.
Mastering how to use shredding disc on food processor Cuisinart properly transforms meal prep from a chore to a joy. Start with the medium disc and firm vegetables like carrots to build confidence, then experiment with different ingredients as you become comfortable. These techniques work for every Cuisinart model from the compact Mini-Prep to the professional DLC series—once you learn these fundamentals, you’ll reach for your shredding disc daily whether prepping weeknight dinners or holiday feasts. The key to perfect shreds every time? Consistent pressure, proper disc selection, and immediate cleaning—follow these steps and your Cuisinart will deliver flawless results for years to come.


