
That persistent drip from your kitchen faucet isn’t just annoying—it’s costly. A single leaky faucet can waste more than 3,000 gallons of water annually, translating to hundreds of dollars in unnecessary water bills. The constant sound disrupts your kitchen’s peace, and the moisture can lead to mold growth under your sink. The good news is that 90% of kitchen faucet leaks can be fixed with basic tools in under an hour, saving you the $150-$300 plumber’s fee. Whether your faucet drips from the spout, leaks around the handle, or shows moisture at the base, this guide gives you the precise steps to stop the leak permanently.
Before you replace your entire faucet or call for professional help, you need to identify your faucet type and the exact leak location. Compression, cartridge, ball, and ceramic disc faucets each fail differently and require specific repair approaches. This comprehensive guide walks you through diagnosing your specific leak, gathering the right tools, and executing the correct repair for your faucet model—no plumbing degree required.
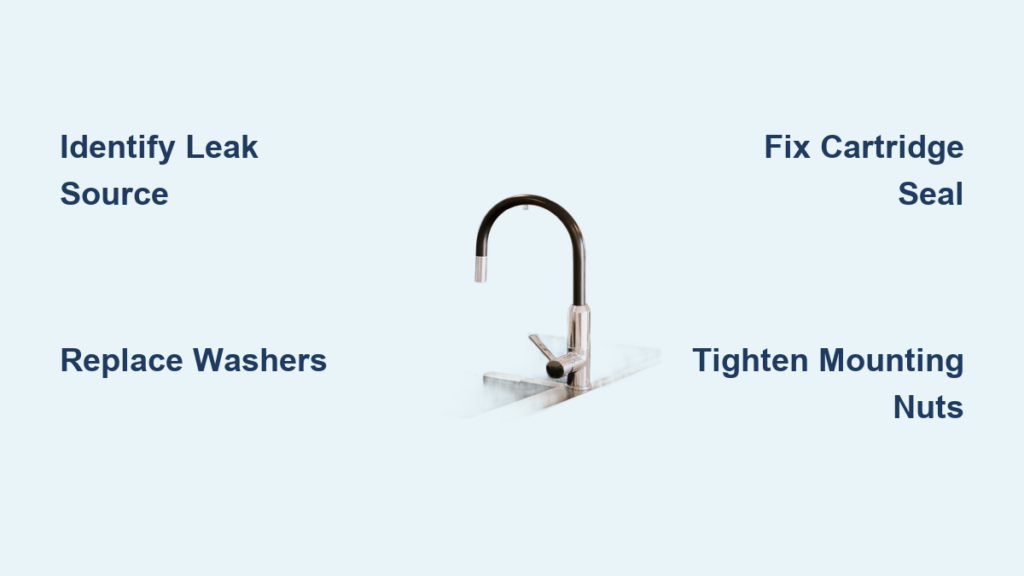
Identify Your Faucet’s Leak Source Accurately
Pinpointing exactly where your faucet leaks determines your repair approach. Kitchen faucet leaks typically occur in three distinct locations, each signaling different internal failures that require specific solutions.
Spout leaks happen when water continues to drip or stream from the spout even when the handle is fully turned off. This indicates worn internal seals, O-rings, or washers that no longer create a tight seal. If you notice water pressure affecting the drip rate (more drip with higher pressure), you’re dealing with a spout leak.
Handle leaks appear as water pooling on top of the faucet or dripping down the side when you operate the handle. This means the packing nut has loosened or the cartridge has worn out, allowing water to escape around the stem rather than staying contained within the faucet body.
Base leaks show as moisture accumulating where the faucet meets your countertop or sink. Water collects around the base, often accompanied by rust stains or mineral deposits. This usually indicates failed mounting seals or loose mounting hardware rather than internal component failure.
Before disassembly, conduct a thorough leak test. Turn off the water supply completely by closing both hot and cold shutoff valves under your sink. Dry the entire faucet assembly thoroughly, then place white paper towels around the spout, handle, and base. Turn the water back on and operate the faucet through its full range. Check which paper towel shows moisture first—that’s your primary leak source.
Gather the Right Repair Tools for Your Faucet Type

Having the correct tools before starting prevents frustration and ensures a successful repair. The specific tools you need depend on your faucet type, but these essentials cover most kitchen faucet repairs.
For compression faucets (two separate handles), you’ll need a 6-inch adjustable wrench, Phillips and flathead screwdrivers, needle-nose pliers, replacement rubber washers, valve seat grinding tool, and plumber’s grease. Keep a small parts tray nearby to organize removed components—faucet parts are small and easily lost.
Cartridge faucet repairs (single handle) require a cartridge puller tool, which makes removing stubborn cartridges without damaging the faucet body. These inexpensive tools ($5-$15) are available at most hardware stores and pay for themselves in preventing costly mistakes. You’ll also need a small Allen wrench set for set screws commonly found on modern single-handle faucets.
For ball faucets (single handle with rounded cap), prepare a ball faucet repair kit specific to your brand. These kits contain all the rubber seats, springs, and O-rings you’ll need. Include a pair of locking pliers with protective jaws to remove the cap without scratching your faucet finish.
Always keep plumber’s grease on hand—it lubricates moving parts and creates better seals than dry assembly. Apply it sparingly to all new O-rings and moving components before reassembly.
Fix a Leaking Compression Faucet Spout
Compression faucets leak at the spout when the rubber washer no longer seals against the valve seat. This is the most common faucet leak and surprisingly straightforward to fix with the right approach.
Start by removing the decorative cap on the handle—use your fingernail or a flathead screwdriver wrapped in tape to avoid scratching the finish. Underneath, you’ll find a brass screw holding the handle in place. Remove this screw and lift the handle straight up. For stiff handles, gently tap the base with a rubber mallet to loosen corrosion.
With the handle removed, use your adjustable wrench to loosen the packing nut. Turn counter-clockwise while stabilizing the stem with pliers to prevent twisting. Once loose, pull the stem straight up—you may need to wiggle it slightly if mineral deposits have bonded it in place.
At the bottom of the stem, remove the brass screw securing the rubber washer. Take the old washer to your hardware store to ensure an exact match—faucet washers vary in size and thickness. While you’re there, pick up a valve seat grinding tool if the brass seat inside the faucet body shows pitting or corrosion.
Install the new washer with the concave side facing down, then reassemble the stem. Hand-tighten the packing nut first, then give it just a quarter-turn with your wrench—over-tightening compresses the washer unevenly and causes immediate re-leaking. Test immediately for drips before reinstalling the handle.
Repair Single-Handle Cartridge Faucet Leaks
Cartridge faucet leaks often start as small drips that worsen over time as internal seals degrade. The repair process varies slightly between brands, but the fundamental approach remains consistent across most single-handle kitchen faucets.
After shutting off water and removing the handle, locate the retaining mechanism holding the cartridge in place. Moen faucets use a C-clip removed with needle-nose pliers, while Delta models have a brass retaining ring requiring a special tool or pliers with protective covers. Take photos at each disassembly step—reassembly becomes much easier when you can reference your own images.
When removing the cartridge, grip it firmly at the base and pull straight up. If it resists, try the “wiggle and pull” technique: gently rock the cartridge side-to-side while applying upward pressure. Never use excessive force—damaging the cartridge housing means faucet replacement rather than repair.
Take the old cartridge to your hardware store for an exact replacement. Manufacturers use proprietary designs, so don’t rely on measurements alone—match the entire unit visually. Before installing the new cartridge, lubricate all O-rings with plumber’s grease and ensure proper alignment with the faucet body’s internal slots. A misaligned cartridge causes immediate leaks and handle stiffness.
Reinstall the retaining mechanism last, ensuring it seats completely. Many DIYers make the mistake of thinking the clip is fully seated when it’s not—double-check by trying to lift the cartridge slightly. If it moves, the retainer isn’t secure.
Solve Persistent Base Leaks and Handle Drips
Base leaks and handle drips require different solutions than spout leaks, focusing on mounting hardware and secondary seals rather than primary water control components.
For base leaks, start by tightening the mounting nuts underneath your sink. Use two wrenches—one to hold the mounting post steady, the other to tighten the nut. Tighten incrementally, alternating between nuts to keep the faucet level. If tightening doesn’t stop the leak, you’ll need to remove the faucet completely.
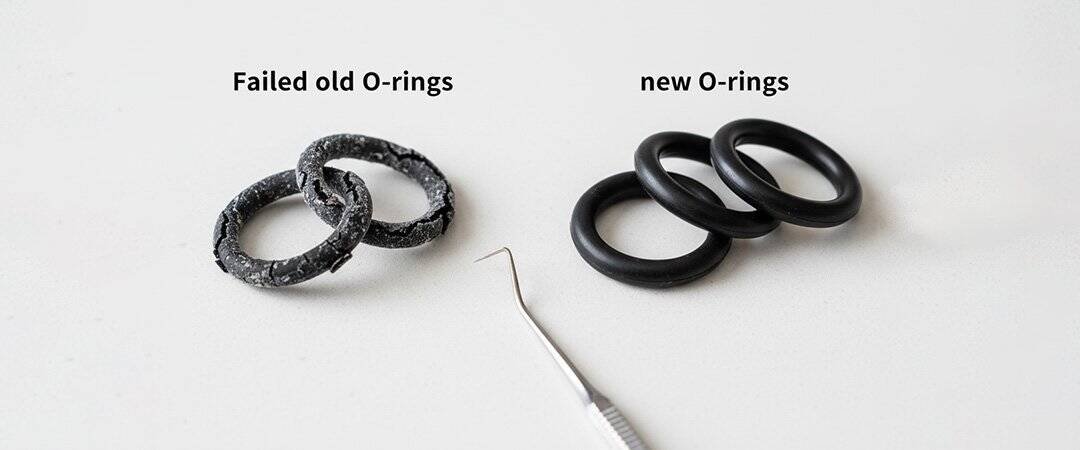
Place towels in the sink basin to protect it, then disconnect the supply lines and remove the mounting nuts. Lift the faucet out and inspect the large O-ring or gasket between the faucet base and sink surface. Replace this seal if flattened, cracked, or compressed. Apply a thin bead of plumber’s putty around the base before reinstalling for a watertight seal.
Handle drips on single-handle faucets often indicate cartridge misalignment or worn handle seals. Remove the handle and check for a small O-ring around the cartridge stem—this commonly fails and causes water to seep up around the handle. Replace this tiny ring with an identical size from your repair kit, applying plumber’s grease before reassembly.
For two-handle faucets with handle drips, the packing nut below the handle needs tightening. Remove the handle, tighten the nut with your wrench, then reassemble. If dripping continues, replace the stem O-ring—this rubber ring sits between the stem and the faucet body and wears out over time.
Prevent Future Leaks with Smart Maintenance
The key to avoiding recurring faucet leaks lies in proper maintenance after your repair. Most DIY repairs fail within months because homeowners skip these critical final steps.
Test your faucet thoroughly before declaring the job complete. Run hot and cold water for several minutes, checking for leaks at all potential points. Operate the handle through its full range multiple times—some leaks only appear when the handle is in specific positions.
After confirming no leaks, apply a small amount of silicone-based faucet lubricant to the handle mechanism. This reduces friction on internal components and makes operation smoother. Avoid petroleum-based lubricants as they degrade rubber seals over time.
Establish a simple maintenance schedule: clean your aerator monthly by unscrewing it and soaking in vinegar, check for handle stiffness quarterly, and inspect under-sink connections for moisture every six months. Catching minor wear early prevents major leaks later.
Consider upgrading to a ceramic disc faucet if you’re replacing rather than repairing. These models use advanced ceramic components that rarely wear out and typically come with lifetime warranties against leaks. While costing 20-30% more initially, they save money long-term through reduced water waste and repair costs.
A properly repaired kitchen faucet should operate smoothly with no drips, leaks, or handle stiffness. If your faucet continues leaking after following these steps, the problem may be more complex than basic seal replacement—mineral buildup in hard-to-reach areas or internal corrosion might require professional attention. However, for the vast majority of common kitchen faucet leaks, this guide provides everything you need to stop the drip permanently. Remember that timely repairs not only save water and money but also prevent more serious damage to your cabinetry and flooring. With the right tools, knowledge, and attention to detail, you’ve just transformed from a frustrated homeowner into a capable faucet fixer—ready to tackle the next leak with confidence.


