
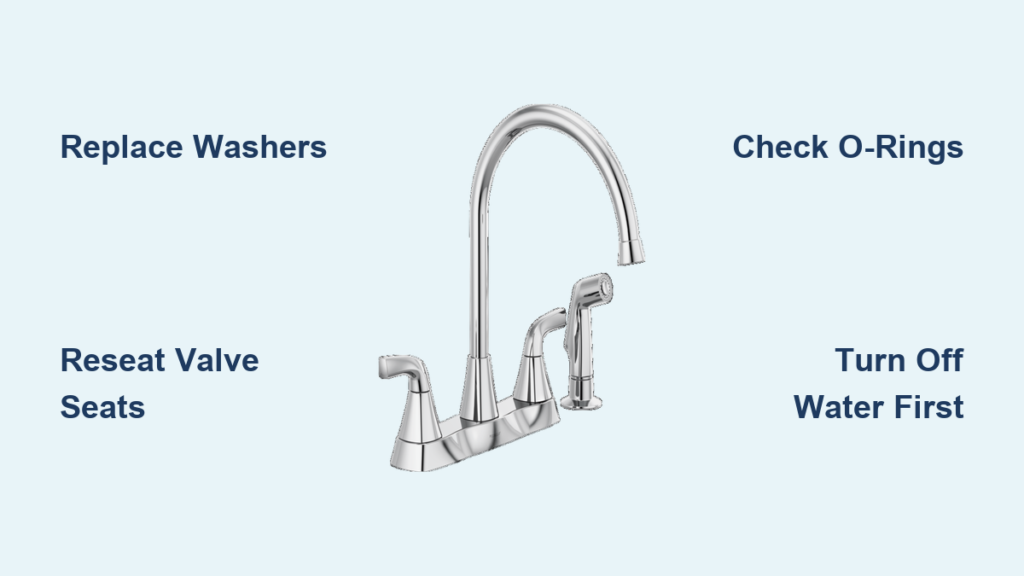
That persistent drip-drip-drip from your kitchen sink isn’t just annoying—it wastes hundreds of gallons of water yearly and hikes your utility bills. When your two-handle faucet won’t stop leaking, you’re facing a classic compression faucet issue where worn internal parts fail to seal properly. This guide delivers actionable steps to silence that drip using standard repair techniques for most two-handle kitchen faucets. You’ll learn exactly how to diagnose the faulty component, replace critical parts, and prevent future leaks—all without calling a plumber for this common $15 fix.
Most dripping two-handle faucets stem from deteriorated rubber washers or corroded valve seats—the unsung heroes that create watertight seals under pressure. Unlike modern single-handle models, these traditional faucets rely on mechanical compression, making them prone to wear after 2-5 years of use. Before you grab tools, confirm your faucet type: two separate handles controlling hot and cold water almost always indicate a compression design. Turn off both handle hot/cold shutoff valves under the sink first—this prevents accidental flooding during repair. With basic tools and 30 minutes of your time, you can eliminate that maddening drip permanently.
Why Your Two-Handle Faucet Keeps Dripping (Common Culprits)
Hot vs. Cold Handle Drip Patterns Reveal the Problem
Notice which handle drips? Hot-side leaks often indicate mineral buildup from heated water accelerating washer decay, while cold-side drips typically mean general wear. If both handles leak, your valve seats likely have pitting corrosion. Listen for hissing sounds—that’s water forcing through compromised seals under pressure.
The Washer and Seat Failure Timeline You Can’t Ignore
Compression faucets fail predictably: Rubber washers harden and crack within 3 years due to constant water exposure, while brass valve seats develop grooves from washer friction. A single drip per second wastes 3,000 gallons annually—enough to fill a swimming pool over five years. Don’t wait for major leaks; address drips immediately to avoid sink damage.
Essential Safety Steps Before Opening Your Faucet
Shutting Off Water: The Two Critical Valves You Must Close
Ignoring this risks catastrophic flooding. Locate the shutoff valves under your sink—turn both clockwise until tight. Then open BOTH faucet handles to drain residual water and relieve pressure. If handles drip after closing valves, your shutoffs are faulty—turn off the main house water supply immediately. Never skip this dual-valve check.
Workspace Prep: Avoiding Costly Slip-Ups
Lay towels in the sink basin to catch dropped parts. Place a bowl under pipes to collect residual water. Wrap faucet bases with painter’s tape to prevent tool scratches. Most crucially: Photograph each disassembly step with your phone—reassembly mistakes cause 70% of post-repair leaks.
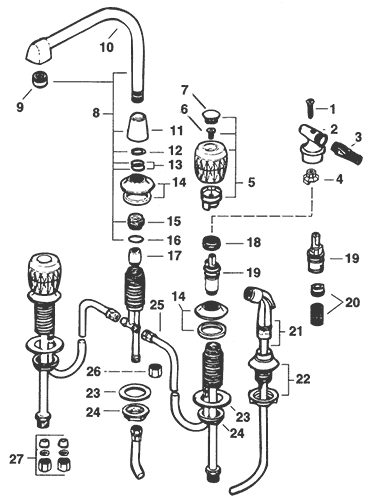
Tools and Parts You’ll Need for a Compression Faucet Fix
Must-Have Repair Kit (Under $20 Total)
- Adjustable wrench (8-10″)
- Screwdrivers (Phillips #2 and flathead 1/4″)
- Seat wrench (specific to your faucet brand)
- Replacement kit: Washers, O-rings, valve seats
- Needle-nose pliers
- White vinegar (for mineral deposits)
Choosing Correct Replacement Parts: Avoid These Mistakes
Two-handle faucets require handle-specific parts—hot-side washers often differ from cold. Bring old parts to the hardware store; “universal” kits frequently fail. For Moen faucets, use rubber-faced washers; Kohler models need neoprene. Never reuse old washers—they compress unevenly after removal.
Step-by-Step Faucet Handle Removal Process
Removing Decorative Caps Without Damage
Pry off handle caps with a flathead screwdriver wrapped in tape. For stubborn caps, slide dental floss underneath to break adhesive seals. Never hammer or force caps—they’re often brittle plastic. Underneath, you’ll find a setscrew holding the handle to the stem.
Loosening the Setscrew: The Hidden Obstacle
Spray penetrating oil on the setscrew if corroded. Hold the handle steady while turning the screw counterclockwise—use vise grips if it strips. If the handle sticks after screw removal, gently tap it upward with a rubber mallet. Never pry handles off; you’ll crack the porcelain coating.
Extracting and Inspecting the Valve Stem

Stem Removal: When to Apply Heat (Safely)
Corroded stems won’t budge with standard wrenches. Apply a hairdryer for 60 seconds to expand metal, then use channel-lock pliers with rag protection. Turn stems counterclockwise—lefty loosey—but stop if you feel sudden resistance. Forcing it strips internal threads.
Diagnosing Damage: What to Examine Closely
Pull the stem straight out and inspect:
– Washers: Check for cracks, tears, or flat spots (replace if uneven)
– Stem threads: Look for pitting or corrosion (smooth with emery cloth)
– Valve seat: Shine a flashlight down the faucet body—grooves deeper than 1/32″ require reseating
Replacing Critical Components: Washers and Valve Seats
Washer Replacement: The Precision Technique
Slide the new washer onto the stem screw—concave side down for most models. Tighten the screw just enough to hold the washer flat; over-tightening distorts the seal. Test fit the stem before reassembly: Rotate it slowly—if it catches, the washer is misaligned.
Reseating the Valve: When Skipping This Causes Leaks
Minor seat pitting? Use a seat dresser tool (included in kits) by inserting it and turning clockwise 3-4 times. For deep grooves, replace the entire seat: Insert the new brass seat, then tighten with a seat wrench until fully seated. Wipe away metal shavings with a damp cloth—debris causes instant leaks.
Reassembling Your Faucet Without Leaks
O-Ring Installation: The Often-Missed Step
Two-handle faucets have stem O-rings that degrade alongside washers. Lubricate new O-rings with plumber’s grease before sliding them into grooves. Pinched O-rings cause handle stiffness—rotate the ring as you insert it to prevent twisting.
Handle Reattachment: Avoiding Cross-Threaded Disasters
Align the stem flat spot with the handle opening. Slide the handle straight down—no side-to-side wiggling. Hand-tighten the setscrew first, then give a quarter-turn with tools. Over-tightening cracks handles; under-tightening causes wobble and leaks.
Testing and Troubleshooting Post-Repair

The 3-Stage Leak Test You Must Perform
- Slow crank test: Open handle 1/4 turn—watch for drips at spout base
- Full pressure test: Run at max flow for 2 minutes—check handle base for seepage
- Shutoff test: Close handle abruptly—listen for water hammer sounds
Fixing Common Reassembly Mistakes Immediately
If water leaks around the handle base, your stem O-ring is pinched—disassemble and reseat it. Drips from the spout mean the washer isn’t sealing; tighten the washer screw 1/8 turn. Hissing sounds indicate debris in the valve seat—flush with vinegar for 10 minutes.
When to Call a Professional Plumber Immediately
Danger Signs Beyond DIY Repair
Stop work if you see:
– Cracked faucet body (requires full replacement)
– Stripped shutoff valves (leaks won’t stop without main water off)
– Water pooling under the sink (indicates pipe damage)
Plumbers charge $150-$300 hourly—attempting complex fixes when these signs appear risks $5,000+ water damage. For vintage faucets (pre-1990), specialty parts may require a pro’s supplier network.
Preventing Future Drips: Maintenance You Can’t Skip
Quarterly Care That Doubles Faucet Life
Every 3 months: Remove handles and apply silicone grease to stems. Soak washers in vinegar for mineral deposits. Check shutoff valves—turn them fully off/on once to prevent seizing. This 5-minute ritual prevents 90% of drips.
Upgrade Smartly: When Repairs Aren’t Worth It
If your faucet needs parts replacement yearly, install a ceramic-disk model. Though costing $200+, they last 10+ years with zero maintenance. For rentals, confirm landlord approval before upgrades—many require original fixture retention.
Final Note: A repaired two-handle faucet should operate silently with zero drips after proper washer and seat replacement. Keep leftover parts in your toolbox for future emergencies—most kits include extras. If leaks persist after two repair attempts, corrosion has likely compromised the faucet body, making replacement the only permanent solution. Always photograph each disassembly step for future repairs, and remember: Turning off both shutoff valves isn’t optional—it’s what separates a quick fix from a flooded kitchen. For persistent issues, consult manufacturer diagrams online using your faucet’s model number (typically stamped under the spout).


