
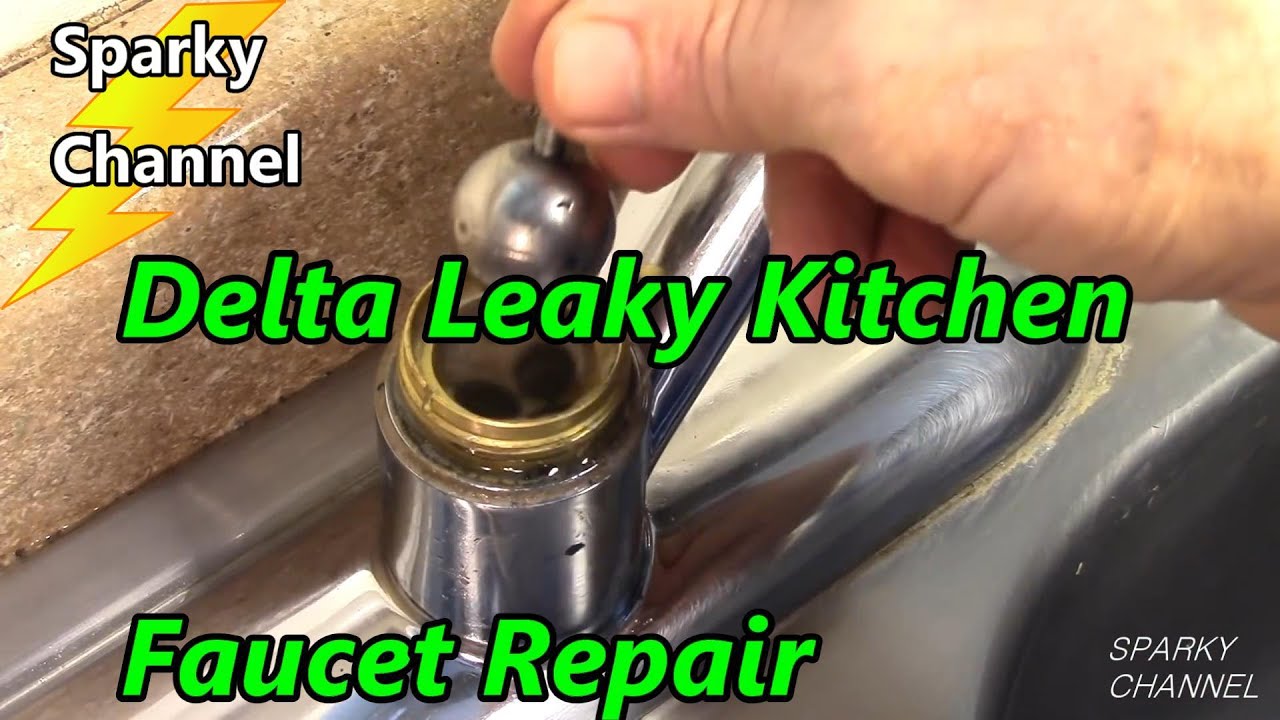
If you’re wondering how to remove a Delta kitchen faucet spout, you’re likely dealing with a leak, clog, or simply want to upgrade your faucet’s appearance. Many homeowners mistakenly believe this task requires professional plumbing skills, but Delta’s clever design makes spout removal surprisingly straightforward for DIYers with basic tools. The key lies in understanding Delta’s signature setscrew system that holds most of their pull-down and pull-out spouts securely in place.
Before you begin, recognize that Delta uses two primary spout attachment methods across their extensive product line. The most common setup features a setscrew hidden beneath the spout base, while certain models cleverly conceal this fastener behind the handle assembly. Whether you own a contemporary Trinsic model or a classic Foundations series faucet, knowing which system your specific Delta kitchen faucet uses determines your entire removal approach. This guide walks you through every step needed to safely remove your spout without damaging your faucet’s finish or internal components.
Gather Essential Tools Before Starting
Having the right tools ready prevents frustrating interruptions during your spout removal project. For most Delta kitchen faucets, a 3mm or 1/8-inch hex key (Allen wrench) forms the cornerstone of your toolkit—this small tool fits perfectly into the setscrew opening. Check your original faucet packaging first, as Delta often includes the correct hex key with new installations. If yours is missing, any hardware store stocks these inexpensive tools in both metric and imperial sizes.
Beyond the essential hex key, prepare these additional tools:
– Needle-nose pliers for stubborn connections
– Flathead screwdriver for handle cap removal
– Flashlight to illuminate hard-to-see areas
– Soft cloth to protect your sink surface
– Small bowl to store the setscrew (prevents loss down the drain)
– Penetrating oil like WD-40 for corroded fasteners
Place a towel over your sink drain before starting—this catches any dropped components and prevents accidental damage to your sink surface. If your faucet has been installed for several years, apply penetrating oil to the setscrew area 15 minutes before beginning. This step proves crucial for older installations where mineral deposits and corrosion can fuse the setscrew in place. Having all tools organized on a nearby surface keeps you focused on the task rather than searching for equipment mid-project.
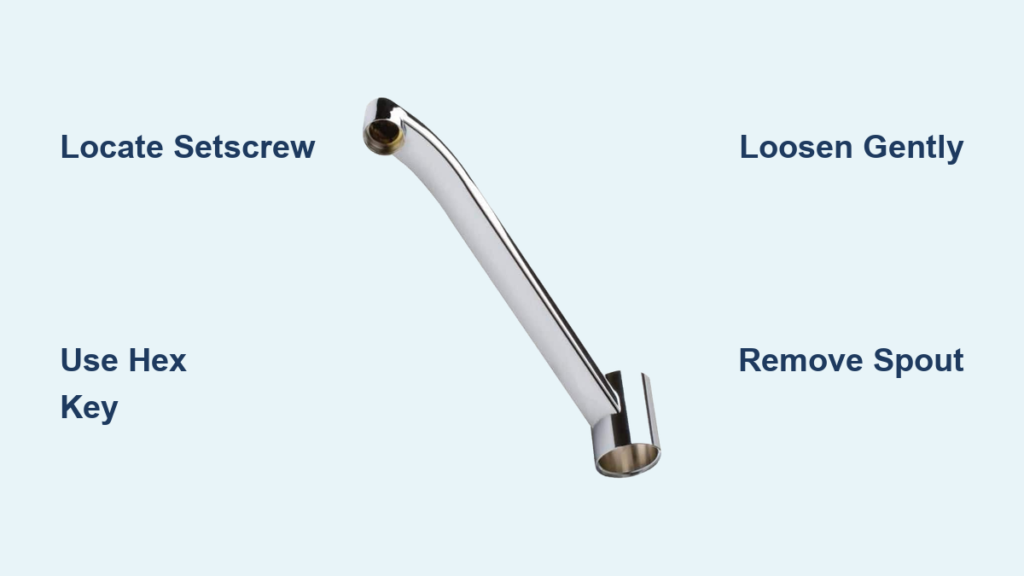
Locate the Setscrew on Your Specific Delta Model
Finding the setscrew represents the make-or-break moment in your how to remove a Delta kitchen faucet spout project. For approximately 80% of Delta pull-down models, the setscrew hides beneath the spout base where it connects to the faucet body. Examine this junction carefully—you’re looking for a small hexagonal opening barely visible from above. Shine your flashlight at a low angle to reveal this critical access point, as overhead lighting often creates shadows that obscure the setscrew.
Certain Delta models, particularly those with single-handle designs like the Victorian or Pilar series, tuck the setscrew behind the handle. To access it, first remove the decorative handle cap using a flathead screwdriver, then loosen the handle mounting screw. Once the handle lifts away, you’ll discover the spout setscrew positioned directly beneath it. If you’ve examined both locations without finding a setscrew, your faucet likely uses Delta’s MagneDock technology found in newer models—you’ll need to depress the magnetic release button at the spout’s base instead.
Before inserting your hex key, clean the setscrew area thoroughly. Mineral deposits often accumulate around this critical fastener, making tool insertion difficult. Use an old toothbrush dipped in vinegar to scrub away buildup, then dry the area completely. This preparation prevents slippage that could strip the setscrew head—a common mistake that transforms a simple 10-minute project into a costly repair nightmare.
Loosen the Setscrew Without Stripping It
Proper setscrew removal separates successful DIYers from those who call emergency plumbers. Insert your hex key fully into the opening and apply steady counterclockwise pressure—Delta setscrews always loosen by turning left. Many beginners make the critical error of applying too much force too quickly; instead, use controlled quarter-turn increments followed by slight clockwise pressure to break corrosion bonds. You’ll typically need 6-10 full rotations before the setscrew releases completely.
Warning: Never use power tools on faucet setscrews! The delicate internal threads can’t withstand impact driver force, often resulting in catastrophic damage requiring complete faucet replacement. If the setscrew resists movement after several minutes of effort, reapply penetrating oil and wait 10-15 minutes—this gives the solution time to work into corroded threads. For particularly stubborn fasteners, apply heat with a hair dryer for 2-3 minutes to expand the metal slightly before attempting removal again.
As you loosen the setscrew, maintain awareness of how the spout responds. Most Delta spouts begin wiggling slightly once the setscrew has backed out sufficiently—this indicates you’re close to completion. If you encounter sudden resistance after initial movement, stop immediately and check for secondary fasteners. Some commercial-grade Delta models feature dual setscrews for added security, requiring both to be loosened before spout removal becomes possible.
Execute the Proper Removal Technique for Your Spout Type
After fully loosening the setscrew, most Delta kitchen faucet spouts release with a specific sequence rather than simply lifting straight up. For standard pull-down models, grip the spout firmly with both hands and apply gentle upward pressure while simultaneously twisting it 15-30 degrees clockwise. This slight rotation aligns internal mounting tabs that prevent accidental detachment during normal use. You should feel the spout “break free” with a subtle click as these tabs disengage.
Pull-out spout models follow a similar process but require additional attention to the internal hose. As you lift the spout, guide the connected hose through the faucet body opening—never yank or force this component. Take photos at this stage to document hose routing for reinstallation, as improper positioning causes kinks that restrict water flow. Some newer Delta models feature magnetic docking systems that require pressing a release button while lifting the spout.
Critical mistake to avoid: Never use excessive force when removing stubborn spouts. If your spout refuses to release after proper setscrew loosening, it’s likely fused by mineral deposits rather than mechanical attachment. In these cases, tap gently around the spout base with a rubber mallet while applying upward pressure—the vibrations often break the mineral bond without damaging finishes.
Handle Common Removal Complications Like a Pro

When standard removal techniques fail, several specialized approaches can rescue your how to remove a Delta kitchen faucet spout project. For spouts fused by years of mineral buildup, create a vinegar-soaked rag and wrap it around the spout base for 30 minutes—this dissolves calcium deposits naturally. For severely corroded setscrews, try a slightly smaller hex key that grips the remaining undamaged edges of the opening.
Stripped setscrew heads represent the most common complication requiring advanced techniques. If your hex key slips repeatedly, apply firm sideways pressure while turning to maximize contact with the screw’s edges. As a last resort, drill a small pilot hole into the setscrew center and use an extraction tool—but be warned this often damages the base threads, requiring professional repair. Always photograph each step when dealing with complications to aid in reassembly.
For models with integrated soap dispensers or side sprays, remember these components may share plumbing with the main spout. Before attempting removal, shut off both hot and cold water supplies under the sink and run the faucet briefly to relieve pressure. Disconnect any auxiliary components first, labeling each connection point with tape to ensure proper reinstallation.
Complete Your Project with Proper Reinstallation Guidance
Once you’ve successfully removed your Delta kitchen faucet spout, proper reinstallation ensures trouble-free operation. Before positioning the new or cleaned spout, thoroughly clean both the faucet body opening and spout base with a vinegar solution to remove all mineral deposits. Inspect the rubber O-rings for cracks or dryness—replace them if damaged using Delta’s exact replacement parts (model numbers vary by series).
When reinstalling, align the spout’s internal tabs with the faucet body grooves before applying downward pressure. Most Delta spouts click audibly when properly seated—never force the spout if it doesn’t seat easily. Thread the setscrew in by hand first to avoid cross-threading, then tighten with your hex key until snug. Crucial tip: Tighten only until resistance increases slightly—overtightening strips threads and creates leaks. For pull-down models, ensure the internal hose feeds smoothly through the spout without kinks before final tightening.
After installation, run both hot and cold water for several minutes to flush debris from the system. Check for leaks around the spout base while water flows, as these indicate improper seating or damaged seals. If installing a replacement spout, verify compatibility with your specific Delta model—spouts aren’t universally interchangeable across series despite similar appearances.
Removing your Delta kitchen faucet spout successfully transforms what seems like a complex plumbing task into a manageable DIY project. By following these precise steps and understanding your specific model’s requirements, you’ll complete the job efficiently while protecting your faucet’s integrity. Whether addressing a persistent leak or updating your kitchen’s style, mastering this fundamental maintenance skill saves money and builds confidence for future home improvement projects. With the right approach, you’ll find how to remove a Delta kitchen faucet spout ranks among the most straightforward plumbing maintenance tasks you’ll ever tackle.


