
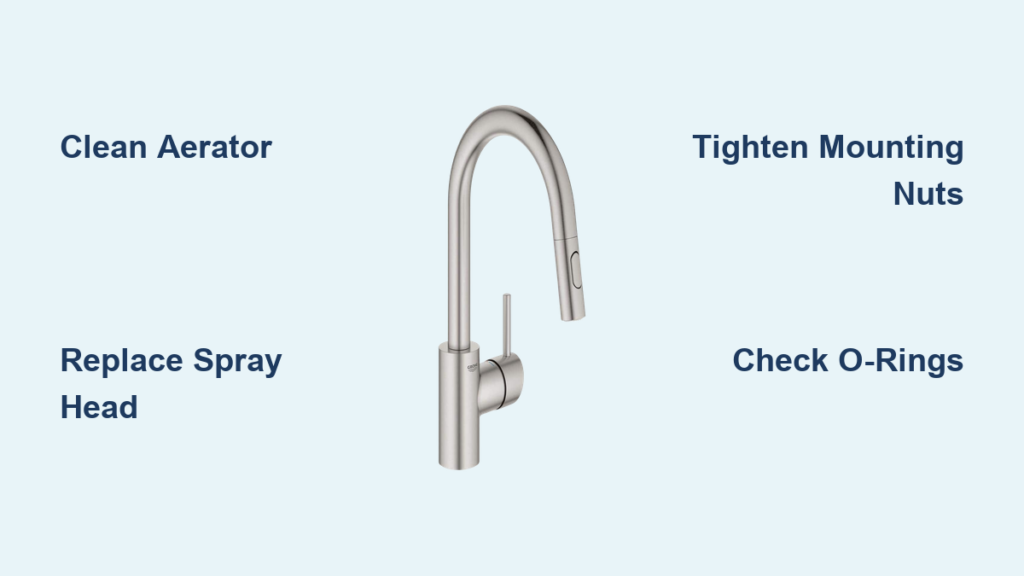
Discovering a leaky Grohe kitchen faucet or a spray head that’s lost its functionality can disrupt your daily routine and waste precious water. As a precision-engineered fixture known for German engineering excellence, your Grohe faucet deserves proper attention when issues arise. Whether you’re dealing with a clogged aerator reducing water flow, a spray head that refuses to switch patterns, or mysterious leaks around the faucet base, knowing how to fix Grohe kitchen faucet problems saves you both time and the cost of professional plumbing services. Most common issues stem from predictable causes like mineral buildup from hard water, worn internal seals, or debris trapped in the spray mechanism—all of which you can resolve with basic tools and genuine replacement parts.
Before you grab your toolbox, understand that Grohe offers several faucet configurations including pull-out spray heads, pull-down designs, and fixed spout models. Each requires different repair approaches, so identifying your specific model is crucial. The model number—typically found on the underside of the faucet base, original packaging, or purchase documentation—determines which replacement parts will fit your fixture. Having this information before starting any repair prevents unnecessary part purchases and wasted effort. This guide walks you through diagnosing problems, performing effective repairs, sourcing correct components, and maintaining your faucet to prevent future issues.
Diagnose Grohe Faucet Flow and Spray Problems
Accurate diagnosis saves you from unnecessary repairs and wasted time. Grohe kitchen faucets typically experience problems in three predictable areas: reduced water flow, spray pattern switching failures, and leaks at various connection points. Each symptom points directly to specific components, allowing you to target your repair efforts efficiently.
Low water flow represents the most frequent issue homeowners encounter with their Grohe kitchen faucets. This problem almost always originates in the aerator—the small component at the spray head tip that mixes air with water. Mineral deposits from hard water accumulate in the aerator’s tiny openings over time, gradually restricting flow until the spray becomes disappointingly weak. In most cases, cleaning or replacing the aerator resolves this issue completely. If flow remains low after aerator maintenance, the problem may lie deeper in the supply lines or valve mechanism.
Spray pattern switching failures occur when the button mechanism on multi-pattern spray heads stops changing between stream, spray, and pause functions. Unlike aerator clogs, this problem cannot typically be solved through cleaning—the internal switching mechanism is a precision assembly that wears out over time and requires complete spray head replacement. Attempting to disassemble and repair the switch mechanism usually causes additional damage and may void any remaining warranty coverage.
Leaks develop at specific locations, each with its own cause and remedy:
– Leaks at the base where the faucet meets the sink indicate failed sealing washers or loosened mounting hardware
– Drips from the spray head when the faucet is off suggest check valve or internal seal failures
– Leaks at the connection between spray head and hose point to worn O-rings or damaged fittings
Fix Clogged Grohe Faucet Aerators
Reduced water flow from your Grohe kitchen faucet most likely stems from a clogged aerator, and the fix is straightforward enough for most homeowners to complete in under thirty minutes. The aerator is located at the tip of your spray head and can be removed by hand on most models. If it’s particularly tight, wrap the jaws of adjustable pliers in cloth to prevent scratching the finish, then grip the aerator firmly and turn counterclockwise to remove it.
Once removed, examine the aerator for visible mineral buildup. The small mesh screens inside often show obvious white or gray deposits when clogged. Rinse the aerator thoroughly under running water to flush loose debris, then inspect the openings. If deposits remain, prepare a 50/50 mixture of white vinegar and water in a container large enough to submerge the aerator completely. Soak the aerator in this solution for approximately one hour—the acetic acid in white vinegar effectively breaks down calcium carbonate deposits that cause clogging.
After soaking, remove the aerator and rinse it thoroughly with clean water. Use a small brush or toothpick to clear any remaining debris from the individual openings, then reinstall the aerator by hand, turning clockwise until snug. Turn on the faucet and check the flow rate. If water flow has returned to normal, you’ve successfully resolved the issue. Should low flow persist after cleaning, consider replacing the aerator with a new one—model 122583 (AERATOR NEOPERL 1.00GPM) costs approximately $5.60 and installs in seconds.
Repair Non-Functional Grohe Spray Pattern Switches
When your Grohe faucet’s spray head stops switching between stream, spray, and pause patterns, the internal mechanism has typically reached the end of its service life. The button that controls pattern switching operates a precision internal assembly that experiences wear with each use. Unlike aerator clogs or simple seal replacements, this mechanism does not lend itself to successful disassembly and repair—even skilled technicians usually find that attempting to open the spray head causes more harm than good.
The only viable solution for a non-functional spray pattern switch is complete spray head replacement. This might seem excessive, but the cost is reasonable—replacement spray heads range from approximately $18 for basic pull-down models to over $100 for premium pull-out variants. More importantly, a new spray head restores full functionality and includes fresh internal seals that will provide years of reliable service.
To ensure you order the correct replacement, identify your faucet’s model number before purchasing. The model number is typically located on the underside of the faucet base where it contacts the sink, on the original packaging, or on documentation that came with your faucet. Grohe uses different connection types for pull-out versus pull-down spray heads, and even subtle differences in mounting configuration can affect compatibility. When in doubt, take photos of your current spray head from multiple angles and compare them with product images from authorized Grohe dealers.
Stop Leaks at Grohe Faucet Connection Points
Kitchen faucet leaks waste water, increase utility bills, and can cause water damage to surrounding cabinetry if left unaddressed. The location of your leak reveals its cause and points you toward the appropriate repair:
Leaks at the faucet base where the fixture meets the sink usually indicate failed sealing washers or mounting hardware that has loosened over time. Water migrating under the faucet base suggests the mounting nuts securing the faucet to the sink have loosened, allowing slight movement that breaks the seal. Tightening these mounting nuts typically resolves the issue—access them from below the sink using a basin wrench or adjustable pliers. If tightening doesn’t help, replace the sealing washers using the mounting set, model 48477, which provides all necessary hardware for approximately $14.
Drips from the spray head when the faucet is off indicate a problem with the check valve or internal seals that prevent backflow through the system. These components prevent water from flowing back through the spray head when the faucet is closed, and when they fail, you’ll notice dripping that continues for several seconds after turning off the water. Repairing this issue requires disassembling either the spray head or the faucet body to access and replace the failed seals. In many cases, particularly for older faucets, replacing the entire spray head proves more cost-effective than attempting internal valve repairs.
Leaks at the spray head connection occur where the spray head meets its supply hose. This connection uses O-rings that create a watertight seal, and these seals deteriorate with age and constant flexing. Inspect the connection while moving the spray head through its full range of motion—continuous drips suggest worn O-rings, while leaks that occur only at certain positions may indicate hose damage or kinks. O-ring replacement kits are available for common applications, though complete spray head replacement may be simpler for older units where individual components are no longer available.
Source Genuine Grohe Replacement Parts
Finding the correct replacement parts for your Grohe kitchen faucet requires knowing where to look and what to order. Grohe maintains extensive inventory of repair parts for their faucets, with most components available through their official website and authorized dealers. The challenge lies in correctly identifying your specific model to ensure parts compatibility—a process that becomes straightforward once you know where to look and what information to provide.
The model number serves as your key to successful parts sourcing. This alphanumeric code identifies your faucet’s specific configuration and determines which components will fit. The model number is typically located in one of several places: engraved or printed on the underside of the faucet base where it contacts the sink, printed on the original packaging if you’ve kept it, listed on any documentation that came with the faucet, or stamped on the underside of the spray head for some models. If the number has become illegible due to wear or installation conditions, you can often identify compatible parts by matching physical characteristics—handle style, spray head type, and overall configuration—with the parts catalog.
When sourcing parts, purchasing from authorized Grohe dealers ensures component authenticity and compatibility. The official Grohe website maintains current inventory of most repair parts and provides model-specific compatibility information. Third-party retailers may offer generic or aftermarket alternatives at lower prices, but these often compromise on fit, finish, and durability. Aftermarket components may appear similar but frequently differ in critical dimensions, seal materials, and internal construction, potentially leading to premature failure or voided warranty coverage.
Maintain Your Grohe Faucet for Long-Term Reliability
Preventive maintenance extends your Grohe kitchen faucet’s lifespan and prevents most common problems before they develop into serious repair needs. A simple quarterly maintenance routine takes only a few minutes but protects your investment and maintains optimal performance. The key is consistency—addressing minor issues before they escalate saves both time and money compared to emergency repairs.
Quarterly maintenance should include:
– Inspection of all visible connections for signs of leakage
– Cleaning of the spray head aerator to prevent mineral accumulation
– Verification that the spray head operates smoothly through its full range of motion
– Checking under the sink for any moisture or water stains
Monthly care involves wiping the faucet finish with a soft cloth dampened with water and mild soap to remove fingerprints and water spots. Avoid abrasive cleaners, scrubbing pads, or harsh chemicals that can damage the finish. For chrome and other polished finishes, a periodic application of quality chrome polish helps maintain original luster. Pay particular attention to the area where the spray head connects to its hose, as this joint experiences constant flexing and benefits from regular inspection.
For households with hard water, consider more frequent aerator cleaning—monthly rather than quarterly—to prevent mineral deposits from accumulating. Installing a water softener provides a permanent solution for hard water issues but represents a significant investment. Alternatively, Grohe’s water-saving kits allow you to reduce flow rates while maintaining pressure, and these kits include components that resist mineral buildup more effectively than standard aerators.
When problems do develop, addressing them promptly prevents secondary damage. A small leak at the base can eventually cause cabinet damage, mold growth, or structural issues if ignored for months. Keeping your model number handy and understanding basic repair procedures positions you to respond quickly when maintenance needs arise.


