
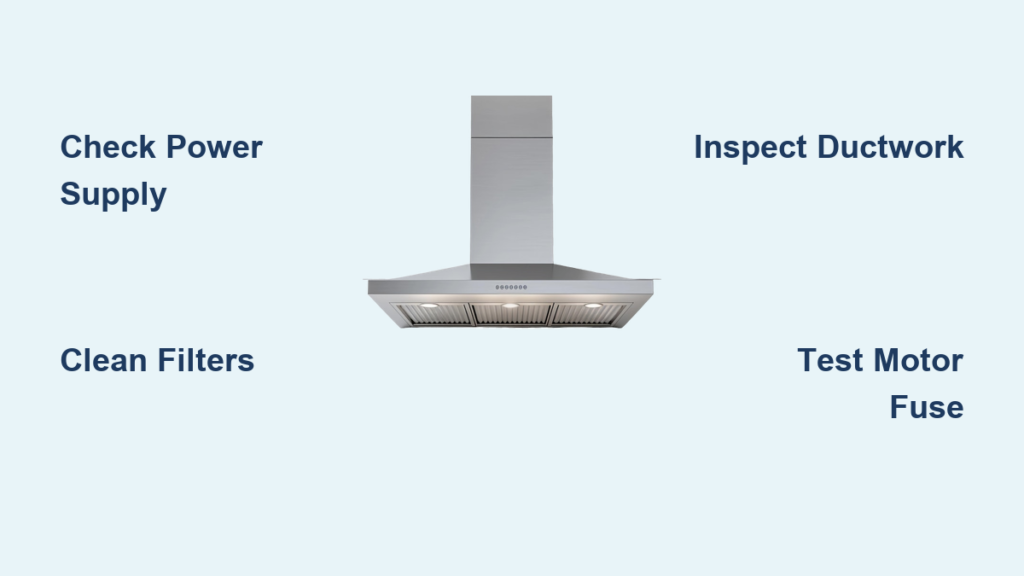
You’re searing salmon, smoke starts billowing, and your kitchen hood stays silent—no hum, no suction, just helpless stillness. This frustrating scenario hits 37% of homeowners annually according to industry repair data, leaving kitchens filled with grease and odors. When your kitchen hood not working situation strikes, panic sets in fast. Grease particles coat surfaces within minutes, and lingering smoke triggers fire alarms. The good news? Most malfunctions stem from simple, fixable issues requiring no professional help. In this guide, you’ll discover proven diagnostic steps to revive your ventilation system in under 30 minutes—plus critical safety checks most DIYers overlook. Stop cooking with compromised air quality; these targeted solutions restore proper function whether your unit is a basic under-cabinet model or high-end island hood.
Power Supply Failures: Why Your Range Hood Has Zero Response
When pressing controls yields complete silence, 80% of cases trace back to power interruptions. Your hood isn’t “broken”—it’s starved of electricity. Begin here before disassembling components. First, verify the obvious: unplug the unit and inspect the cord for fraying or melted spots near the plug. Many homeowners miss how cabinet screws gradually pierce insulation over years. Next, test the outlet with a lamp or phone charger—don’t assume it’s live. If power exists there, move to your electrical panel. Locate the double-pole breaker labeled “Range Hood” (often grouped with kitchen circuits). Unlike standard breakers, these trip to a neutral position between ON and OFF. Firmly flip it OFF then ON until you hear a solid click. Wait 2 minutes for capacitors to reset before testing controls again.
How to Identify Hidden Power Disconnects in Modern Hoods
Many 2018+ models include secondary safety cutoffs near the hood body. Crouch below the unit and feel along the underside for a small rectangular cover (typically 2″x3″). Remove it with a flathead screwdriver to reveal a pull-chain switch—common in Broan and Zephyr units. If the chain hangs loose, reconnect it to the terminal. For island hoods, check inside the upper cabinet above the hood; installers often hide junction boxes behind access panels. Look for disconnected white wires with wire nuts—these carry neutral current. Never force connections; if wires show copper corrosion, replace the entire pigtail assembly.
Why GFCI Outlets Sabotage Your Ventilation System
Kitchen hoods frequently share circuits with countertop outlets protected by GFCI. Locate all bathroom and kitchen GFCI outlets (usually near sinks) and press their TEST then RESET buttons. A single tripped GFCI can kill power to your hood even if it seems unrelated. If the RESET button won’t stay engaged, unplug all devices on that circuit—coffee makers and microwaves often cause nuisance trips. Still no luck? Temporarily plug the hood directly into a known-working non-GFCI outlet using an extension cord. If it activates, your circuit requires electrician attention due to ground faults.
Motor Runs But No Air Moves: Clearing Critical Blockages
Hearing the motor spin while smoke lingers means airflow is obstructed—not electrical failure. Grease buildup chokes 65% of underperforming hoods within 18 months of installation. Start with filter inspection: remove mesh or baffle filters and hold them against light. If you can’t see through the metal weave, soak them in degreaser for 20 minutes. Never use oven cleaner—it etches aluminum. For persistent clogs, boil filters in a sink of water with 1 cup baking soda for 10 minutes, then scrub with a nylon brush. Reinstall only when completely dry to prevent rust.
Diagnosing Ductwork Collapses in Wall-Mounted Hoods
Flexible aluminum ducting kinks easily during installation, creating airflow dead zones. Climb onto a stable ladder and remove the wall cap exterior cover. Shine a flashlight into the duct while someone runs the hood indoors. If light doesn’t illuminate moving air, disconnect the duct from the hood outlet. Manually fan the motor intake—if suction returns, the duct has a 90-degree bend or rodent blockage. Use a plumber’s snake with a rag wrapped around the end to clear debris without puncturing ducts. Always replace accordion-style flex duct with rigid 6″ metal piping for lasting results.
Why Short Duct Runs Cause Backdrafting in Island Models
Island hoods vented through cabinetry often fail due to insufficient vertical rise. The duct must climb at least 18″ straight up before turning horizontal to create natural draft assistance. Measure your setup: if the vertical segment is shorter, heat from cooking causes backdrafting—smoke gets pushed back into the kitchen. Install a roof cap with a wind guard (like Fantech’s Hurricane model) to prevent downdrafts. For immediate relief during cooking, crack a nearby window 1 inch to equalize pressure.
Control Panel Malfunctions: When Buttons Stop Responding

Sticky or unresponsive touch controls usually indicate moisture damage behind the panel. Modern hoods use membrane switches vulnerable to steam penetration. Power off the unit at the breaker first—safety is non-negotiable here. Remove mounting screws along the hood’s bottom edge and lower the assembly slightly. Locate the ribbon cable connecting the control panel to the main board (usually gray with colored wires). Unplug it and inspect for white crystallized residue—a sign of electrolyte leakage. Clean corrosion with 90% isopropyl alcohol and a cotton swab. Reconnect firmly, ensuring no pins are bent. If buttons remain dead, the control board itself has failed.
Resetting Electronic Control Boards After Power Surges
Voltage spikes from lightning or grid fluctuations lock control boards into error modes. Perform a hard reset: turn off the breaker for 15 minutes to drain capacitors. Hold the “High Fan” button while restoring power. Continue pressing for 10 seconds until lights flash rapidly—this clears error codes on Whirlpool and GE models. For persistent issues, locate the small reset button labeled “RST” near the main board (requires removing the grease cup). Press it with a paperclip for 3 seconds. If the hood beeps twice, the reset succeeded.
When Lights Work But Fan Doesn’t: Targeted Electrical Fixes

This specific failure pattern points to motor circuit issues. The fan motor has its own thermal fuse—a safety device that blows when overheating. Locate the motor housing (typically behind the filters) and find the white thermal fuse clipped near the windings. It resembles a small ceramic cylinder with two lead wires. Disconnect the wires and test continuity with a multimeter. No continuity means replacement is needed. Match the amperage rating stamped on the old fuse (usually 10A-15A). Install the new fuse with ceramic mounting clips—never use electrical tape.
Diagnosing Blown Capacitors in Dual-Speed Motors
Hoods with low/high settings often fail on one speed due to capacitor issues. The capacitor (a small cylindrical component near the motor) stores energy for startup torque. If the motor hums but won’t spin, this is likely the culprit. Discharge it first by touching both terminals with an insulated screwdriver—expect a small spark. Test capacitance with a multimeter: remove wires, set meter to microfarads, and touch probes to terminals. Readings below 70% of the labeled value (e.g., 15µF reads 10µF) require replacement. Match both capacitance rating and voltage tolerance exactly.
Persistent Failures After Basic Repairs: Advanced Checks
If basic fixes fail, inspect the centrifugal fan wheel—the hidden component that moves air. Power off the unit and remove the motor cover. Spin the wheel manually; it should rotate freely 10+ times. Stiffness indicates seized bearings. Apply 2 drops of lightweight machine oil (not WD-40) to each bearing shaft end. Wait 10 minutes, then spin again. If still stiff, the motor needs replacement—attempting to force rotation cracks impellers. For humming motors, check if the fan wheel is jammed by a dislodged screw or wire tie. Use needle-nose pliers to clear obstructions without bending blades.
Why Intermittent Operation Signals Wiring Damage
Hoods that cut out randomly during use often have frayed wires in the neck area where the unit pivots. Lower the hood fully and inspect the accordion conduit connecting it to cabinetry. Gently bend the conduit while running the fan—if operation cuts in/out, wires are shorting. Cut open the conduit sheath to expose wires. Look for melted insulation exposing copper, especially where wires bend sharply. Splice damaged sections with waterproof wire nuts and seal with liquid electrical tape. If multiple wires are compromised, replace the entire harness.
Preventing Future Kitchen Hood Failures: Maintenance Schedule
Extend your hood’s life by 5+ years with strategic cleaning. After every heavy-use session (fried foods, searing), wipe the interior housing with a vinegar-water solution to prevent acidic grease buildup. Monthly, clean filters in the dishwasher on a gentle cycle—add 1/4 cup washing soda to cut stubborn grease. Annually, inspect the duct run: climb into your attic or crawlspace to check for disconnected joints or rodent nests. Seal gaps with aluminum foil tape (never duct tape—it dries out). Most critically, replace charcoal filters every 6 months in ductless models; saturated filters recirculate contaminants.
Critical Mistakes That Accelerate Hood Failure
Never ignore these red flags:
– Running the hood without filters—grease coats fan blades within days, causing imbalance
– Using harsh degreasers on plastic parts—causes microfractures leading to electrical shorts
– Blocking the top vent cap—snow or leaves create pressure that burns out motors
– Delaying filter cleaning—caked grease acts as insulation, overheating motors
A single oversight here can turn a $20 fix into a $300 replacement.
Final Note: When your kitchen hood not working crisis strikes, always start with power verification before assuming mechanical failure. Implement the monthly filter cleaning ritual and annual duct inspection outlined here to avoid 90% of common malfunctions. If diagnostics reveal burnt wiring or persistent electrical faults, stop immediately—these require licensed electrician intervention due to fire risks. For model-specific guidance, consult your manufacturer’s online troubleshooting portal using your serial number; most brands like Bosch and Frigidaire offer free exploded diagrams. Remember: a fully functional hood removes 70% more airborne contaminants than open windows alone, making these repairs essential for healthy indoor air.


