
Your kitchen light suddenly stops working, or maybe you’re ready to upgrade those dated bulbs to energy-efficient LEDs. Whatever the reason, knowing how to safely open your kitchen light fixture is essential for any homeowner. This guide walks you through the exact process for the four most common kitchen lighting types, so you can complete this task confidently without risking electrical hazards or damaging your fixture. Whether you’re dealing with a flush-mount ceiling light above your sink or recessed can lights illuminating your countertops, these specific instructions will get you access to the bulb compartment or wiring safely and efficiently.
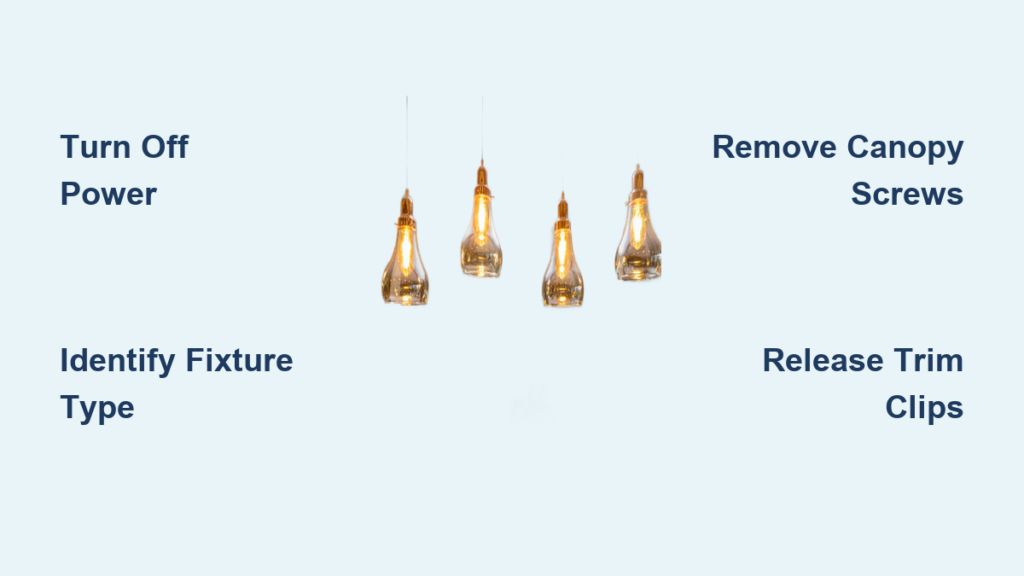
Disconnect Power Before Touching Any Fixture
Before you grab a ladder or touch a single screw, you must cut power to your kitchen light fixture. Working with live electricity risks serious shock, burns, or even fire—this step isn’t optional. Head to your circuit breaker panel and locate the switch labeled “kitchen lights” or “kitchen ceiling.” Flip this breaker to the OFF position, then test the wall switch to confirm no power reaches your fixture.
Never rely solely on wall switches—they only interrupt the circuit but don’t fully disconnect power from the fixture. Use a non-contact voltage tester near the fixture’s wiring points to verify complete power disconnection. Hold the tester close to the fixture’s mounting screws or visible wires; if it beeps or lights up, return to the breaker panel and find the correct circuit. For added safety when working on ceiling fixtures, consider turning off your main house power—this eliminates any risk of accidental re-energizing during your project.
Identify Your Specific Fixture Type First
Kitchen light fixtures come in four primary configurations, each requiring distinct opening techniques. Misidentifying your fixture type leads to broken components or frustration during the process. Stand directly under your light and examine its mounting style before proceeding:
- Flush-mount fixtures sit completely against the ceiling with no gap
- Semi-flush mounts extend 3-6 inches below the ceiling surface
- Recessed lights appear as circular openings within the ceiling
- Pendant lights hang from cords, chains, or rods above work areas
Your fixture’s mounting style determines not only how to open it but also which tools you’ll need. Taking a photo of your fixture now creates a visual reference for reassembly—this simple step prevents confusion when putting everything back together.
Open Flush-Mount Ceiling Fixtures in 3 Steps

Flush-mount fixtures dominate modern kitchens due to their sleek profile and efficient light distribution. To open yours without damage:
-
Locate the center knob or perimeter screws—most flush-mount designs feature either a decorative center cap or small screws around the fixture’s edge. If you see a finial or knob at the fixture’s center, this is your access point.
-
Turn counterclockwise to release—place one hand firmly on the glass diffuser while grasping the center knob with your other hand. Rotate slowly counterclockwise; some fixtures require multiple full rotations before releasing. If your fixture uses perimeter screws, remove them one by one while supporting the diffuser with your free hand.
-
Lower the diffuser carefully—once fully released, lower the glass or plastic cover straight down. Never let go suddenly, as the diffuser could shatter on impact. If the diffuser sticks, gently wiggle it side-to-side while maintaining downward pressure—never force it.
Pro tip: Older flush-mount fixtures often have paint sealing the diffuser to the base plate. Carefully run a utility knife blade around the seam to break this seal before attempting to turn or remove screws.
Open Semi-Flush Mount Fixtures Without Damaging Trim
Semi-flush fixtures extend slightly below the ceiling, creating visual interest while maintaining clearance in standard-height kitchens. Opening these requires accessing the canopy where the fixture stem meets the ceiling:
Why your semi-flush fixture won’t open: Most failures occur when homeowners try to remove the fixture body instead of the ceiling canopy. The decorative lower portion typically remains intact during bulb replacement—you only need to access the canopy for electrical work.
-
Locate canopy mounting screws—these usually appear as small screws around the canopy’s bottom edge or hidden beneath decorative trim. Use a flathead screwdriver to gently lift any trim pieces covering hidden screws.
-
Remove screws while supporting the canopy—loosen each screw gradually rather than removing completely at once. Keep one hand firmly on the canopy as you remove the final screw to prevent it from falling.
-
Lower the canopy to expose wiring—once free, carefully lower the canopy to reveal the mounting bracket and wire connections. The fixture body itself may attach via threaded rod or set screws—only address these if replacing the entire fixture.
Warning: Never let the canopy hang by its wires—this strains connections and risks electrical hazards. Support the entire weight until you’re ready to work on wiring.
Release Recessed Lighting Trim Safely
Recessed “can” lights provide focused kitchen task lighting but confuse many homeowners with their hidden access mechanisms. Instead of removing the entire fixture (which requires attic access), you only need to release the visible trim:
Spring-clip trim (most common): Press inward on the two metal clips positioned opposite each other along the trim’s edge while gently pulling the trim downward. These clips spring outward to hold the trim in place—applying inward pressure releases them. Support the trim from below as it releases to prevent dropping.
Twist-lock trim: Grasp the outer decorative ring and rotate counterclockwise until it releases—this may require significant pressure. Note the ring’s orientation before removal to ensure proper reinstallation.
Pin-hole trim: Locate small pins on opposite sides of the trim ring and press them toward the center while slowly lowering the trim. These pins engage slots in the housing—compressing them disengages the mechanism.
Critical safety note: Always verify power disconnection before touching recessed light bulbs—halogen bulbs operate at extremely high temperatures and can cause severe burns if recently used.
Access Pendant Light Bulbs Without Removing Entire Fixture

Pendant lights over kitchen islands create dramatic focal points but often frustrate homeowners during bulb replacement. Most require accessing only the shade assembly, not the ceiling canopy:
Bottom-access pendants: Locate the decorative finial (small knob) at the shade’s bottom. Turn this counterclockwise to release the glass or metal shade. Support the shade while turning—some require multiple rotations before releasing.
Side-screw pendants: Check for small set screws along the shade’s upper rim. Loosen these screws with a precision screwdriver, then gently lower the shade. Never force the shade if screws are only partially loosened.
Multi-panel pendants: These feature several glass panels held by clips or brackets. Release each clip sequentially while supporting the panels to prevent dropping. Take photos during disassembly to simplify reassembly.
Expert tip: Wrap painter’s tape around glass shades before removal—this provides better grip and prevents accidental drops if your hands slip.
Fix Stuck Components Without Breaking Your Fixture
Older fixtures or those in humid kitchens often develop stuck components due to corrosion or paint buildup. When standard methods fail:
For stuck center knobs: Apply penetrating oil around the knob’s base and wait 15 minutes before retrying. If paint has sealed the knob, carefully score the seam with a utility knife to break the seal.
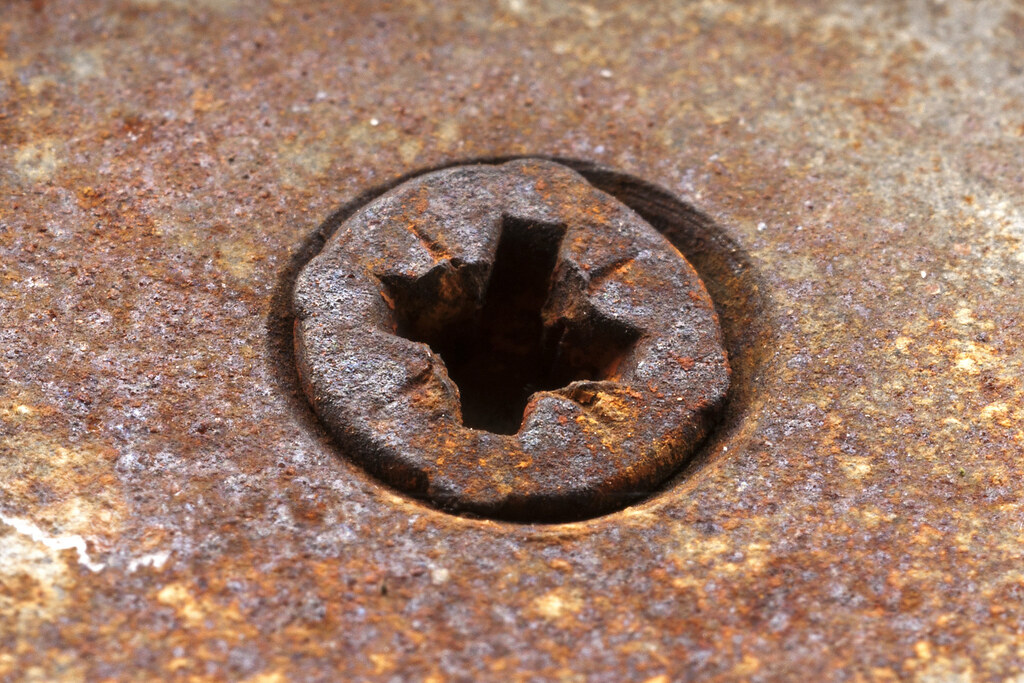
For stripped screw heads: Grip the damaged screw head with needle-nose pliers while turning counterclockwise. If this fails, use a rubber band between the screwdriver and screw head for extra grip.
For rusted connections: Apply heat with a hair dryer to expand the metal slightly, breaking the corrosion bond. Alternate between gentle clockwise and counterclockwise turns to work the corrosion loose.
Never use excessive force—this cracks glass components or strips mounting holes. If a component resists after multiple attempts, stop and consult a professional.
Reassemble Correctly to Prevent Future Problems
Proper reassembly ensures your fixture functions safely and avoids future access difficulties:
- Hand-tighten all screws first before using tools to prevent cross-threading
- Distribute pressure evenly when securing glass components—tighten screws in a star pattern
- Verify wire positioning before final assembly to prevent pinched insulation
- Test before final tightening—temporarily restore power to confirm operation before completing reassembly
Critical step: Before flipping the breaker back on, double-check that all wire connections are secure and no bare copper is exposed. A single loose wire nut can cause arcing or complete fixture failure.
When to Call an Electrician Immediately
While most fixture openings are DIY-friendly, certain situations require professional help:
- Exposed or damaged wiring showing signs of scorching, melting, or fraying
- Aluminum wiring connections which require special handling to prevent fire hazards
- Flickering lights after replacement indicating potential circuit problems
- No labeling on fixture making wattage or bulb type uncertain
Licensed electricians possess the training to handle complex electrical issues safely—don’t risk your safety to save a service call. For most straightforward bulb replacements and cleaning, however, following these steps puts kitchen light fixture access firmly within your capabilities.


