
Your kitchen cabinets tell a story—whether it’s decades of family meals or recent renovations. When you decide to update your cabinet handles or remove them entirely for a sleek, modern look, those leftover holes can ruin the clean aesthetic you’re trying to achieve. Knowing how to fill handle holes in kitchen doors properly transforms what could be a frustrating eyesore into an invisible repair that makes your entire kitchen look professionally updated. This comprehensive guide reveals the exact techniques cabinet refinishers use to eliminate handle holes completely, whether you’re switching hardware styles or creating a handle-free minimalist design.
The difference between amateur and professional results comes down to understanding why standard quick-fix methods fail. Most DIYers simply squirt wood filler into the hole, sand it flush, and call it done—only to discover weeks later that the repair has cracked, shrunk, or shows through their new paint. Proper hole filling requires strategic layering, material selection based on your specific door construction, and color-matching techniques that account for how different surfaces absorb finishes. By following this systematic approach, you’ll create repairs that withstand daily kitchen use and look flawless whether you’re staining, painting, or leaving your cabinets natural.
Measure Your Handle Hole Diameter Precisely

Before selecting any materials, get accurate measurements of your cabinet hardware holes. Most standard cabinet handles use 32mm (1.25 inch) or 96mm (3.75 inch) center-to-center spacing, but the actual hole diameter varies significantly based on the hardware type. Use a digital caliper or drill bit gauge to determine the exact size—typically between 3/16 inch for small knobs and 1/2 inch for larger handles with through-bolts.
Depth assessment is equally critical for successful repairs. While most cabinet doors are 3/4 inch thick, European-style hinges and certain handle mounting systems create through-holes that penetrate the entire door thickness. Run your finger along the back of the door—if you feel a corresponding hole, you’ll need to implement a backing technique before filling. For holes that don’t go all the way through, measure depth with a small nail inserted until it stops, then mark the depth on the nail for reference.
Match Filler Type to Your Door Material
Your cabinet door’s construction material dictates which filler will work best. Solid wood doors (common in higher-end kitchens) require wood fillers that match both the species and grain pattern. For oak doors with prominent grain, use a grain-filling paste before applying standard wood filler to prevent the grain from showing through repairs. Maple and other tight-grain woods accept standard wood filler with minimal preparation.
MDF (medium-density fiberboard) doors—popular in modern kitchens—need special consideration because they absorb moisture differently than solid wood. Standard water-based fillers cause MDF to swell around the repair area, creating visible bumps. Instead, use epoxy-based fillers or two-part wood putties specifically formulated for MDF that minimize moisture transfer during application.
Laminate-covered particle board doors present the trickiest scenario since the non-porous surface prevents proper filler adhesion. Before applying any filler, roughen the hole’s interior with 100-grit sandpaper to create “tooth” for the material to grip. For best results, use a polyurethane-based filler that bonds well to smooth surfaces, and consider adding a small amount of superglue to the mixture to enhance adhesion.
Prepare the Hole for Maximum Adhesion
Proper preparation separates temporary fixes from permanent repairs. Start by removing all debris from the hole using a vacuum crevice tool followed by a stiff-bristled toothbrush to dislodge stubborn particles. Any loose material left inside creates weak points where the filler won’t bond properly, leading to future cracks.
Clean the hole thoroughly with a cotton swab dipped in mineral spirits to remove oils and residues that interfere with adhesion. This step is crucial in kitchen environments where cooking grease accumulates on cabinet surfaces. Allow the area to dry completely—about 15 minutes—before proceeding. For laminate surfaces, lightly scuff the immediate area around the hole with 120-grit sandpaper to help the filler grip the non-porous surface.
Create a Solid Base for Deep Holes
Holes deeper than 1/2 inch require internal support to prevent sagging and shrinkage. Insert wooden toothpicks, matchsticks, or small dowels into the hole until they create a firm plug about 1/4 inch below the surface. Apply a drop of wood glue to each piece as you insert it, allowing the glue to penetrate the surrounding material for maximum bonding. Trim excess material flush with the door surface using diagonal cutters once the glue has dried.
For through-holes where the back of the door is visible (common on pantry or island cabinets), apply painter’s tape to the rear surface before filling. This creates a temporary backing that prevents filler from oozing through to the visible side. Carefully remove the tape once the filler has set but before it fully cures—typically 30-60 minutes depending on the product.
Apply Filler in Strategic Layers
The cardinal rule for professional-looking repairs: never fill deep holes in a single application. Instead, build up the repair in 1/8 to 1/4 inch layers, allowing each to dry completely before adding the next. This prevents surface drying while moisture remains trapped inside—a common cause of cracking and shrinkage.
Use a flexible plastic putty knife to press the first layer firmly against all sides of the hole, ensuring complete contact with the substrate. Scrape the surface smooth but leave it slightly concave since the filler will shrink as it dries. Work quickly with epoxy fillers which have limited pot life, but take your time with standard wood fillers to eliminate air pockets.
Perfect the Final Layer
The last application should extend 1/16 inch above the surrounding surface to account for sanding. Mix a small batch of filler and add a drop of water to create a slightly runnier consistency that flows into microscopic pores. Apply this final layer with the putty knife held at a 45-degree angle, feathering the edges outward to create a seamless transition.
Allow the final layer to dry until it’s firm to the touch but not completely hardened—this “leather-hard” stage (typically 2-4 hours for most fillers) is ideal for initial shaping. Use a sharp chisel or utility knife to trim any excess before proceeding to sanding. This preliminary shaping reduces sanding time and prevents accidentally removing too much material.
Achieve Invisible Sanding Results
Sanding technique makes or breaks your repair. Start with 120-grit sandpaper wrapped around a small wooden block, sanding in the direction of the wood grain (if visible) while applying light, even pressure. Focus on creating a smooth transition from the filled area to the surrounding surface rather than trying to sand perfectly flush immediately.
Progress through grits systematically: 180-grit to remove scratches from the previous stage, then 220-grit for final smoothing. Between grits, wipe the area with a tack cloth to remove dust that could create new scratches. For painted surfaces where absolute smoothness matters most, finish with 320-grit paper.
Verify Your Work with Strategic Lighting
Hold a flashlight parallel to the door surface to reveal imperfections invisible under normal lighting. This side-lighting technique highlights even minor depressions or high spots that need additional attention. Run your finger across the repair—you should feel no transition between the filled area and original surface. If you detect any irregularities, apply a micro-thin layer of additional filler to low spots before final sanding.
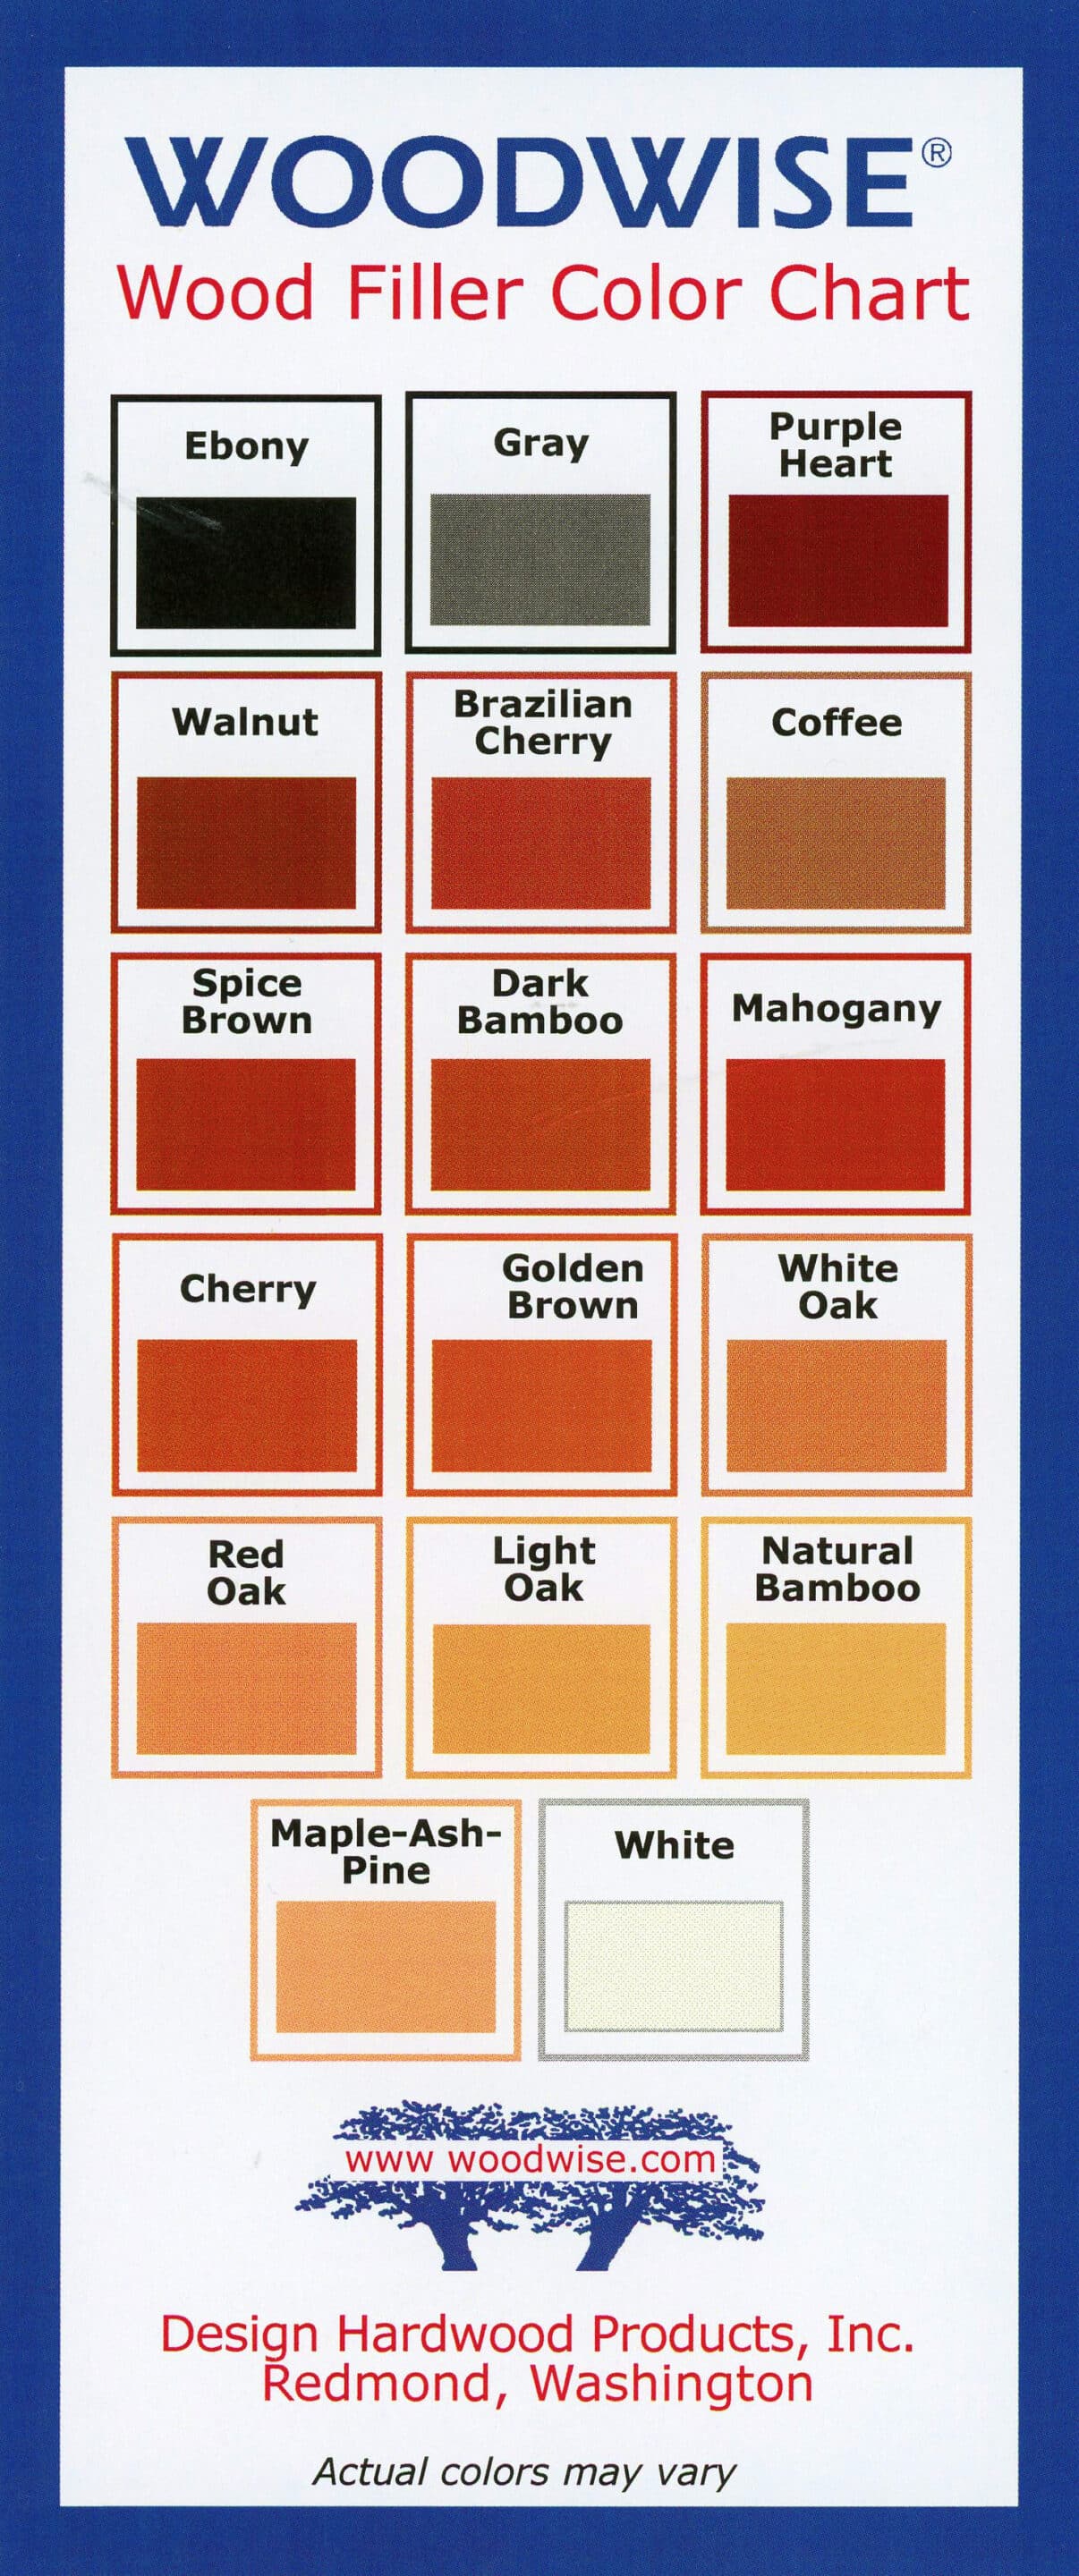
Match Finish Colors Perfectly
Painted cabinets require precise color matching since fillers absorb paint differently than the original surface. Apply a primer specifically designed for repairs before painting—this creates a uniform base that prevents the filled area from appearing darker or lighter. When applying paint, blend outward from the repair in diminishing circles to avoid visible edges.
Stained cabinets present greater challenges because wood fillers don’t absorb stain like natural wood. Test your stain on a hidden area first, applying it with a cotton swab for precise control. Build color gradually with multiple light applications rather than one heavy coat. For stubborn mismatches, mix small amounts of different colored stains to create a custom blend that matches your cabinets.
Professional Color Correction Techniques
If the filled area appears too dark after staining, gently wipe it with a cloth dampened with mineral spirits to lift excess pigment. For areas that remain too light, apply a wash coat of thinned stain (1 part stain to 3 parts mineral spirits) to subtly deepen the color without obscuring the repair. Always apply your final protective topcoat to the entire door panel—spot finishing creates visible differences in sheen that draw attention to the repair.
Reinforce for Future Hardware Installation
If you plan to install new hardware in a different location, reinforce the filled area to ensure secure mounting. Insert a wooden dowel into the old hole before filling, applying wood glue to create a solid anchor point that will hold screws firmly. Alternatively, use epoxy filler which provides superior screw-holding strength compared to standard wood putty.
When drilling new holes near filled areas, maintain at least 3/4 inch distance from the repair to prevent compromising the structural integrity of the filled section. For high-traffic drawers or doors, apply a small drop of thread locker to mounting screws to prevent them from loosening over time.
Essential Time-Saving Shortcuts
Experienced refinishers use these professional tricks to accelerate the process without sacrificing quality:
- Pre-mix filler batches in small containers with tight lids for multiple repairs
- Use toothpicks as depth gauges when building up layered fills
- Store partially used filler in the freezer to extend its shelf life
- Create custom color blends by mixing fillers before application
- Use a heat gun on low setting to accelerate drying between layers
By following these detailed techniques for how to fill handle holes in kitchen doors, you’ll achieve repairs that look like they were never there. The key is understanding that successful hole filling isn’t just about covering the opening—it’s about recreating the structural and visual integrity of the original surface. With proper preparation, strategic layering, and careful finishing, your cabinet doors will showcase the clean, updated appearance you envisioned without revealing the history of previous hardware choices. Whether you’re preparing for a kitchen remodel or simply refreshing your space, these professional methods ensure your cabinet doors look flawless from every angle.


