
Your large kitchen island isn’t just workspace—it’s the vibrant heart of your home where meals come together, conversations flow, and memories form. Yet too many homeowners treat this prime real estate as merely functional, missing the opportunity to create a stunning focal point that elevates your entire kitchen’s design. How to decorate a large kitchen island effectively requires balancing visual impact with practical needs, turning what could be just counter space into a conversation-starting masterpiece. Whether you’re designing a new kitchen or refreshing your current layout, the right decorative approach transforms your island from mundane to magnificent while supporting your daily routines.
The challenge with large kitchen islands (typically 8-12 feet long) is avoiding the “empty tabletop” syndrome where sparse decoration looks accidental rather than intentional. Unlike smaller kitchen elements that can be purely ornamental, your island must serve multiple purposes without becoming cluttered. This guide cuts through the noise to deliver specific, actionable strategies that work for substantial island surfaces, helping you create a space that’s both beautiful and functional. You’ll learn exactly how to select appropriate lighting, arrange impactful centerpieces, integrate seating, and avoid the most common mistakes that turn potential showstoppers into design disasters.
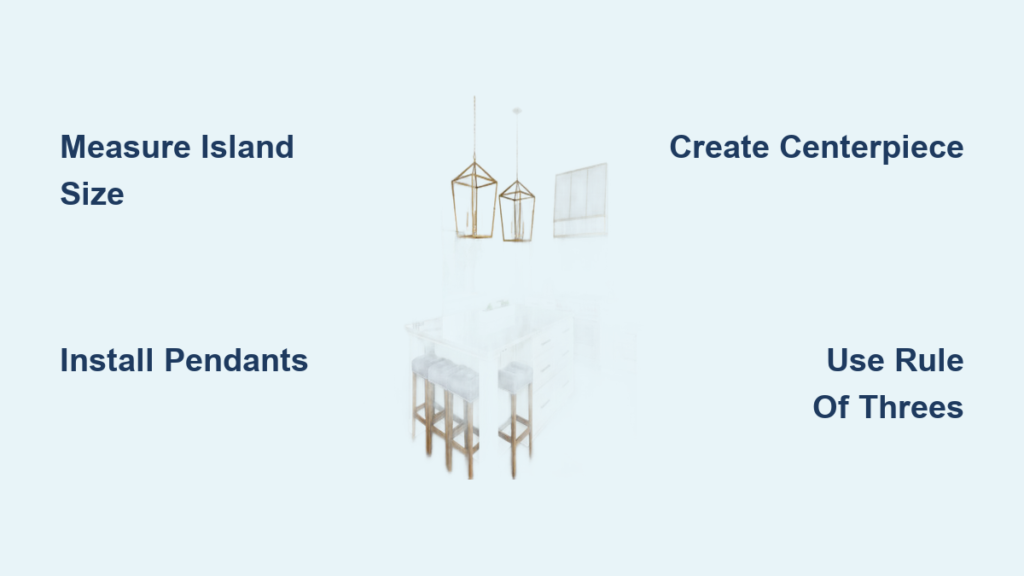
Measure Your Island for Proper Scale and Visual Balance
Before adding a single decorative element, you must understand your island’s exact dimensions and how they relate to your kitchen’s overall proportions. Large kitchen islands measuring over 10 feet require different approaches than smaller ones—attempting to fill excessive space with tiny decor items creates visual chaos rather than cohesion. Grab your tape measure and note both length (typically 8-12 feet) and depth (usually 3-5 feet), as these measurements dictate what decorative elements will work.
For islands exceeding 10 feet in length, implement zoning strategies that divide the surface into distinct functional areas. Create a food preparation zone on one end (keeping 30-36 inches clear for chopping), a casual dining section in the middle (allowing 24-30 inches per seat), and a dedicated decorative display area on the opposite end. This prevents the island from feeling like one giant, overwhelming surface while maintaining practical workflow. Islands with 4+ feet of depth can accommodate under-counter appliances, which then determine how much decorative space remains available.
What Height Should Pendant Lights Hang Above Your Island?
The standard rule states pendant lights should hang 30-36 inches above your island surface, but this changes dramatically with ceiling height. For standard 9-foot ceilings, 30 inches provides ideal illumination without obstructing views. With vaulted ceilings or two-story spaces, increase this to 40-48 inches to maintain visual proportion—otherwise, your lighting will appear undersized and disconnected from the island below. Measure from the bottom of your pendant fixtures to the countertop surface to ensure proper clearance for both function and aesthetics.
Install Multiple Pendant Fixtures for Visual Impact

A single pendant light over an 8+ foot island creates a comical “spotlight on nothing” effect that fails both functionally and aesthetically. For large kitchen islands, install three to five pendant fixtures spaced evenly along the length—this provides adequate task lighting while creating appropriate visual weight. Maintain consistent spacing of 24-30 inches between each fixture and center the arrangement both lengthwise and widthwise relative to the island surface.
Oversized fixtures (12-18 inches in diameter) make bold statements on expansive islands, while clusters of smaller pendants (6-10 inches each) generate visual interest through repetition. For contemporary spaces, consider linear suspension fixtures that span the entire island length. When selecting materials, match your kitchen’s style: industrial metals for modern spaces, hand-blown glass for transitional designs, and woven rattan for farmhouse aesthetics.
How Many Pendants Do You Need for a 10-Foot Island?
The magic number is three to five pendants for islands 8-12 feet long. For a 10-foot island, four pendants create ideal visual balance—place the outer fixtures 12 inches from each end, then space the remaining two evenly between them. This arrangement ensures even illumination across the entire surface while preventing the “string of pearls” effect that looks haphazard rather than intentional.
Create Substantial Centerpiece Arrangements That Fill Space

Small decorative items disappear on large kitchen islands, making oversized centerpiece arrangements essential. Aim for displays that occupy one-third to one-half of your island’s length—anything smaller looks accidental rather than curated. For an 8-foot island, this means centerpiece elements spanning 32-48 inches to create appropriate visual weight without overwhelming the space.
Natural elements provide organic warmth and life: a trio of substantial potted plants (like fiddle leaf figs or snake plants) in matching ceramic containers creates living focal points. For low-maintenance options, group preserved eucalyptus branches with dried pampas grass in a large woven basket. Decorative bowls and trays add sculptural interest while serving practical purposes—stack a large wooden bowl inside a hammered copper tray with a small plant nestled between them for layered visual interest.
Why Group Decor in Odd Numbers on Large Islands?
Grouping decorative items in odd numbers (three, five, or seven) creates more natural, visually appealing arrangements than even-numbered groupings that feel forced. Three varying-height vases create dynamic interest, while five cookbooks stacked with different spine colors add curated charm. This principle applies to all decorative groupings—odd numbers prevent symmetrical arrangements that feel staged rather than lived-in.
Style Seating for Social Interaction Zones
Large kitchen islands often serve as primary gathering spots, making seating arrangement critical for both function and social dynamics. Standard counter-height islands (36 inches) require counter stools (24-26 inches seat height), while bar-height islands (42 inches) need taller bar stools (29-31 inches). Allow 24-30 inches of width per person for comfortable seating with elbow room—on an 8-foot island, this typically accommodates three to four seats total.
Position seating along one side rather than both sides to create more intimate conversation zones where seated individuals face into kitchen activity. Backless stools tuck completely under the island when not in use, maximizing floor space, while upholstered stools with backs provide superior comfort for extended seating. For social flow, leave at least 42 inches of clearance behind seating for comfortable movement.
How to Prevent Island Seating From Blocking Traffic Flow
The most common mistake is positioning island seating where it impedes kitchen workflow. Ensure 42-48 inches of clearance behind seating for comfortable movement, and avoid placing seating directly in the path between refrigerator, sink, and stove (the “work triangle”). If your kitchen layout forces seating into a traffic area, opt for wall-mounted stools that can be folded away when not in use, preserving valuable floor space during meal preparation.
Apply the Rule of Threes to Avoid Visual Clutter
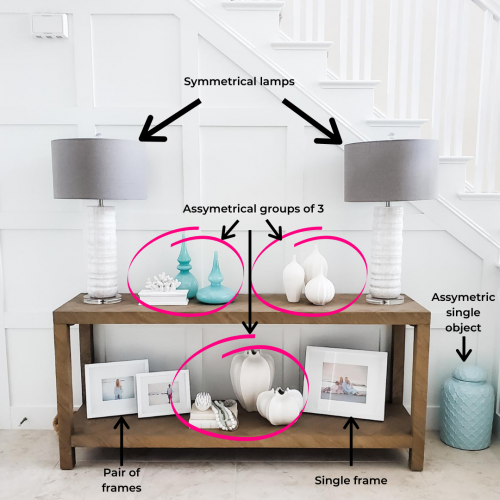
Large surfaces tempt homeowners to fill every inch, resulting in visual chaos rather than curated interest. Professional designers follow the rule of threes—grouping decorative elements in sets of three for natural visual appeal. Create three distinct zones on your island: food preparation (functional), casual dining (social), and decorative display (aesthetic). Within each zone, group items in threes: three cookbooks, three plants, or three decorative vessels.
Strategic negative space is equally important—maintain at least 50% of counter space clear for functional use. This doesn’t mean empty space, but rather intentional breathing room between decorative groupings that allows each element to be appreciated. Edit ruthlessly: if an item doesn’t serve function or bring genuine aesthetic pleasure, remove it. The most successful large island decorations feel intentional rather than overcrowded.
What Percentage of Counter Space Should Remain Clear?
For practical functionality, maintain at least 50% of your island’s surface free from permanent decorative elements. This percentage may increase to 60-70% for serious cooks who use their island extensively for food preparation. Designate specific zones for permanent decoration (like the far end away from cooking areas) while keeping primary work surfaces clear. This approach preserves functionality while still creating visual impact.
Rotate Seasonal Decor Without Complete Overhauls
Keeping your large kitchen island feeling fresh involves strategic seasonal updates that don’t require complete redecoration. Maintain a consistent base of neutral permanent elements (like a favorite decorative bowl or plant arrangement) and layer seasonal items on top. For spring, add pastel-colored ceramic pitchers with fresh tulips; for fall, incorporate warm-toned gourds and dried wheat bundles.
The key to successful seasonal rotation is limiting changes to three key elements that make the biggest visual impact: one centerpiece item, one wall decor piece, and one textile element. This approach takes 10-15 minutes to implement yet completely transforms the island’s feel. Store seasonal items in labeled bins beneath the island for easy access when it’s time to refresh.
How to Implement Seasonal Decor Changes in Under 15 Minutes
Streamline seasonal updates by creating “decor kits” for each season stored beneath your island. Each kit should contain three key items: a centerpiece element (like a ceramic bowl for spring or wooden tray for fall), a wall decor piece (small framed art or seasonal wreath), and a textile accent (linen napkin or runner). When changing seasons, simply swap these three elements while keeping your permanent base decor in place—this creates noticeable change without requiring complete reconfiguration.
Conclusion: Balance Beauty With Practicality on Your Island
Decorating a large kitchen island successfully requires respecting its dual role as both showpiece and workhorse. The most effective designs incorporate substantial lighting arrangements that provide both function and drama, centerpiece displays scaled appropriately to the island’s size, and strategic negative space that preserves functionality. By implementing the rule of threes for grouping, maintaining clear zones for different activities, and rotating seasonal elements, you create a dynamic space that evolves with your needs.
Remember that your island decoration should reflect how you actually live—prioritize functional beauty over pure aesthetics. A stunning centerpiece means little if it constantly gets moved to make room for meal preparation. Focus on elements that serve multiple purposes: decorative bowls that hold fruit, cookbooks that get used regularly, and seating that accommodates both quick breakfasts and evening entertaining. With thoughtful implementation of these strategies, your large kitchen island will become the beautiful, functional heart of your home that you enjoy every single day.


