

Kitchen islands are the heart of modern homes, but what happens when yours feels too cramped for your growing family or entertaining needs? Extending your kitchen island transforms your cooking space without a full remodel, adding valuable counter space, seating, or storage where you need it most. Whether you’re preparing holiday feasts or hosting casual brunches, a properly extended island can solve common kitchen frustrations while boosting your home’s value. This guide reveals exactly how to extend kitchen island functionality through proven methods that work for most home layouts and budgets—no guesswork required.
Before reaching for tools, measure your existing kitchen dimensions carefully. Most building codes require 36-48 inches of clearance around all sides of your island to ensure safe movement and accessibility. Stand in your kitchen and visualize traffic patterns—will an extension block your path to the refrigerator or create a bottleneck? A small 12-24 inch extension often suffices for adding seating, while larger 3-5 foot expansions create separate work zones or accommodate secondary sinks. The right extension size balances your functional needs with your kitchen’s proportions—too large overwhelms the space, while too small delivers minimal benefit.
Measure Twice: Space Assessment & Code Compliance
Your extension’s success starts with precise measurements and understanding legal requirements. Begin by documenting your current island’s exact dimensions: length, width, height, and countertop thickness. Use painter’s tape to outline your proposed extension on the floor, then walk through your kitchen to test traffic flow. Does the new configuration create awkward corners or obstruct access to appliances? Never sacrifice 36 inches of clearance between your island and surrounding cabinets—this is both a safety requirement and building code standard in most jurisdictions.
Electrical codes typically mandate outlets every 48 inches along the island perimeter, requiring professional installation for new circuits. Plumbing modifications for sinks or appliances need permits and licensed plumbers to prevent costly water damage. Gas line extensions for cooktops are strictly for certified professionals—attempting this yourself risks dangerous leaks. Check with your local building department before starting; skipping permits can lead to failed inspections that devalue your home during sale.
Choose Your Extension Type Based on Space & Budget
Selecting the right extension method determines both functionality and project complexity. Countertop overhangs offer the simplest solution when your existing base cabinet can support additional weight. Standard overhangs range from 12 inches for basic seating to 24 inches for full bar-height configurations. For granite or quartz countertops exceeding 12 inches of overhang, steel reinforcement brackets rated for 200+ pounds are non-negotiable to prevent catastrophic failure.
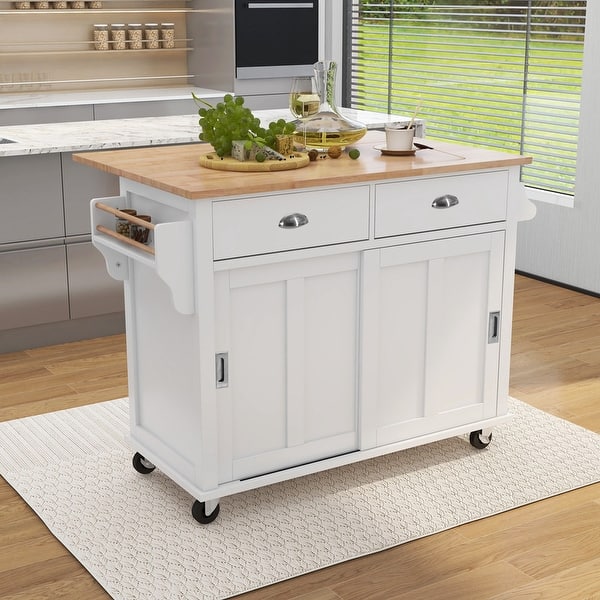
Movable extensions solve space constraints in smaller kitchens. Rolling butcher block carts ($150-$400) provide temporary prep space that tucks away when not needed. Retractable drop-leaf extensions mounted on heavy-duty hinges create instant dining space without permanent footprint changes. For permanent solutions, fixed structural extensions using matching base cabinets deliver maximum functionality but require professional installation. Prioritize hardware quality—cheap drawer slides fail under daily kitchen stress—invest in full-extension models rated for 100+ pounds.
Material Selection: Matching & Durability Essentials

Your extension must visually and functionally integrate with existing elements. For quartz or granite countertops, professional templating ensures seamless color and pattern matching—DIY attempts often reveal noticeable variations between batches. Butcher block extensions offer warm aesthetics but require monthly oiling to prevent cracking. Laminate provides budget-friendly options ($30-$70/sq. ft.) though visible seams may compromise the “built-in” look you want.
Support hardware selection makes or breaks your extension’s longevity. Wood corbels work for decorative overhangs under 10 inches, but metal brackets with hidden mounting are essential for functional extensions. Never use standard drywall anchors for countertop brackets—they’ll pull out under load. Instead, locate floor or wall studs and use 3-inch lag bolts into solid framing. For islands floating in the room center, build internal steel supports within the base cabinet before final assembly.
Build Your Base Cabinet: Structural Foundation Steps
Base cabinet construction requires precision framing that matches existing heights and depths. Standard base cabinets sit 34.5-36 inches tall with 24-inch depth—measure yours before cutting materials. Start with pressure-treated 2×4 framing for the floor-contact base, adding horizontal supports every 16 inches for countertop stability. Plywood sides (¾ inch minimum) prevent racking, while a 1×3 face frame provides door mounting surfaces.
Install full-extension drawer slides rated for kitchen weights (75-100 lbs) before attaching cabinet fronts. Test all drawers with 20 lbs of weight before final installation—poorly aligned slides jam under real-world use. Add toe-kick space (4-6 inches high) for comfortable standing, then finish with matching paint or stain. Allow 48 hours drying time before countertop installation to prevent adhesive failure.
Countertop Installation & Seam Management
Professional countertop installation ensures seamless integration, especially for stone surfaces. For DIY laminate projects, use contact cement applied to both surfaces with a 15-minute drying period before joining. Solid surface materials like Corian require specialized bonding agents and seam rollers to create invisible joins. Position seams over cabinet supports—not mid-span—to prevent cracking under weight.
Quartz and granite extensions demand professional fabrication. Expect $3,000-$6,000 for a 3-foot extension including templating, fabrication, and installation. Allow 24-48 hours curing time before use—premature loading stresses adhesive bonds. Finish by filling seams with color-matched epoxy and polishing edges to match existing profiles.
Functional Upgrades: Seating & Appliance Integration
Your extension’s value multiplies with smart functional additions. Bar-height seating (40-42 inches) requires 12-15 inch overhangs with 24-30 inches per seat for comfort. Install LED strip lighting beneath overhangs to illuminate seating areas without overhead fixtures. For appliance integration, secondary sinks need proper drain slope (¼ inch per foot)—hire a plumber to avoid future clogs.
Beverage centers and wine coolers transform extensions into entertainment hubs but require dedicated 15-amp circuits. Downdraft ventilation systems allow cooktop placement in islands without overhead hoods, though they cost $1,000-$2,500 installed. Always run appliance tests for 24 hours before final cabinet assembly to catch leaks or electrical issues.
Final Touches & Maintenance Protocol
Complete your extension with matching trim and hardware. Caulk all joints between old and new sections using color-coordinated silicone—never standard latex caulk that cracks near water sources. Tighten all connections after 30 days as materials settle. Test structural integrity by applying 50 lbs of pressure to overhang edges—any flexing indicates inadequate support.
Maintenance preserves your investment. Quartz needs only soap-and-water cleaning, while granite requires annual sealing. Inspect support brackets every six months for loosening. Lubricate drawer slides with silicone spray annually—never petroleum-based oils that attract grease. Address water spots immediately on wood surfaces to prevent permanent staining.
Extending your kitchen island delivers transformative functionality when approached methodically. By prioritizing precise measurements, code compliance, and quality materials, you’ll create an extension that blends seamlessly with your existing kitchen while solving real pain points. Remember that professional help proves cost-effective for electrical, plumbing, and stone countertop work—attempting these yourself risks expensive mistakes. Start with a modest 12-24 inch extension if you’re new to remodeling, then expand as confidence grows. With proper execution, your extended island will become the durable, functional centerpiece your kitchen deserves for decades to come.


