
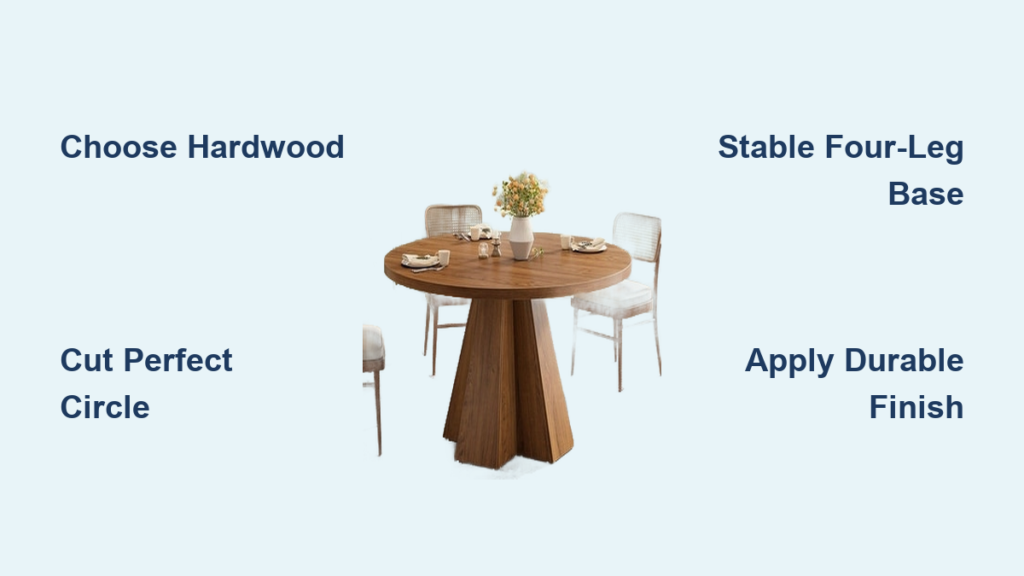
A wobbly store-bought table that barely fits your space is a common kitchen frustration. Building your own round kitchen table solves both problems while creating a centerpiece that sparks conversation and fits your exact dimensions. Unlike rectangular models that create isolated seating areas, a round table naturally encourages connection—perfect for family meals and gatherings. The best part? Constructing your own table typically costs 50-70% less than purchasing a comparable quality piece from furniture retailers. Whether you’re a weekend warrior with basic tools or an experienced woodworker, this guide provides everything you need to build a sturdy, beautiful round kitchen table that becomes the heart of your home for decades.
Select the Perfect Wood and Essential Tools
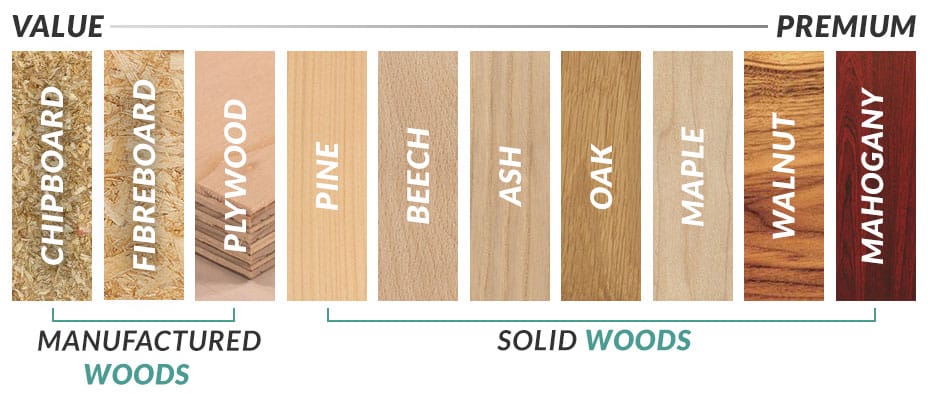
Choosing appropriate materials makes the difference between a table that lasts generations and one that wobbles after six months. For kitchen use where spills and daily wear are inevitable, hardwoods outperform softwoods and plywood. Oak withstands heavy use with its prominent grain pattern that hides minor scratches. Maple’s tight grain creates a smooth surface ideal for families with children—its natural hardness resists dents from dropped utensils. Walnut delivers rich, dark tones that elevate your kitchen’s aesthetic but requires careful handling due to its slightly softer composition. Cherry starts light and gradually deepens to a luxurious reddish-brown with exposure to light, developing character over time.
For a standard 42-inch diameter table (seating 4-6 people), purchase 40-50 board feet of kiln-dried hardwood with 6-8% moisture content. Acclimate the wood in your workshop for two weeks before cutting to prevent post-construction warping. Inspect boards carefully—select those with straight grain on the face and minimal knots, especially for the tabletop where appearance matters most. Avoid boards with twisted grain or excessive sapwood edges that create weak points.
Critical Tools Checklist for Round Table Construction:
- Circular or table saw for breaking down lumber
- Jigsaw with fine-tooth blade for cutting circular profiles
- Random orbital sander with 80, 120, and 220-grit papers
- Drill with assorted bits and countersink for clean screw holes
- Kreg jig for pocket hole joinery (essential for strong, invisible connections)
- Four 24-inch bar clamps and pipe clamps for glue-ups
- Tape measure, carpenter’s square, and compass for accurate layout
- Router with flush-trim bit for perfect circular edges
- Safety glasses and hearing protection (never optional)
Create a Flawless Round Tabletop Without Specialized Equipment
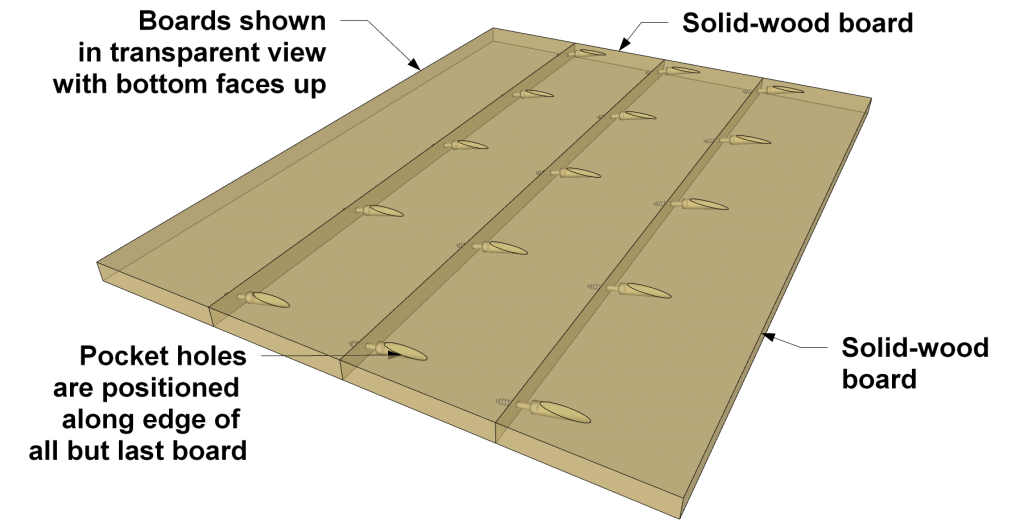
The tabletop’s quality determines your project’s success—nothing undermines craftsmanship like an uneven or poorly joined surface. Start by edge-joining three 8-inch wide boards for a 42-inch diameter table. Joint each board’s edge to create perfect 90-degree angles—this ensures seamless glue lines without gaps. Apply wood glue liberally along joining edges, then clamp with bar clamps placed every 12 inches. Alternate clamp positions above and below the boards to distribute pressure evenly. Wipe excess glue immediately with a damp cloth to prevent sanding issues later.
After 24 hours of curing, create a precise circular template. Drive a nail through the center of your glued panel, tie a string to it measuring exactly half your desired diameter (21 inches for a 42-inch table), and attach a pencil to the other end. Rotate the string to draw a perfect circle. For cleaner cuts, use painter’s tape along your cutting line to prevent tear-out.
Cut along your marked line with a jigsaw, staying 1/8 inch outside the line. Clamp the rough-cut circle to your workbench and use a router with a flush-trim bit to achieve a smooth, uniform edge. Check roundness by measuring from center to edge at 12 equally spaced points—all measurements must match within 1/16 inch. Sand progressively through 80, 120, and 220 grit, always following the wood grain direction.
Prevent seasonal cracking by adding movement accommodation. For intermediate woodworkers, install breadboard ends with sliding dovetails that allow the tabletop to expand and contract. Beginners should glue a 1.5-inch wide edge band around the perimeter, then sand flush after drying. This simpler method still provides adequate movement relief for most climates.
Build Rock-Solid Four-Legged Base for Maximum Stability
Four-legged bases outperform pedestal designs for kitchen tables because they offer superior stability on uneven floors while being simpler to construct. Position each leg so its outer face aligns 5 inches from the tabletop edge—this placement creates optimal knee clearance while maintaining structural integrity. For standard dining height (29.5 inches from floor to tabletop), cut legs from 3×3 inch hardwood stock, ensuring all four measure exactly the same length.
Construct the apron (the frame connecting legs) from 1×4 inch material, positioned 2.5 inches below the tabletop. This height provides adequate clearance for chairs while maintaining visual balance. Join legs to aprons using pocket hole joinery—drill three 2.5-inch pocket holes at each connection point with wood glue for maximum strength. The apron should form a perfect square that fits precisely within your tabletop’s circumference.
Attach the base to the tabletop using figure-8 hardware that accommodates wood movement. Never glue or screw the base directly to the tabletop—this restricts natural expansion and contraction, inevitably causing cracks. Pre-drill all holes with a bit slightly smaller than your screw threads, and use a countersink to bury screw heads below the tabletop surface. This creates invisible attachment points that maintain structural integrity while allowing necessary movement.
Achieve Perfect Stability on Any Floor Surface
Wobble is the enemy of every table builder. After positioning your leg assembly on the upside-down tabletop, check alignment with a carpenter’s square at multiple points. Drive screws only until snug—not overtightened—to avoid stripping wood fibers or stressing the tabletop. Test stability immediately by placing the table on your actual kitchen floor (not your workshop floor, which may be perfectly level).
If the table rocks, identify which leg(s) require adjustment. Most often, one leg is slightly shorter or your kitchen floor has subtle unevenness. Sand the bottom of the shortest leg using 100-grit paper on a flat surface, checking frequently with a level. For a permanent solution, install adjustable furniture levelers on all four legs—these threaded inserts allow fine-tuning on any surface.
Verify tabletop flatness by placing a straightedge across multiple diameters. Minor imperfections (less than 1/16 inch) can be addressed during final sanding. Significant dips indicate problems with your initial glue-up or circle cutting that require disassembly and correction before finishing.
Apply Durable Finish That Withstands Kitchen Realities
Kitchen tables endure spills, heat, and daily wear—choose a finish that protects without compromising beauty. Tung oil provides natural-looking protection that’s easily repaired: apply generously with a cloth, wait 15 minutes, then wipe completely dry. Repeat this process three times, allowing 48 hours between coats. For high-use tables, add a final coat of paste wax for extra water resistance.
Before finishing, complete thorough sanding through 220 grit. Remove all dust with a tack cloth—any particles will become visible under finish. Pay special attention to edges: round over sharp corners with 120-grit paper wrapped around a dowel to create comfortable, chip-resistant edges.
Apply your first finish coat to the tabletop underside first—this allows wood movement without finish cracking. Let dry completely before finishing the top surface. Always test your finish on scrap wood from your project to verify color and sheen before committing to the tabletop.
Maintain Your Handcrafted Table for Generations
Your hand-built table will last decades with minimal care. Clean spills immediately with a slightly damp cloth—never let liquids pool on the surface. Use trivets for hot dishes and coasters for all beverages to prevent finish damage. Annual maintenance differs by finish type: tung oil tables benefit from a light oil application each year, while polyurethane finishes need spot repairs only when wear becomes visible.
Protect your investment from environmental damage. Position the table away from direct sunlight, which fades wood and degrades finishes over time. Maintain consistent indoor humidity (35-45% relative humidity) to minimize wood movement—use a humidifier in winter dryness and a dehumidifier during humid summers.
When cleaning, avoid commercial furniture polishes containing silicones that build up over time and interfere with future refinishing. A simple mixture of equal parts vinegar and olive oil makes an effective, natural cleaner that enhances wood luster without harmful residues.
Building your own round kitchen table delivers more than furniture—it creates a gathering place where memories form around shared meals. The circular shape naturally encourages conversation, while your custom craftsmanship ensures perfect fit for your space. With proper construction techniques and attention to wood movement, your hand-built table will serve as the heart of your home for generations, becoming more beautiful with each story it witnesses. Start your project this weekend and transform raw lumber into the centerpiece of your kitchen’s daily life.


