
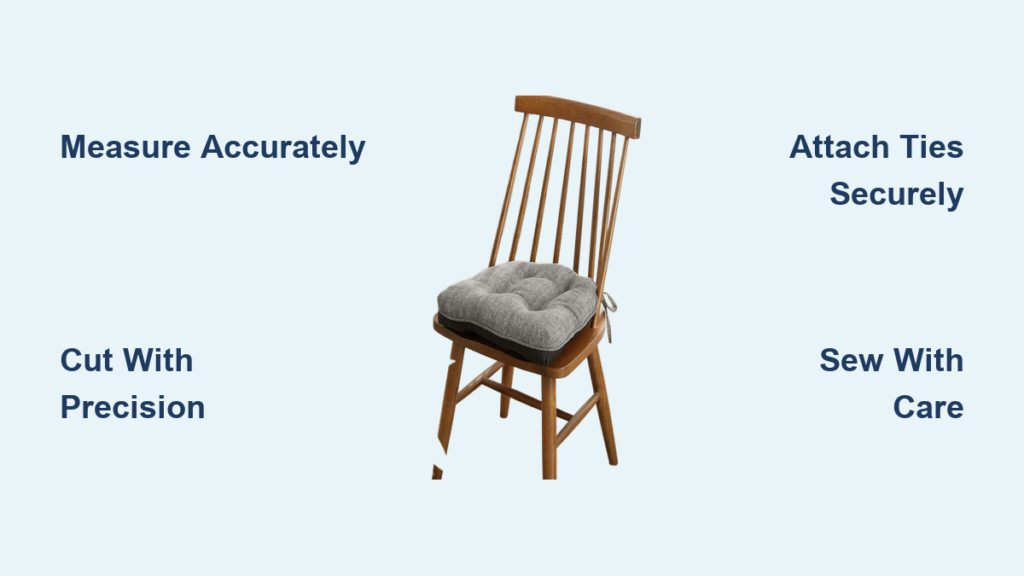
Nothing transforms a kitchen quite like custom chair cushions that perfectly match your decor and stay securely in place. Kitchen chair cushions with ties solve the annoying problem of slipping seats while adding comfort and style to your dining area. Unlike store-bought options that often slide around or don’t fit properly, handmade cushions with secure tie closures give you complete control over fabric selection, padding thickness, and the all-important tie placement that keeps everything in position. Whether you’re refreshing dated chairs or protecting new ones, creating your own cushions takes basic sewing skills and a few hours of your time—resulting in professional-looking seating that enhances both comfort and aesthetics. This guide reveals exactly how to measure, cut, sew, and finish kitchen chair cushions with ties that stay put through daily use.
Gather Materials and Tools for Cushion Success
Assembling all necessary supplies before cutting fabric prevents frustrating mid-project interruptions and ensures professional results. Having everything ready creates a smooth workflow that transforms raw materials into beautiful finished cushions in just one or two dedicated sessions.
Essential sewing supplies include sharp fabric scissors or a rotary cutter with self-healing mat for clean cuts, quilting pins or fabric clips to hold layers without damaging fabric, a reliable sewing machine with universal needles (size 80/12 for medium-weight fabrics), and high-quality thread that matches your fabric. Don’t overlook an iron and ironing board—pressing seams as you work creates crisp edges that elevate your project from homemade to professional. Fabric marking tools like tailor’s chalk or water-soluble pens prove invaluable for marking tie placements and seam allowances.
Required materials consist of your chosen upholstery fabric (allow 1/2 to 1 yard per chair depending on size), cushion filling (high-density foam, polyester batting, or pre-cut inserts), and thread for creating fabric ties. For beginners, consider fusible web tape as a no-sew alternative for attaching ties. Create templates using cardboard or freezer paper to transfer your chair measurements accurately to fabric.
Smart fabric selection makes the difference between cushions that last and those needing replacement in months. Choose medium-weight cottons, canvas, or performance fabrics with tight weaves that withstand daily kitchen use. Pre-wash all natural fibers to prevent shrinkage after completion. For households with kids or pets, opt for stain-resistant fabrics or dark patterns that hide everyday spills. Always purchase 10-15% extra fabric for pattern matching or future repairs.
Measure Your Chairs for Perfect-Fitting Cushions
Accurate measurements are non-negotiable for cushions that fit seamlessly on your chairs—too small and they’ll slip, too large and they’ll create awkward bulges that look unprofessional.
Seat dimensions require precision. Measure front-to-back depth at the widest point (usually center), then side-to-side width at the front edge. Add 2 inches to both measurements for seam allowances and padding thickness. For chairs with curved edges, place newspaper or tracing paper on the seat, carefully outline the shape, then transfer this pattern to cardboard for your reusable template. Test-fit the cardboard template before cutting fabric to catch measurement errors early.
Determine ideal cushion thickness based on your comfort preferences and chair design. Most kitchen chairs use 1.5-inch thick foam for optimal balance of support and comfort—thinner cushions (1 inch) work for formal dining chairs where appearance trumps comfort, while thicker options (2 inches) suit everyday kitchen seating. Sit on folded towels of varying thicknesses to find your personal sweet spot before committing to foam density.
Mark tie attachment points by measuring 3-4 inches below the top edge of your chair back—this placement ensures ties wrap securely without visible gaps. Most standard kitchen chairs need two ties positioned 4-6 inches from each back corner. Use a fabric marker to note these points on your template so they transfer accurately to your cushion fabric.
Cut Fabric with Professional Precision
Precision cutting transforms quality materials into perfectly fitting cushions—rushed cuts create lopsided seats that undermine your entire project.
Create your template by tracing your chair seat onto cardboard, then test-fitting it until it sits flush with no gaps or overlaps. Place this template on your pre-washed, ironed fabric with the wrong side up, positioning it to maximize fabric usage. For directional prints, ensure all pieces face the same direction for visual consistency across multiple chairs.
Cut fabric methodically using sharp tools for clean edges. Place weights on your template rather than pins to avoid shifting, then cut around the perimeter with 1/2 inch seam allowance added. Mark tie placement points with chalk or water-soluble pen—these reference marks prevent misaligned ties that compromise security. For foam padding, use an electric carving knife for smooth, straight cuts through high-density foam.
Label each piece immediately after cutting (top, bottom, chair #1, etc.) to prevent confusion during assembly. Store cut pieces together with clips or safety pins to maintain organization throughout the sewing process.
Attach Ties for Secure, Professional Results

Properly attached ties transform ordinary cushions into functional seating that stays put through daily use—their placement and construction determine whether your cushions remain securely positioned.
Create professional fabric ties by cutting 24-inch long strips (for 12-inch finished ties) that are 2.5 inches wide. Fold strips lengthwise with right sides together, sew along the long edge with 1/4 inch seam allowance, then turn right-side out using a safety pin or loop turner. Press flat with the seam centered on the back for invisible construction. Alternatively, fold raw edges to the center, press, then topstitch both sides for a clean, no-turn method.
Position ties strategically by pinning folded ends to your marked points on the cushion top piece, with raw ends extending inward toward the center. Ensure ties sit 1/2 inch from the edge so they’ll catch in your seam allowance during assembly. Most kitchen chairs need two ties spaced 4-6 inches from each back corner—add a third tie across the back for wider chairs.
Secure ties before sewing by basting them in place with long stitches, then verify positioning by wrapping ties around your actual chair. Adjust if needed before final stitching—once sewn into the cushion seam, tie placement becomes permanent. Trim excess tie length after final assembly for clean ends that won’t fray.
Sew Cushion Layers Together Professionally
Sewing the cushion layers together requires careful attention to detail—this stage transforms separate components into a functional, attractive finished product.
Layer components correctly by placing cushion top and bottom pieces right sides together, with foam or batting sandwiched between them. Position ties between layers at marked points, ensuring raw ends point inward. Pin or clip layers together every 2-3 inches, paying special attention to corners and tie areas where shifting commonly occurs.
Sew with confidence using a 1/2 inch seam allowance consistently around the perimeter. Start at the center of one side, backstitching at beginning and end for security. Pivot at corners by stopping with the needle down, lifting the presser foot, rotating the fabric 90 degrees, then continuing. For curved seats, clip the seam allowance every 1-2 inches along concave curves to allow the fabric to lay flat after turning.
Insert foam and finish openings by working the padding into corners gently but firmly—don’t force foam as this creates unsightly bulges. Leave a 4-6 inch opening for foam insertion if using removable padding, then hand-stitch the opening closed with an invisible ladder stitch. For permanent foam cushions, sew completely around but leave small openings to adjust tie positioning before final closure.
Add Finishing Touches That Elevate Your Project
Professional finishing touches distinguish handmade cushions from amateur attempts—these final details demonstrate craftsmanship that shows in every use.
Press seams meticulously using appropriate heat for your fabric type, pressing seams open or to one side for crisp edges. Well-pressed cushions maintain their shape better and present more attractively in photos or when selling handmade items. Pay special attention to corners where bulk commonly gathers.
Topstitch for durability and style by sewing 1/8 inch from the edge around the entire cushion perimeter. This visible stitching reinforces seams while adding decorative interest—use matching thread for subtle elegance or contrasting color for bold statement. For rounded corners, reduce stitch length slightly to maintain even tension.
Test fit and adjust before considering the project complete. Place each cushion on its chair and sit to verify comfort, checking that ties wrap securely without twisting. Make minor adjustments while you still have tools ready—small tweaks at this stage prevent frustration later. Trim any stray threads and apply fray-check to tie ends for long-lasting durability.
Maintain Your Cushions for Long-Term Beauty
Proper care extends the life of your kitchen chair cushions significantly—establishing maintenance routines from the beginning protects your investment of time and materials.
Clean strategically based on fabric type—most cotton and canvas cushions can be removed for machine washing on gentle cycles with mild detergent, followed by air drying. Spot-clean spills immediately with appropriate cleaners before stains set. Performance fabrics and vinyls wipe clean with damp cloths and mild soap. Rotate cushions monthly to distribute wear evenly across all sitting surfaces.
Store properly during seasonal changes by cleaning thoroughly before storage and ensuring complete dryness to prevent mold. Store in climate-controlled spaces away from pests, rolling rather than folding to prevent permanent creases in foam. Vacuum storage containers periodically to maintain cleanliness during off-season storage.
Address wear promptly by repairing loose threads before they unravel, replacing worn ties when needed, and refreshing foam padding when it loses resilience. With proper care, well-made kitchen chair cushions with ties can last 3-5 years of daily use—far outperforming most store-bought alternatives.
Creating custom kitchen chair cushions with ties delivers perfectly fitted seating that combines comfort, style, and security. The process rewards careful attention to measurement, thoughtful material selection, and patient construction with beautiful results that enhance your kitchen daily. Your finished cushions will serve your family for years while showcasing the satisfaction of handmade home decor that reflects your personal style.


