
Nothing beats the aroma of two golden Belgian waffles crisping simultaneously in your Cuisinart WAF-F20. Yet countless owners battle soggy centers, stubborn sticking, or messy overflows despite owning this powerful appliance. Properly learning how to use Cuisinart double waffle maker techniques transforms breakfast chaos into a seamless ritual. This guide reveals professional secrets for flawless results—whether cooking for one or feeding a hungry crowd—while avoiding critical mistakes that ruin your waffles and appliance.
You’ll discover precise batter measurements, thermal management tricks, and the exact moment to flip grids for maximum crispness. Most importantly, you’ll unlock the dual-waffle strategy that produces restaurant-quality results in half the time. Forget trial-and-error frustration; these field-tested methods guarantee success from your very first use of the Cuisinart WAF-F20 Series.
Position Your Waffle Maker for Optimal Safety and Performance
Place your Cuisinart double waffle maker on a heat-resistant, level countertop with 6 inches of clearance on all sides. The short power cord prevents tripping hazards—position near an outlet to avoid extension cords. If you must use an extension cord, ensure it matches the appliance’s 120V AC electrical rating and never let it drape over edges or touch hot surfaces.
Before first use, verify all parts are included and remove every scrap of packaging material. Wipe grids with a damp cloth to eliminate manufacturing residue. Plug into a polarized outlet (wider blade first—never force it) and expect slight odor during initial heating; this normal off-gassing disappears after 2-3 uses. Crucially, never operate near heat sources, in appliance garages, or under wall cabinets while plugged in.
Prime Grids for Guaranteed Non-Stick Results
Season grids before every use—even with the premium nonstick coating—to prevent sticking disasters. After preheating (not before), spray or brush flavorless vegetable oil across both grids. Use a paper towel to distribute evenly, removing excess oil. This step is particularly vital for the first use to maintain the special nonstick surface.
Pro tip: Seasoning post-preheating creates a superior barrier. Cold oil on hot grids forms a polymerized layer that releases waffles effortlessly—skip this and you’ll battle stuck batter. Never use aerosol sprays containing lecithin, as they degrade nonstick coatings over time.
Set Browning Controls for Perfect Crispness

Your browning knob ranges from 1 (palest) to 6 (darkest). Commercial Belgian waffle mixes perform best at setting 4, yielding golden exteriors with crisp lace patterns and tender interiors. Adjust based on batter composition:
- Settings 1-2: Ideal for delicate batters or children’s preferences
- Settings 3-4: Standard for most store-bought mixes (recommended starting point)
- Settings 5-6: Creates deep mahogany crunch for hearty batters
Thicker batters may require lower settings to prevent burnt edges with raw centers. Always test with your first waffle of the session before committing to a full batch.
Perfect Single-Waffle Technique Step-by-Step
Preheat Sequence and Signal Recognition
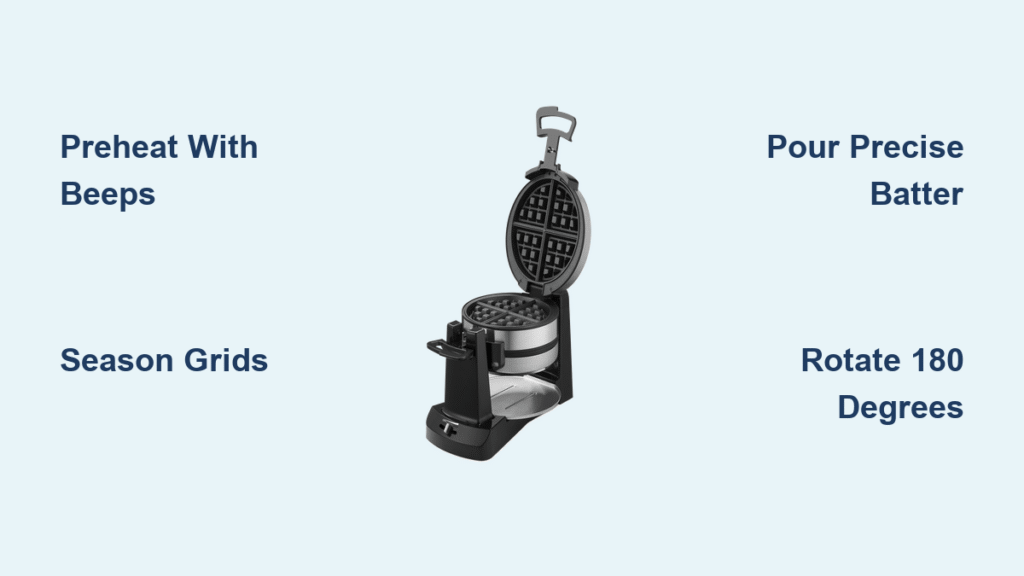
Flip the rocker switch to ON. The unit automatically preheats until reaching target temperature, signaled by six distinct beeps. This audio cue occurs only once per baking session—when starting your very first waffle.
Precision Batter Application
Open the grids using proper grip: thumb on lower handle lip, index finger under upper handle lip. Pour batter using the supplied measuring cup filled precisely to the top—this quantity perfectly fills one grid. Start pouring from the center in a circular motion, then spread evenly to edges with a heatproof spatula. Underfilling causes thin waffles; overfilling triggers overflow.
Rotation and Completion Protocol
Close the cover firmly and rotate plates 180 degrees clockwise. When done, three beeps sound and the corresponding indicator light illuminates. Rotate this grid to the top position, open carefully (steam escapes rapidly), and slide a heatproof spatula under the edge for clean removal. Never force stuck waffles—adjust batter fat content instead.
Execute Flawless Dual-Waffle Production
Overlapping Cooking Sequence
Start your first waffle per single-waffle instructions. After closing and rotating, the Ready light turns off—this indicates active cooking. Immediately lift the now-top cover and pour batter onto the second grid. Close and rotate 180 degrees again. The unit manages both waffles independently despite overlapping cycles.
Continuous Batch Rhythm
When the first waffle completes (three beeps + indicator light), rotate its grid to the top, remove the waffle, and instantly reload with fresh batter. This continuous cycle produces waffles every 3-4 minutes. Maintain momentum by keeping batter nearby—interruptions disrupt thermal consistency and cause uneven cooking.
Pro tip: For family breakfasts, prepare extra batter in a squeeze bottle. This allows rapid refilling during the reload phase without breaking rhythm.
Prevent Overflow and Grid Separation
Grid separation during cooking is normal but controllable. If batter seeps from edges, reduce measuring cup fill by 1-2 tablespoons. The grids need expansion space for steam—overfilling causes messy overflows and uneven cooking. Watch for these danger signs:
- Batter reaching grid edges before closing
- Excessive bubbling from center vents
- Top cover lifting during rotation
If overflow occurs, wipe grids immediately after removal using a damp cloth while still warm (but never hot). Persistent overflow indicates batter is too thin—add 1 tablespoon flour to thicken.
Professional-Grade Cleaning Protocol
Immediate Post-Cooking Actions
Turn OFF and unplug immediately after your final waffle. Leave the lid open for complete cooling—typically 30-45 minutes. Never attempt cleaning while warm, as thermal shock can damage nonstick coatings.
Stubborn Residue Removal
For baked-on batter, pour 1 teaspoon cooking oil over residue and wait approximately five minutes. This softens stubborn bits for effortless wiping. Never use abrasive pads, steel wool, or harsh cleansers—they permanently scratch grids. The knowledge base explicitly states: “Never disassemble the waffle maker for cleaning.”
Exterior Maintenance
Wipe stainless steel housing with a soft, dry cloth only. Avoid moisture near electrical components or cord connections. Never immerse any part in water—this voids warranties and creates shock hazards.
Restaurant-Style Serving and Storage
Crispness Preservation Strategy
Serve waffles immediately for peak texture. To keep multiple waffles warm without sogginess, preheat oven to 200°F and place finished waffles directly on the rack (not a pan). Avoid foil wrapping—it traps steam and softens edges, contrary to common practice.
Freezing for Future Breakfasts
Cool waffles completely on a wire rack, then stack with waxed paper separators in sealed freezer bags. They’ll last 3 months frozen. Reheat directly from frozen: 5-7 minutes at 350°F in oven or 2-3 cycles in a toaster—no thawing needed.
Fix Common Problems in 60 Seconds
- Sticking waffles: Increase batter fat content by 1-2 tablespoons melted butter (not oil)
- Pale centers/dark edges: Batter too thick—thin with 1 tablespoon milk
- Long cooking times: Check voltage supply—extension cords reduce efficiency
- Uneven browning: Distribute batter more evenly and ensure full 180° rotation
- Indicator light failure: Unplug for 2 minutes to reset internal sensors
Critical note: Grid separation during cooking is normal per Cuisinart’s specifications—simply reduce batter quantity slightly.
Extend Appliance Lifespan Through Proper Care
Perform weekly deep cleaning: After complete cooling, use a soft toothbrush to dislodge crumbs from grid grooves. Inspect the power cord monthly for fraying—never operate with damaged cords. The sealed heating elements contain no user-serviceable parts; internal issues require authorized Cuisinart service.
Never operate the unit without batter in the grids, as this overheats heating elements. Always store with the lid open to prevent moisture buildup that degrades nonstick coatings.
Mastering how to use Cuisinart double waffle maker techniques transforms breakfast from a chore into a celebration. With these precise methods, you’ll consistently produce two perfectly crisp, golden Belgian waffles every time—no more guesswork, no more mess. The Cuisinart WAF-F20’s true potential lies in understanding its thermal rhythm and dual-grid coordination. Implement these steps today, and you’ll never settle for single-waffle waits or uneven results again.


