
Dirty dishes pile up as you stare at your kitchen sink filled with murky water that refuses to drain. That familiar sinking feeling hits—you’ve got a clog, and calling a plumber means waiting days and paying hundreds. The good news? Most kitchen sink blockages can be cleared in under an hour with a simple tool you can buy for less than $20: a drain snake. This flexible, cable-based tool reaches clogs chemical cleaners can’t touch and works where plungers fail, making it the most reliable DIY solution for stubborn kitchen sink blockages.
Learning how to use a drain snake for kitchen sink clogs properly can save you from recurring plumbing emergencies and costly service calls. Unlike harsh chemical drain cleaners that corrode pipes over time, a drain snake physically removes the obstruction without damaging your plumbing system. In this guide, you’ll discover the exact techniques professionals use to clear kitchen sink clogs efficiently, along with prevention strategies that keep your drains flowing freely for months between maintenance sessions.
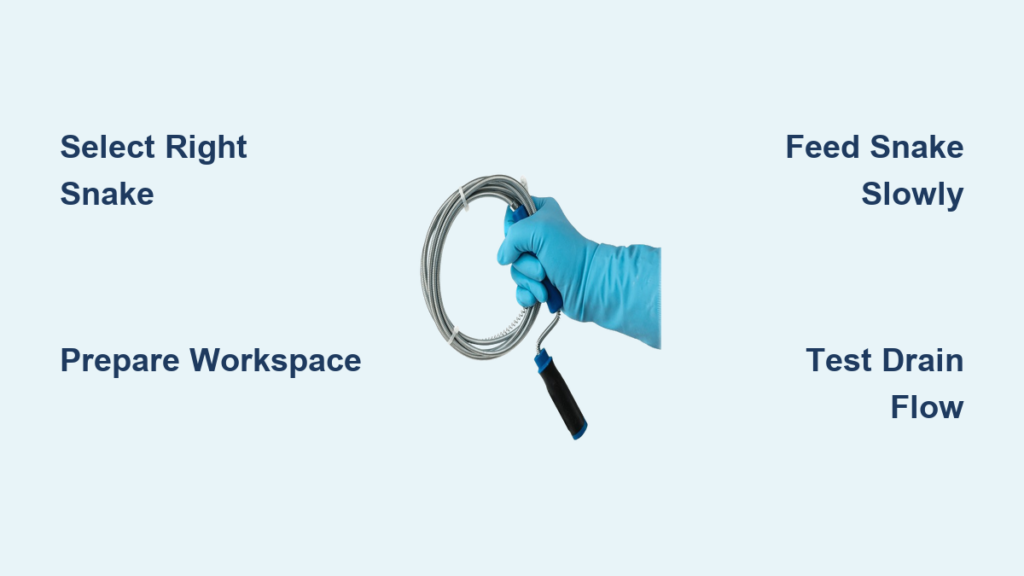
Choose the Right Drain Snake for Kitchen Sink Clogs

Selecting the appropriate drain snake makes the difference between a quick fix and a frustrating mess. For most kitchen sink clogs, a manual drum auger with a 25-foot cable provides the perfect balance of power and control. These models feature a rotating handle that feeds a flexible metal cable through your pipes while a corkscrew auger head breaks up and retrieves clogging material. Look for a cable diameter between 1/4 and 3/8 inch—thick enough to maintain rigidity in pipes but slim enough to navigate the tight bends of kitchen plumbing.
Powered drain snakes that attach to your drill offer extra torque for particularly stubborn clogs but require more skill to use effectively. Reserve these for situations where manual snakes fail, as excessive power can damage older PVC pipes if you’re not careful with the technique. If you choose a powered option, select a variable-speed drill to maintain control and prevent the snake from kinking inside your pipes.
Don’t forget the essential accessories: a 5-gallon bucket to catch debris, heavy-duty rubber gloves that reach your forearms, microfiber towels for quick cleanup, and a headlamp or work light to illuminate the dark spaces under your sink. Having these items ready before you start prevents mid-job interruptions and keeps your workspace contained.
Prepare Your Workspace Before Snaking
Proper preparation prevents messy accidents and makes the snaking process more effective. Begin by removing all visible debris from the sink basin using a small cup or container to bail out standing water into your bucket. While water doesn’t prevent the snake from working, removing it reduces splashing and gives you a clearer view of the drain opening. For double-bowl sinks, block the unclogged side with a wet cloth to increase water pressure when testing your results later.
Clear everything from beneath the sink cabinet and lay down several old towels to protect your floor from drips. Position your bucket directly under the P-trap area—the U-shaped pipe section that traps debris—since this is where most clogs form in kitchen sinks. If your sink connects to a garbage disposal, unplug it from the wall outlet before starting to eliminate the risk of accidental activation while working.
Put on your rubber gloves and remove the sink strainer or stopper. Take a moment to identify where the clog likely sits based on your symptoms: if water drains slowly but eventually clears, the obstruction is probably in the drainpipe just below the sink. If water doesn’t drain at all, the blockage may be in the P-trap or further down the main drain line.
Access the Drain Through the Best Entry Point

Choosing the optimal entry point determines how easily your snake reaches the clog. For most kitchen sinks, removing the P-trap provides the most direct access and often reveals the clog immediately. Place your bucket beneath the P-trap and loosen the slip nuts connecting it to the drainpipe using adjustable pliers—turn them counterclockwise while supporting the trap to catch any residual water.
If the P-trap is clear or you prefer not to disassemble pipes, look for a cleanout plug on the drainpipe below the sink basin. This threaded access point, usually found on the horizontal section of pipe, provides straight-line entry that bypasses the P-trap’s curves. Removing this plug with a wrench gives your snake unobstructed access to the main drain line and significantly improves your chances of reaching deeper clogs.
For sinks without a cleanout plug, feed the snake directly into the drain opening after removing the strainer. Angle the cable toward the back of the sink rather than straight down—kitchen drainpipes typically run horizontally toward the wall before connecting to the main plumbing system.
Feed and Maneuver the Snake Through Your Pipes
With your entry point prepared, slowly feed the auger end of the drain snake into the drain while rotating the handle clockwise. Apply gentle but firm pressure as you advance the cable, moving it forward a few inches at a time before pulling back slightly. This technique prevents the snake from kinking inside the pipes and helps the auger catch clogging material rather than pushing it deeper.
As the snake navigates pipe bends, you’ll feel resistance that diminishes once the cable straightens in a horizontal section. When you encounter consistent, firm resistance that doesn’t decrease with continued rotation, you’ve likely reached the clog. Increase pressure slightly while maintaining steady rotation—the auger should begin to break through the obstruction within 15-20 seconds.
Once you feel the resistance suddenly decrease, you’ve penetrated the primary blockage. Continue feeding the snake 6-12 inches beyond this point to ensure complete clearance, then slowly retract it by turning the handle counterclockwise while pulling backward. The auger will bring debris back with it, so keep your bucket positioned to catch whatever emerges.
Verify Complete Clog Removal and Test Drain Flow

After retrieving the snake, inspect the auger head for collected debris—this reveals what caused your clog and whether you’ve cleared it completely. Grease buildup appears as thick, yellowish residue; food particles look like mushy organic matter; and foreign objects might include small utensils or jewelry.
Test your work by running cold water at full pressure for several minutes. Watch how quickly the water drains and listen for gurgling sounds that indicate partial blockage. If drainage remains slow, repeat the snaking process, pushing the cable deeper and spending more time breaking up residual material.
For grease-related clogs, follow snaking with boiling water to melt remaining residue, then pour 1/2 cup baking soda followed by 1 cup vinegar down the drain. Let this mixture foam for 15 minutes before flushing with another pot of boiling water—this natural treatment dissolves minor grease buildup without damaging pipes.
Clean Your Drain Snake After Each Use
Proper maintenance extends your snake’s lifespan and prevents cross-contamination between drains. Wipe the entire cable with a rag soaked in warm, soapy water, paying special attention to the auger head where debris collects. For stubborn grease, use a stiff brush to clean between the auger coils without bending the metal.
Inspect the cable for kinks, fraying, or weak spots that indicate replacement time. A damaged cable can snap during use, leaving part of the tool stuck in your plumbing—a much worse problem than the original clog. Store your snake loosely coiled in a dry location, preferably hung on a wall hook to maintain its flexibility.
Consider maintaining separate snakes for kitchen and bathroom drains since kitchen clogs typically involve grease and food while bathroom clogs deal with hair and soap scum. Using the same tool without thorough cleaning transfers grease to bathroom pipes, potentially causing different types of blockages.
Prevent Future Clogs With Simple Daily Habits
The most effective drain maintenance happens before clogs form. Never pour cooking oil, fat, or grease down your sink—even small amounts accumulate over time to create stubborn blockages. Instead, collect grease in a metal can, let it solidify, and dispose of it in the trash.
Install a fine-mesh sink strainer that catches food particles before they enter the drain, and empty it into the trash after each use. Scrape plates thoroughly before washing, paying special attention to starchy foods like pasta and rice that expand with water to form dense clogs.
Run hot water for 30 seconds after each use to flush potential buildup, and treat your drain weekly with boiling water to melt grease deposits. Monthly, pour 1/2 cup baking soda followed by 1 cup vinegar down the drain, let it foam for 15 minutes, then flush with hot water—this natural treatment keeps pipes clear without damaging them.
Recognize When Professional Help Is Needed
While most kitchen sink clogs yield to proper snaking technique, some situations require a professional plumber. If you’ve snaked the drain multiple times without success, or if clogs recur frequently despite prevention efforts, you may have tree root intrusion, collapsed pipes, or main sewer line issues.
Warning signs include multiple drains clogging simultaneously, sewage backup in other fixtures when using the kitchen sink, persistent foul odors, and water backing up into other sinks when the dishwasher runs. These symptoms indicate a blockage in your main drain line rather than just the kitchen sink branch.
Professional plumbers have access to motorized drain augers, pipe cameras, and hydro-jetting equipment that handle clogs beyond consumer-grade tools’ capabilities. They can also identify and address underlying issues causing recurring clogs, potentially saving you money compared to repeated DIY attempts.
Mastering how to use a drain snake for kitchen sink clogs puts you in control of one of the most common household emergencies. With the right technique and regular maintenance, you’ll keep your kitchen drain flowing freely for years while avoiding costly plumbing service calls. Remember that prevention is always easier than cure—developing simple daily habits takes just seconds but saves you hours of frustration when clogs inevitably try to strike again.


