
Water pooling in your sink while dirty dishes pile up creates one of the most frustrating kitchen emergencies. When your kitchen sink drain not working properly, you can’t wash hands, clean produce, or tackle the evening’s dishes—disrupting your entire household routine. The good news? Most clogs stem from common issues you can fix yourself without calling a plumber. This guide reveals exactly why your kitchen sink stops draining and the proven methods to restore proper flow, whether you’re dealing with a slow drain or a complete blockage.
Why Your Kitchen Sink Suddenly Stops Draining Completely
Grease and oil buildup creates the most persistent kitchen sink clogs you’ll encounter. When you pour bacon grease or cooking oil down the drain, these substances cool and solidify inside your pipes, trapping food particles and soap residue. This combination forms a stubborn barrier that grows thicker with each use until your sink won’t drain at all. Even small amounts of grease accumulate over time, explaining why your sink worked fine yesterday but won’t drain today.
Food debris escaping past the strainer causes nearly as many drainage failures. Fibrous vegetables like celery, starchy pasta, and expandable beans swell when wet, creating dense clogs in the P-trap or further down the line. These materials resist normal water flow and require specific clearing techniques to remove completely. Soap scum mixing with hard water minerals creates another hidden problem, coating pipe interiors with a sticky film that gradually narrows the drain opening until water can’t pass through.
Immediate Checks That Pinpoint Your Drain Problem
Before attempting any fixes, determine exactly what’s causing your kitchen sink drain not working. Testing both sides of a double sink reveals whether the problem affects one basin or your entire system. If only one side backs up, focus on that specific drain assembly. When both sides fail simultaneously, the blockage likely exists in the shared main drain line.
Listen carefully for gurgling sounds when water tries to drain—this indicates venting issues rather than simple clogs. Improper air flow through vent pipes creates suction that pulls water unevenly through your drain system. This problem requires different solutions than physical blockages and often needs professional assessment.
Check if water drains slowly or not at all. A completely stopped sink suggests a solid blockage near the drain opening or in the P-trap, while slow drainage points to partial clogging further down the line. This distinction determines which unclogging method will work fastest for your specific situation.
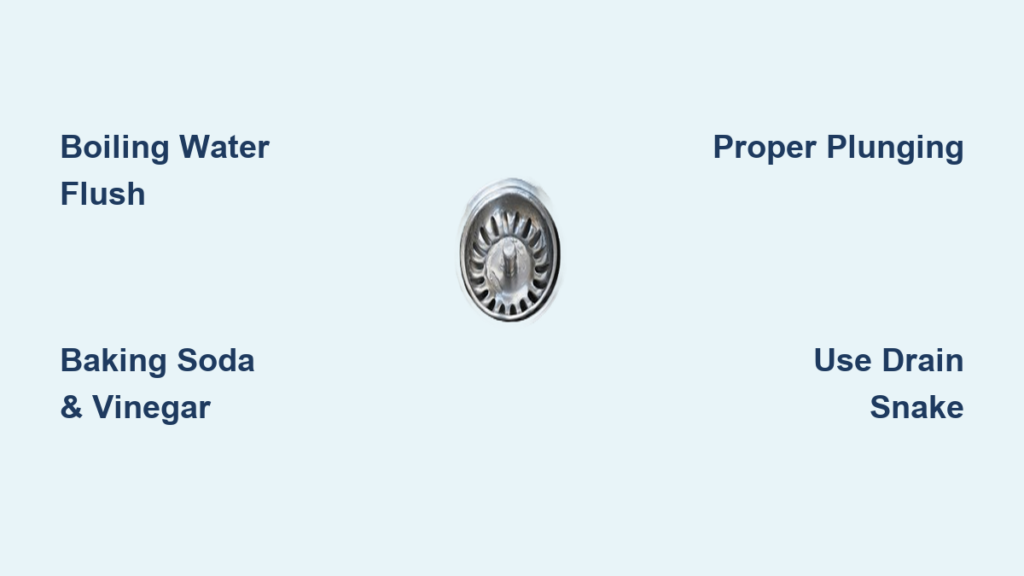
Three DIY Methods That Clear 90% of Kitchen Sink Clogs
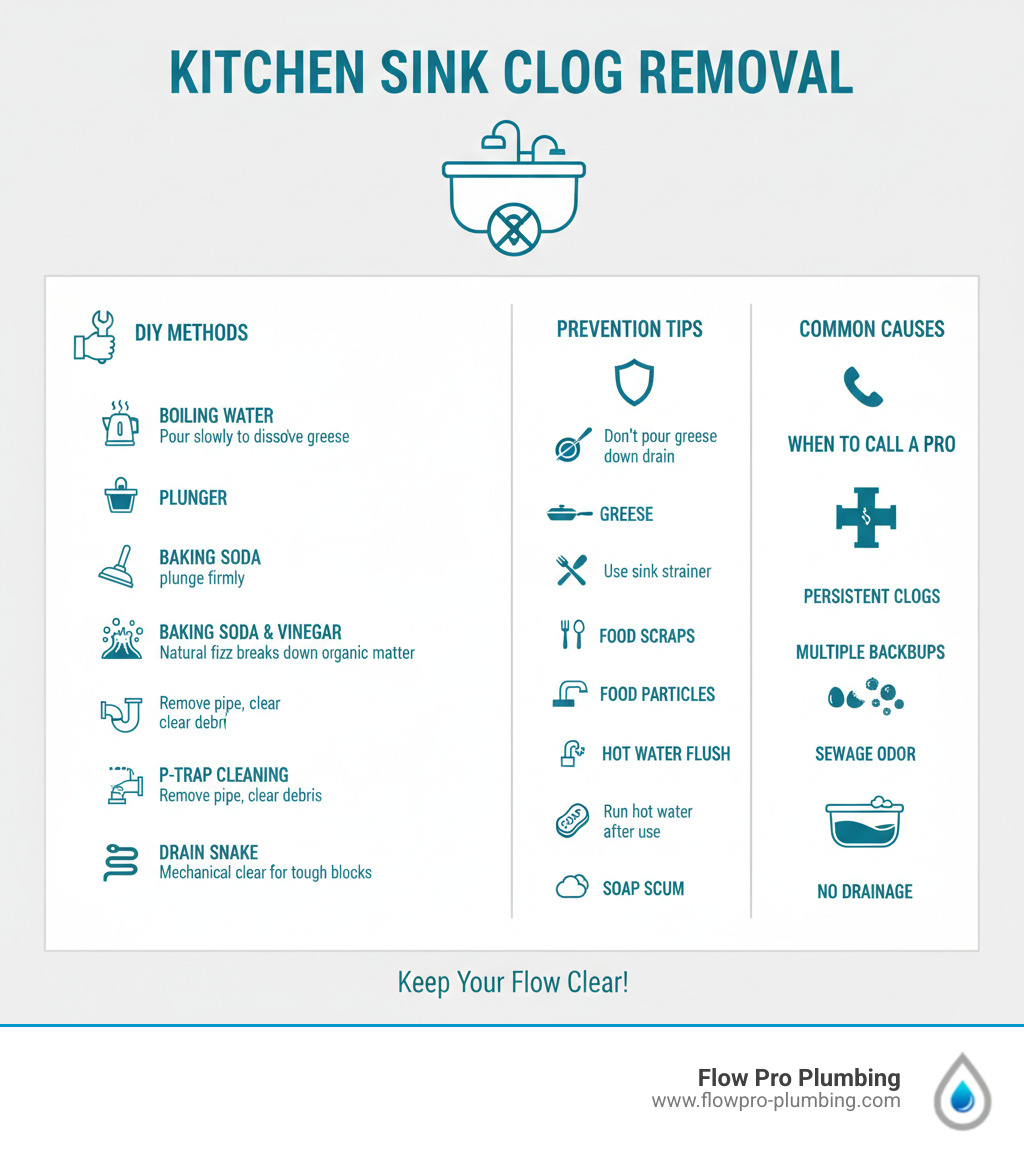
Clear Grease Clogs with Boiling Water (When Safe)
Boiling water dissolves accumulated grease when poured correctly down your kitchen sink drain. Fill a kettle with water and bring to a rolling boil. Carefully pour half the kettle down the drain, wait 15 seconds, then pour the remainder. The heat melts grease deposits, allowing them to flow further down the pipe. For PVC pipes, use very hot tap water instead of boiling to prevent potential damage to plastic joints.
Unclog with Baking Soda and Vinegar Reaction
This natural drain cleaner tackles organic buildup without harsh chemicals. Pour one cup of baking soda directly into the drain, followed by one cup of white vinegar. Immediately cover the drain opening with a wet cloth to contain the fizzing reaction inside your pipes. Wait 20 minutes while the bubbling action breaks down clogs, then flush with hot water. The carbon dioxide bubbles created during the reaction help dislodge stubborn debris while the mild acid solution dissolves soap scum.
Force Out Clogs Using Proper Plunging Technique
Most people plunge kitchen sinks incorrectly. Fill the basin with enough water to cover the plunger cup, then position the plunger directly over the drain. For double sinks, stuff a wet rag into the unaffected drain first. Press down firmly to create a tight seal, then pump vigorously for 20 seconds. The pressure changes dislodge clogs by forcing water through the obstruction. Remove the plunger and check drainage—repeat if necessary before flushing with hot water.
When to Grab a Drain Snake for Stubborn Blockages
If plunging and natural cleaners fail within 15 minutes, your clog has likely hardened beyond simple remedies. A hand-crank drain snake (available for $15-$30 at hardware stores) reaches blockages 15-25 feet into your pipes. Feed the cable slowly into the drain while turning the crank clockwise. When you hit resistance, continue rotating to break through the clog or hook the debris. Pull the cable back slowly, cleaning the auger head as you remove it.
For double sinks with shared drains, snakes often retrieve the problematic debris near the junction point. If your snake encounters consistent resistance at the same spot, you may have a pipe bend or joint issue rather than a simple clog—time to consider professional help.
Fix Garbage Disposal Drainage Failures in Minutes

When your kitchen sink drain not working involves a garbage disposal, check these common failure points first. Press the red reset button on the disposal’s bottom if the unit hums but doesn’t grind. Turn off power at the circuit breaker, then use a broom handle to manually rotate the impeller blades before resetting.
Remove the drain hose from the disposal outlet and inspect for food buildup where it connects to the sink drain tee. Food debris accumulates at these junctions, restricting flow even when the disposal runs properly. Shine a flashlight into the disposal chamber (with power off) to check for foreign objects causing jams.
Warning Signs Your Drain Problem Needs Professional Help
Multiple drains backing up simultaneously indicates a main sewer line clog rather than a single fixture issue. If water rises in your shower when running the kitchen sink, or toilets gurgle when using the dishwasher, you need immediate professional attention. Sewer odors that persist after running water through all drains also signal serious venting or main line problems.
Recurring clogs in the same sink despite regular cleaning suggest structural pipe issues. Cracks, misaligned joints, or root intrusion create spots where debris accumulates repeatedly. A plumber’s camera inspection (typically $150-$300) reveals these hidden problems before they cause major damage.
Prevent Future Drain Failures with These Daily Habits
Install a fine-mesh drain strainer and empty it after every use—this single habit prevents 80% of kitchen sink clogs. Never pour cooking grease down the drain; instead, wipe greasy pans with paper towels and discard oil in sealed containers. Run hot water for 30 seconds after each sink use to flush particles through the system.
Schedule monthly maintenance by pouring half a cup of baking soda followed by vinegar down your drain. Let it sit for 15 minutes before flushing with hot water. For garbage disposal owners, grind citrus peels weekly to freshen the unit and break down grease buildup.
Cost Comparison: DIY vs. Professional Drain Solutions
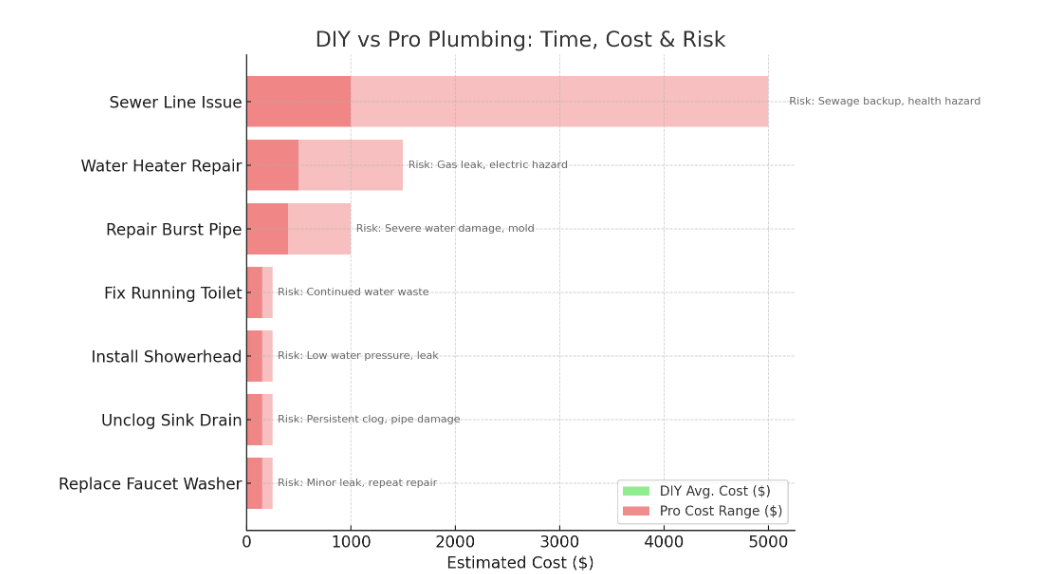
DIY methods cost almost nothing when using household items you already own. A plunger ($10), hand auger ($25), and baking soda/vinegar treatments provide effective solutions for most common clogs. These tools pay for themselves after one avoided plumber visit.
Professional drain cleaning typically costs $150-$350 for standard clogs. Hydro jetting for severe grease buildup runs $300-$600 but provides longer-lasting results than traditional snaking. Camera inspections add $100-$300 but help identify hidden problems before they become expensive emergencies.
When weighing costs, consider that repeated DIY attempts on stubborn clogs can sometimes worsen the problem. If basic methods fail within 30 minutes, professional help often proves more cost-effective than continued DIY efforts that risk damaging pipes.
Get Your Kitchen Sink Draining Properly Again Today
When your kitchen sink drain not working disrupts your routine, start with the simplest solutions first. Most clogs yield to proper plunging technique or a baking soda and vinegar treatment within minutes. For grease-related blockages, hot water flushes often provide immediate relief. If these methods fail within 15-20 minutes, move to mechanical solutions like drain snakes before considering professional help.
Recognize warning signs that indicate bigger problems—multiple fixtures backing up, sewer odors, or recurring clogs despite regular maintenance. These symptoms require professional assessment to prevent costly water damage. Implement daily prevention habits to keep your kitchen sink draining smoothly for years, saving you time, money, and the frustration of constant clog emergencies. With these proven methods, you’ll transform from helpless homeowner to drain problem-solving expert.


