Have you noticed your refrigerator wobbling or liquids pooling in odd spots on your kitchen floor? An unlevel kitchen floor isn’t just annoying—it can damage appliances, create tripping hazards, and even affect cabinet installation. When your kitchen floor isn’t level, everyday tasks become frustrating as dishes slide, cabinets won’t sit flush, and water collects in low spots during spills. This common household issue affects homeowners across all types of properties, from historic homes with settling foundations to newer constructions with subfloor installation errors. In this guide, you’ll discover how to accurately diagnose why your kitchen floor isn’t level, determine whether you can fix it yourself, and implement the right solution for your specific situation—whether that means simple shimming or more extensive subfloor work.
Identifying Your Specific Leveling Problem
Before attempting any repairs, you need to pinpoint exactly what’s causing your kitchen floor not level issue. The approach differs significantly depending on whether you’re dealing with a slight slope affecting a small area or a major dip spanning the entire room.
How to Accurately Measure Floor Unevenness
Grab a 4-6 foot level, a tape measure, and a notepad to document your findings. Start by placing the level on the floor in multiple directions across the kitchen. Where gaps appear between the floor and level, measure the distance with your tape measure. For more precise readings in larger areas, create a string level system by securing a string tautly across the room at floor height and measuring the gap at various points. Focus particularly on areas where you notice visible issues—under appliances, along walls, or near doorways. Document measurements in a simple grid pattern of your kitchen layout.
Is Your Flooring or Subfloor the Culprit?
Determining whether your surface flooring or underlying subfloor causes the unevenness is critical before proceeding. Remove a small section of baseboard molding to inspect the edge where flooring meets the wall. If the flooring appears to follow the contour of the subfloor beneath it, the problem originates below your finished surface. For tile floors, check grout lines—consistent gaps suggest the tile was properly installed over an uneven base. In hardwood floors, look for patterns in gaps between boards that might indicate underlying issues. Vinyl and laminate flooring often telegraph subfloor imperfections more obviously.
Immediate Fixes for Minor Leveling Issues
Not all uneven kitchen floor problems require major reconstruction. Many common issues can be addressed with simple, cost-effective solutions that deliver immediate improvements to functionality.
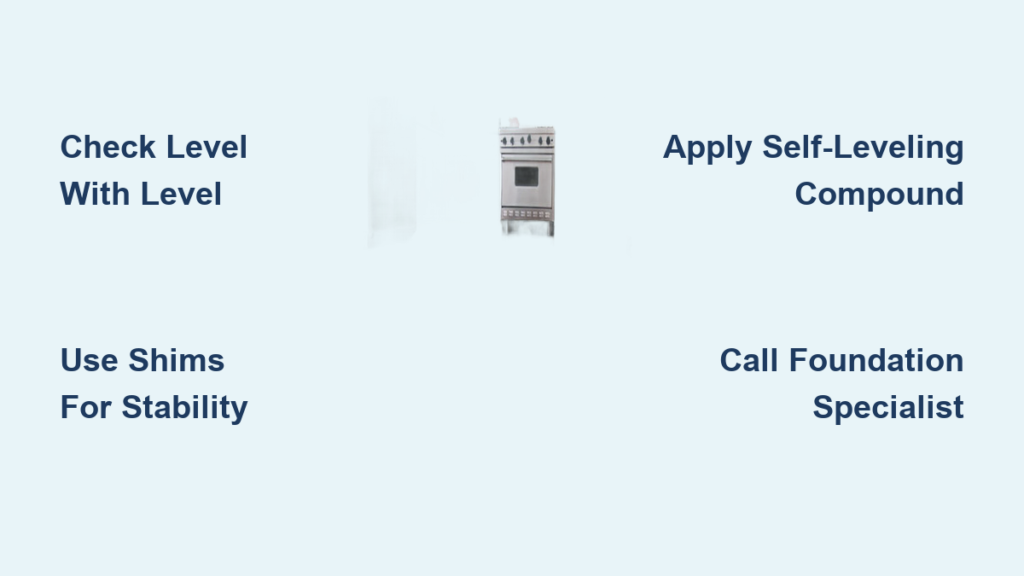
Stabilizing Wobbly Appliances with Adjustable Feet

Most major kitchen appliances come with adjustable leveling feet that can compensate for minor floor irregularities. For refrigerators, ovens, and dishwashers, locate the front leveling legs (usually at the bottom corners) and use a wrench to raise or lower them until the appliance sits firmly without rocking. After adjusting, place a small level on top of the appliance to verify it’s properly positioned. Remember to check both front-to-back and side-to-side stability. This simple fix often resolves 80% of appliance wobble issues caused by slightly uneven floors.
Using Shims for Cabinet and Countertop Stability
When cabinets rock or countertops slope noticeably, strategic shimming provides an effective solution. For base cabinets, remove the kickplate and insert tapered wood shims between the cabinet base and floor at precise points to eliminate movement. Start with the cabinet farthest from the doorway and work systematically through the installation. For countertops, small adhesive-backed felt pads under the lowest corners can create immediate stability. Always check level in multiple directions after shimming—your goal is stable cabinets, not perfectly level ones, as this accommodates natural floor variations.
When Your Kitchen Floor Not Level Problem Requires Subfloor Repair
Significant dips, slopes exceeding 1/4 inch per foot, or widespread unevenness typically indicate subfloor issues that demand more comprehensive solutions than surface-level fixes.
Self-Leveling Compound Application Process
For moderate imperfections between 1/8 and 1 inch deep, self-leveling concrete compound often provides the most efficient solution. Begin by thoroughly cleaning the subfloor and repairing any damaged areas. Apply bonding primer according to manufacturer instructions, then mix the compound to a pourable consistency. Starting from the highest point in the room, pour the mixture and let it flow naturally toward lower areas. Use a trowel to guide the material into problem spots without overworking it. Work quickly as most compounds set within 20-30 minutes. Allow proper curing time (typically 24-72 hours) before installing new flooring.
Plywood Underlayment for Major Dips and Slopes
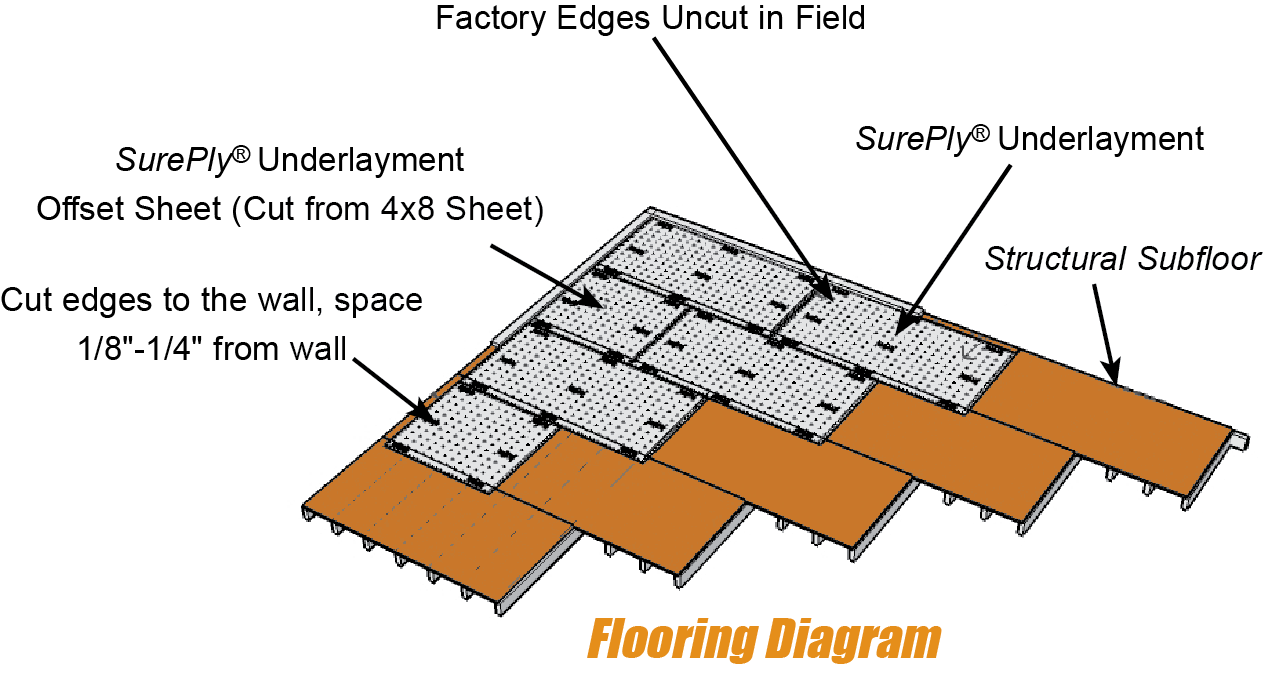
When facing significant unevenness exceeding 1 inch or structural subfloor damage, adding new plywood underlayment creates a stable foundation. First, locate the high point of your floor using a long level or laser level. Measure down from this high point to establish your new level plane. Cut 1/4-1/2 inch plywood to fit problem areas, starting from the high point and working toward low spots. Secure with ring-shank subfloor screws every 6 inches along seams and 8 inches in field areas. Stagger seams between layers if using multiple sheets. This method requires removing existing flooring but creates a permanently level surface for new installations.
Professional Solutions for Severe Leveling Problems
Some kitchen floor not level issues stem from structural problems that require specialized equipment and expertise beyond DIY capabilities.
When to Call a Foundation Specialist
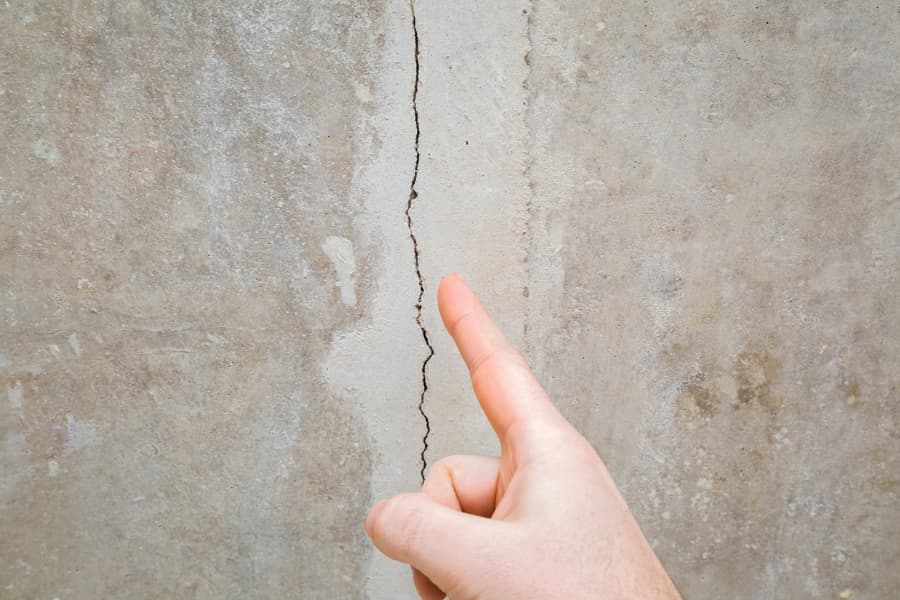
If your uneven kitchen floor accompanies other concerning symptoms like wall cracks, sticking doors, or visible foundation shifts, you likely have structural settlement issues. Foundation specialists use precision laser levels to assess the full scope of movement and determine whether hydraulic piers, slab jacking, or other structural interventions are necessary. Don’t attempt to address these problems with surface fixes alone—doing so might mask serious structural concerns that could worsen over time.
Cost Considerations for Major Repairs
Professional floor leveling costs vary significantly based on the solution required. Simple self-leveling compound applications might cost $2-5 per square foot, while structural foundation repairs can range from $1,500 to $10,000+ depending on severity. Get multiple quotes from licensed contractors who specialize in floor leveling, and ensure they provide detailed assessments showing exactly where and why leveling is needed. For most homeowners, investing in professional assessment for severe issues prevents costly mistakes from improper DIY attempts.
Preventing Future Leveling Problems
Once you’ve successfully addressed your current kitchen floor not level issue, implementing preventive measures protects your investment and avoids recurrence.
Proper Flooring Installation Techniques
When installing new flooring after leveling work, follow manufacturer specifications for underlayment and installation methods. For hardwood, maintain proper expansion gaps around the perimeter. With tile, use appropriate backer board and thinset application techniques. For vinyl and laminate, ensure the underlayment meets the product’s requirements for flatness. Rushing installation or skipping recommended underlayment often leads to premature failure, even on properly leveled subfloors.
Monitoring for Early Warning Signs
Establish a simple quarterly check to catch developing issues before they become major problems. Place a small level on your countertops and major appliances to verify stability. Watch for new gaps appearing between cabinets and walls, or changes in how doors swing. After heavy rainfall, check for new moisture issues that might indicate shifting. Early detection allows for simpler, less expensive interventions before significant damage occurs.
Final Note: An uneven kitchen floor doesn’t have to be a permanent headache. By accurately diagnosing whether your issue stems from minor surface irregularities or deeper structural problems, you can implement the right solution without overspending. Remember that some degree of floor variation is normal in most homes—focus on functional stability rather than absolute perfection. For minor issues, simple shimming and appliance adjustments often provide sufficient improvement, while more significant problems may require professional assessment to determine whether surface leveling or structural repairs are necessary. Regular monitoring helps catch developing issues early, saving you time and money on future repairs.