
Your kitchen table bears the brunt of daily family life—hosting meals, homework sessions, and impromptu gatherings. As one of the most frequently touched surfaces in your home, it becomes a breeding ground for bacteria, viruses, and other harmful pathogens. Learning how to disinfect kitchen table surfaces properly isn’t just about cleanliness—it’s essential protection against illness transmission within your household. This guide delivers actionable steps to transform your kitchen table from a germ reservoir into a hygienic surface that keeps your family safe.
Unlike simple cleaning that removes visible dirt, proper disinfection kills harmful microorganisms that can make you sick. Whether you’re dealing with everyday germs, caring for someone who’s ill, or preparing food after handling raw ingredients, mastering kitchen table disinfection protects your most vulnerable family members. You’ll discover when to disinfect, which products work best for your table material, and how to avoid common mistakes that render your efforts ineffective.
Why Your Kitchen Table Needs Proper Disinfection
Kitchen tables accumulate germs from countless sources throughout the day. Family members transfer bacteria from hands that have touched door handles, phones, and other contaminated surfaces. Food preparation, especially with raw meat or poultry, introduces dangerous pathogens like Salmonella and E. coli. Even casual activities like sorting mail or doing homework deposit respiratory droplets that can survive on surfaces for days.
Understanding the critical difference between cleaning and disinfecting forms the foundation of effective kitchen hygiene. Cleaning removes visible dirt and some germs through soap and water, but doesn’t necessarily kill all microorganisms. Disinfecting, however, destroys 99.9% of bacteria and viruses on surfaces when done correctly. The sequence matters profoundly—you must always clean before disinfecting because food residue and organic matter create protective barriers that prevent disinfectants from reaching germs.
When to Prioritize Disinfecting Over Regular Cleaning
Your kitchen table needs disinfection in three critical scenarios: when someone in your household is sick, after preparing raw meat or poultry, and during seasonal illness outbreaks. During cold and flu season, disinfecting twice weekly prevents germ transmission through shared surfaces. If a family member has a weakened immune system due to medical treatment or conditions like HIV, daily disinfection becomes essential protection against opportunistic infections.
After preparing meals involving raw ingredients, your kitchen table requires immediate disinfection even if you used cutting boards. Juices from raw meat frequently splatter beyond the immediate prep area, contaminating surrounding surfaces. The Centers for Disease Control and Prevention specifically recommends disinfecting any surface that contacts raw meat juices to prevent foodborne illness outbreaks in your home.
Gather the Right Disinfection Supplies

Before tackling how to disinfect kitchen table surfaces, assemble the proper materials to ensure effective results without damaging your furniture. Having everything ready prevents mid-process interruptions that compromise your technique and leaves your table vulnerable to lingering pathogens.
Selecting Effective Disinfecting Products
Choose EPA-registered disinfectants specifically formulated for kitchen surfaces, as these have been rigorously tested for effectiveness against common household pathogens. Check the label for surface compatibility—wood, laminate, and sealed surfaces require different formulations. Multi-surface disinfectants work well for most kitchen tables but always verify they’re safe for your specific material before application.
For households preferring homemade solutions, properly diluted bleach provides reliable disinfection. Mix one tablespoon of unscented household bleach (5-9% sodium hypochlorite) with one gallon of room-temperature water. Never use scented bleach or mix bleach with other cleaners—combining bleach and ammonia creates dangerous chloramine gas. Prepare fresh solutions daily as diluted bleach loses potency within 24 hours.
Essential Application Tools
Gather these tools before starting:
– Rubber gloves to protect your skin from chemical exposure
– Microfiber cloths that won’t scratch most table surfaces
– Spray bottle for even disinfectant distribution
– Clean paper towels for final wiping (if required)
– Safety goggles when using bleach solutions
For wooden tables, avoid abrasive scrubbers that damage the finish. Instead, use soft cotton cloths that gently clean without compromising the protective sealant. Keep all supplies in a designated kitchen caddy for quick access when disinfection moments arise.
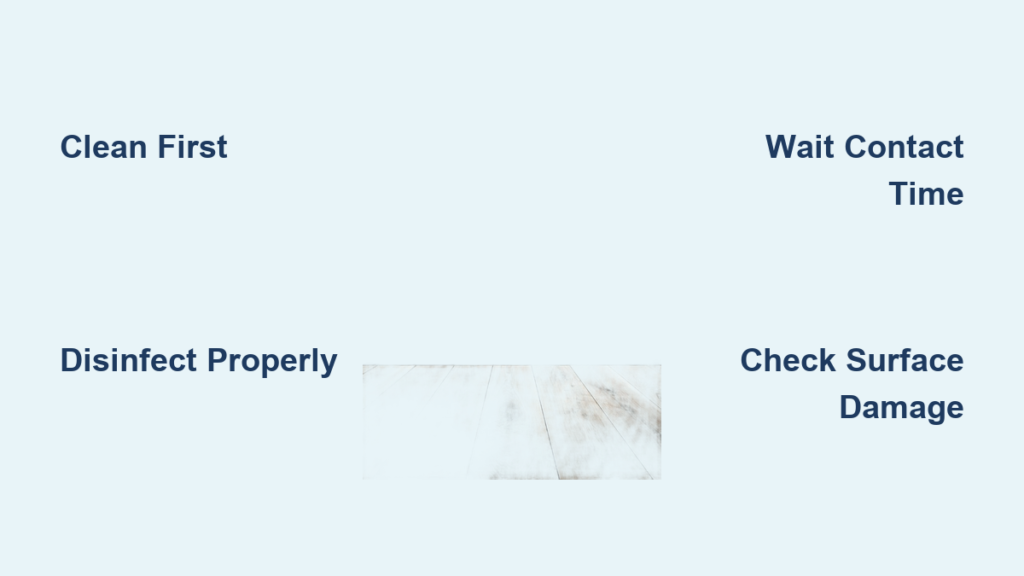
Execute the Two-Step Disinfection Process Correctly
The most common mistake people make when trying to disinfect kitchen tables is skipping the cleaning step. Proper disinfection requires this critical two-step sequence to eliminate both visible debris and invisible pathogens.
Step 1: Thorough Cleaning Before Disinfection
Remove all items from your table—dishes, placemats, condiments, and decorative objects. Apply hot, soapy water with a sponge or cloth, scrubbing the entire surface with special attention to sticky spots and food residue. Warm water works better than cold for breaking down grease and organic matter that shield germs.
Rinse thoroughly with clean water to remove soap residue, then dry completely with a clean towel. This drying step is crucial—excess moisture dilutes your disinfectant below effective concentrations. A properly cleaned surface should feel smooth and free of any residue before you apply disinfectant.
Step 2: Precise Disinfectant Application and Contact Time
Spray or wipe your chosen disinfectant evenly across the entire surface, ensuring complete coverage without oversaturation. The critical factor many miss is maintaining adequate contact time—the period the surface must remain visibly wet for the disinfectant to kill germs. Most household disinfectants require 3-10 minutes of wet contact time.
Set a timer to ensure you don’t wipe too soon. If the surface starts drying before the contact time ends, reapply more disinfectant. Never spray and immediately wipe—this common error renders disinfection ineffective. After contact time, rinse with clean water if using bleach or products requiring rinsing, especially on food-contact surfaces.
Avoid These Common Disinfection Mistakes
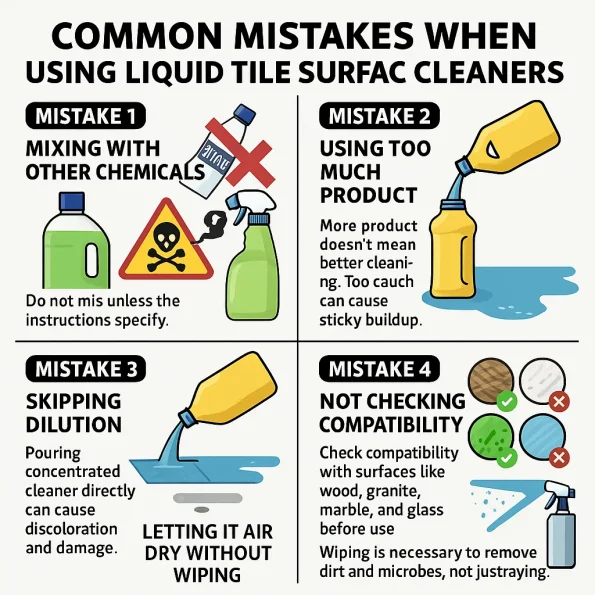
Even with the right products, improper technique leaves your kitchen table contaminated. Recognizing and avoiding these errors ensures your disinfection efforts actually protect your family.
Insufficient Contact Time
The most prevalent mistake is not allowing disinfectants to remain wet on the surface long enough. Spraying disinfectant and immediately wiping it away kills only surface germs while leaving pathogens intact beneath residue. Always follow the product’s specified contact time—typically 3-10 minutes for household disinfectants.
Improper Dilution Ratios
Too much water dilutes active ingredients below effective levels, while too little risks surface damage. Measure bleach solutions precisely—one tablespoon per gallon of water for general disinfection. Store-bought disinfectants should be used as-is unless the label specifies dilution. When in doubt, consult the EPA’s List N for approved disinfectants and their proper usage instructions.
Establish a Sustainable Disinfection Routine
Consistent kitchen table disinfection becomes effortless when integrated into your existing cleaning habits. Create a schedule that fits your household’s needs without becoming burdensome.
Create Your Disinfection Schedule
For most households, disinfecting your kitchen table two to three times weekly provides adequate protection during normal circumstances. Increase frequency to daily during illness outbreaks or when someone in your home has a weakened immune system. Always disinfect immediately after preparing raw meats or when someone in your household is sick.
Pair disinfection with existing habits—disinfect your table after evening cleanup or before weekend meal prep. Keep supplies visible but safely stored to encourage consistent use. Documenting your disinfection routine helps identify patterns during illness outbreaks and ensures no critical sessions are missed.
Monitor Your Table’s Condition
Regularly inspect your kitchen table for signs of damage that compromise disinfection effectiveness. Cracks, chips, or worn finishes create germ-harboring crevices that resist standard cleaning. Wooden tables with damaged sealants absorb liquids rather than allowing disinfectants to remain on the surface where they can kill germs.
Refinish wooden tables every 1-2 years to maintain their disinfection-friendly surface. For laminate or sealed tables, check for scratches that could harbor bacteria. A well-maintained table surface ensures your disinfection efforts actually reach the pathogens you’re targeting.
Alternative Disinfection Methods for Sensitive Households

Some households require chemical-free options due to asthma, chemical sensitivities, or personal preference. While these alternatives may not be as effective against all pathogens, they provide viable options for routine maintenance.
Steam Cleaning for Chemical-Free Disinfection
High-temperature steam cleaners (200-300°F) kill most common bacteria and viruses without chemicals. Move the steam nozzle slowly across the surface, maintaining direct contact for at least 30 seconds per area. This method works best on hard, non-porous surfaces and should be used cautiously on wood to prevent moisture damage.
Vinegar and Hydrogen Peroxide Solutions
While not EPA-registered disinfectants, 3% hydrogen peroxide and white vinegar offer some antimicrobial properties. Apply hydrogen peroxide, wait 5 minutes, then wipe. For vinegar, use full-strength solution and allow 30 minutes contact time. These work best for routine maintenance but shouldn’t replace proper disinfection during illness outbreaks.
Mastering how to disinfect kitchen table surfaces properly transforms this high-touch surface from a germ highway into a protected space for family connection. Remember the critical two-step process: clean thoroughly first, then apply disinfectant with adequate contact time. Your disinfection frequency should match household risk factors—increasing during illness or for vulnerable family members.
Always verify product compatibility with your table’s material to avoid damage while ensuring effectiveness. Document your routine to identify gaps during illness outbreaks, and inspect your table regularly for damage that compromises disinfection. Whether using EPA-registered products, properly diluted bleach, or alternative methods, consistency and proper technique deliver real protection.
By implementing these strategies, you’ll create a kitchen environment where shared meals and family moments happen on surfaces you can trust. The few extra minutes spent disinfecting properly now prevent days of illness later—making your kitchen table not just a gathering place, but a true sanctuary for your family’s health.


