
Did you know your kitchen compost bin could be the easiest solution to reducing household waste by nearly 30%? Learning how to use a kitchen compost bin properly transforms food scraps into garden gold while preventing methane emissions from landfills. This practical guide cuts through the confusion with specific, actionable steps for maintaining an odor-free system that fits seamlessly into your daily routine—whether you live in a studio apartment or a family home. You’ll discover exactly where to place your bin, what materials work best, and how to avoid the common mistakes that turn composting from eco-habit to frustrating chore.
Most people abandon composting because they encounter preventable problems: persistent odors, fruit fly invasions, or confusion about what belongs in the bin. But with the right setup and daily practices, your kitchen compost system should operate so smoothly you’ll barely notice it’s there. This guide reveals professional techniques for managing moisture levels, selecting ideal bin locations, and establishing habits that make composting automatic—not another task on your to-do list.
Select Your Perfect Kitchen Compost Bin Based on Space and Lifestyle
:max_bytes(150000):strip_icc()/sea-group-countertop-compost-bin-madeline-muzzi-02-01011966f171457d8899b6f02f9f6709.jpeg)
Choosing a compost bin that matches your kitchen layout and household habits determines whether composting becomes a lasting habit or another abandoned project. Countertop bins (1-2 gallons) work best for singles or couples who empty daily, while under-sink models (3-5 gallons) suit larger families needing less frequent emptying.
Stainless steel bins resist odors and clean easily but cost more than plastic alternatives. Ceramic options provide superior odor containment and blend with kitchen decor, while bamboo models appeal to eco-conscious users seeking sustainable materials. For hands-free operation during food prep, invest in a pedal-operated model that opens with your foot when your hands are covered in food residue.
Worm composting systems (vermicomposting) work well for apartment dwellers without outdoor space but require careful attention to feeding ratios and temperatures. Most beginners should start with a simple countertop bin before advancing to specialized systems.
Critical Bin Placement Factors You’re Probably Overlooking
Location makes or breaks your composting success—place your bin within arm’s reach of food prep areas but away from heat sources like ovens that accelerate decomposition. The sweet spot? Beside your sink or in the cabinet below, where you naturally scrape plates during cleanup.
Avoid positioning near garbage disposals to prevent confusion between systems. Maintain 2-3 inches of clearance around bins for airflow, especially in enclosed cabinet spaces where moisture buildup causes problems. Bins function best at normal kitchen temperatures (65-75°F)—never place them near drafty windows or exterior doors where temperature fluctuations disrupt decomposition.
Load Your Compost Bin Correctly: Avoid These Common Material Mistakes
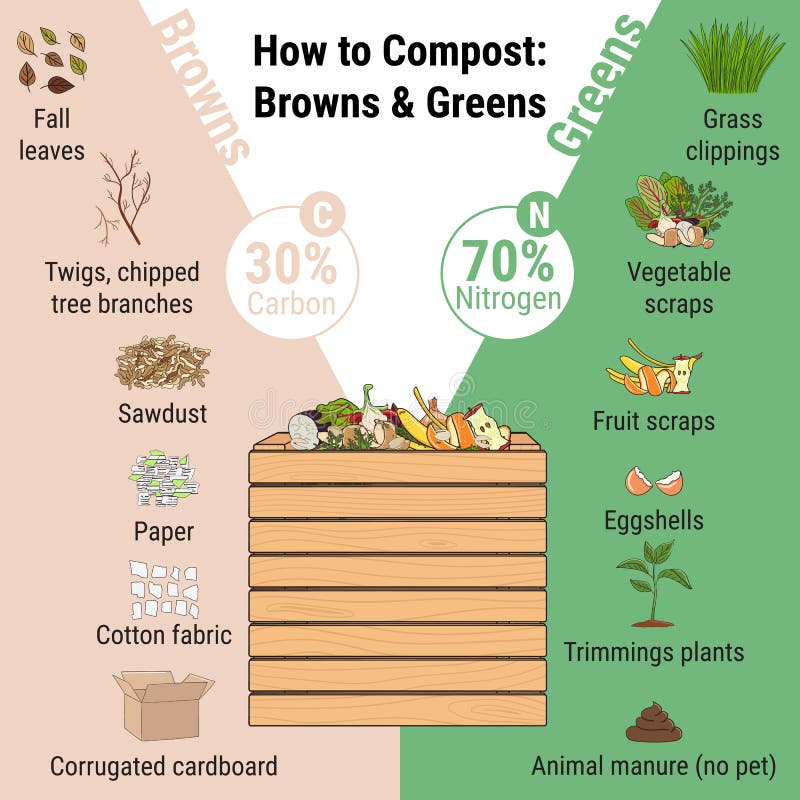
Nitrogen vs. Carbon Balance for Trouble-Free Decomposition
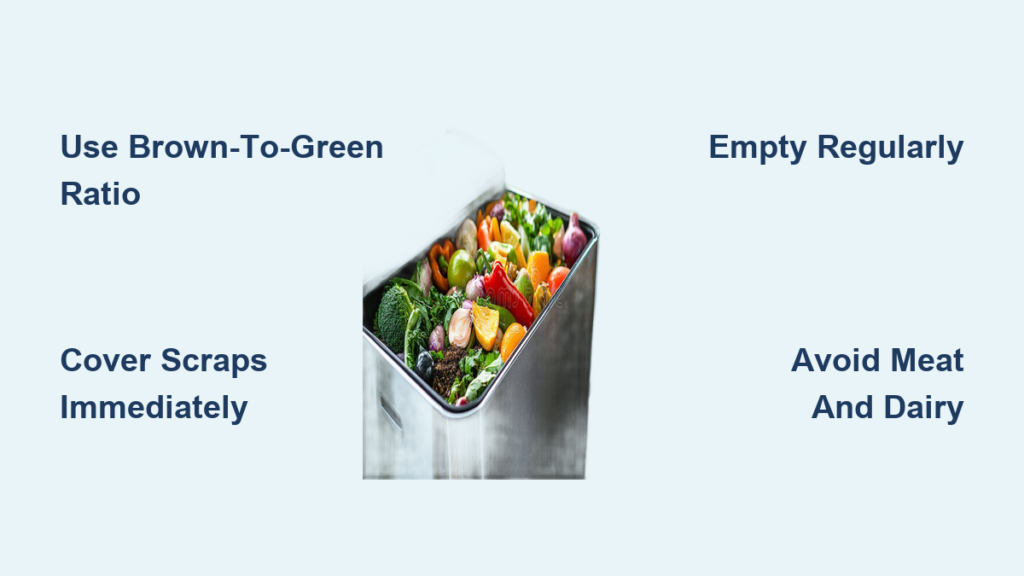
Most kitchen compost problems stem from improper material ratios. Follow the 3:1 brown-to-green rule: for every cup of food scraps (greens), add 3 cups of dry carbon materials like shredded newspaper, dry leaves, or paper towels. This balance prevents the soggy, smelly conditions that attract pests.
Green materials that work: Fruit/vegetable scraps, coffee grounds, crushed eggshells, small bread portions
Problem greens to limit: Citrus peels (attract pests in quantity), onions, garlic
Essential browns: Shredded newspaper (non-glossy), cardboard egg cartons, dried leaves
Materials That Absolutely Don’t Belong in Your Bin
Meat, fish, and dairy products cause immediate odor disasters in indoor bins—save these for outdoor compost systems only. Cooking oils and fats create persistent smells by coating other materials and preventing proper aeration. Pet waste carries pathogens that won’t break down at indoor compost temperatures, while plastic stickers and twist ties contaminate your entire batch.
Coffee filters and tea bags can be composted only if made from unbleached paper—many commercial tea bags contain plastic fibers that won’t decompose. When in doubt, leave it out; one contaminated batch can ruin months of effort.
Daily Compost Bin Management for Zero Odor Operation
The 10-Second Routine That Prevents 90% of Problems
Develop this simple habit: whenever adding food scraps, immediately cover them with a layer of brown material. Push scraps beneath existing contents rather than leaving them exposed at the top where they contact the lid. This single practice prevents 90% of odor and pest issues by maintaining aerobic conditions.
Empty countertop bins every 1-2 days (more often in summer), larger under-sink models every 2-4 days. Signs you’re waiting too long: liquid pooling at the bottom, persistent smells despite proper balance, or visible mold growth. Keep a backup container ready for days when your primary bin needs cleaning.
Moisture Control Tactics Professionals Use
Your compost should feel like a damp sponge—not dripping wet. If liquid accumulates, add crumpled newspaper or dry leaves to absorb excess moisture. For overly dry bins (rare in kitchens), lightly mist contents with water when adding scraps.
Check moisture levels during emptying: squeeze a handful of material—if water drips out, you need more browns; if it feels bone dry, add a few drops of water. Store shredded newspaper beside your bin for quick moisture adjustments during daily use.
Fix These 3 Most Common Compost Bin Problems Immediately
1. Persistent Sour or Rotten Smells
This indicates anaerobic decomposition from excess moisture or protein-rich materials. Empty the bin completely, rinse with vinegar solution (1 part vinegar to 3 parts water), and dry thoroughly. For future prevention, double your brown material ratio and never add meat/dairy to indoor bins.
2. Fruit Fly Infestations
These pests breed in fermenting fruit within 7 days. Empty and clean the bin with hot soapy water, then place a fruit fly trap (apple cider vinegar + dish soap) nearby for 48 hours. Prevent recurrence by freezing fruit scraps overnight before adding to the bin or covering all additions with paper.
3. Slow Decomposition in Collection Bin
Kitchen bins collect rather than actively compost, so some slowness is normal. If materials show no breakdown after 2 weeks, chop scraps smaller (1-2 inch pieces), increase kitchen temperature slightly, or add finished compost to introduce active microbes. Remember: indoor bins store materials for outdoor processing—they shouldn’t fully decompose inside.
Empty and Maintain Your Bin for Long-Term Success
Optimal Emptying Schedule by Season
Summer: Empty daily (decomposition accelerates in heat)
Winter: Every 2-3 days (slower breakdown in cooler temps)
Year-round: Never let bins exceed ¾ full to prevent spills during transport
Transfer kitchen scraps to outdoor compost within 1-2 days, burying them under 6-8 inches of browns to prevent pest attraction. In winter, store scraps in sealed containers until spring if outdoor piles freeze solid.
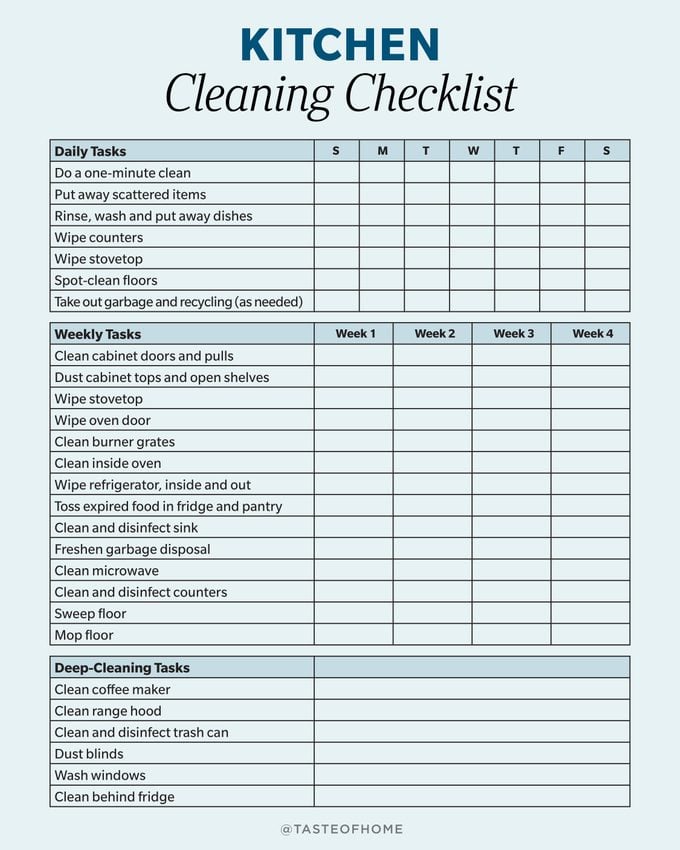
Weekly Maintenance Checklist
- Empty bin completely into outdoor system
- Rinse with hot water to remove loose debris
- Scrub with baking soda paste for stubborn residue
- Replace carbon filter if odors persist
- Dry thoroughly before reuse (prevents mold)
For deep cleaning, soak in vinegar solution for 30 minutes monthly. Stainless steel bins benefit from occasional lemon juice rub to remove stains and neutralize odors.
Transform Food Waste Into Garden Gold Year-Round
Kitchen composting reduces landfill methane emissions while creating free fertilizer that improves soil structure and water retention. A household composting just one pound of food scraps daily prevents approximately 0.5 metric tons of CO2-equivalent emissions annually—equivalent to driving 1,200 fewer miles per year.
Start with a simple countertop bin positioned near your sink, master the 3:1 brown-to-green ratio, and establish the habit of covering scraps immediately. Within weeks, composting will become as automatic as taking out the trash, with the added reward of watching your garden thrive on what was once considered waste. Every coffee ground, banana peel, and vegetable scrap diverted from landfills represents a small but meaningful victory for your local ecosystem and the planet.


