

Your garbage disposal suddenly stops working mid-cycle, leaving behind a foul odor that permeates your entire kitchen. You’re not alone—nearly 60% of homeowners experience garbage disposal issues within the first year of installation. When food particles, grease, and debris accumulate in hard-to-reach places, your disposal becomes a breeding ground for bacteria and unpleasant smells. Knowing how to clean kitchen garbage disposal properly can save you from costly repairs and keep your kitchen smelling fresh. In this guide, you’ll discover seven effective cleaning techniques, learn which methods to avoid, and get professional maintenance tips that extend your unit’s lifespan.
Why Your Garbage Disposal Smells Worse After Running
Most homeowners mistakenly believe running the disposal eliminates odors, but improper cleaning actually traps food particles deeper in the unit. When you grind food waste without proper cleaning afterward, organic matter gets lodged in the crevices around the impellers and housing. This creates the perfect environment for bacteria to thrive, producing hydrogen sulfide gas—the same compound responsible for rotten egg smells. The longer these particles remain, the more stubborn the odor becomes, eventually requiring more than just a quick rinse to eliminate.
Essential Safety Steps Before Cleaning Your Garbage Disposal
Disconnect Power at the Source
Never attempt to clean your garbage disposal while it’s connected to power. Locate the circuit breaker dedicated to your disposal unit and switch it off completely. For added safety, unplug the unit if it’s connected via a standard electrical cord beneath your sink. Test that power is disconnected by attempting to run the disposal with the switch—no sound should occur. This critical step prevents accidental activation that could cause serious injury to your hands or cleaning tools.
Verify No Objects Are Lodged in the Grinding Chamber
Before inserting any tools or cleaning implements, visually inspect the disposal chamber using a flashlight. Shine light directly into the unit to check for foreign objects like silverware, bottle caps, or large food chunks that could damage blades during operation. If you spot any obstructions, use needle-nose pliers (never your fingers) to carefully extract them. A blocked disposal creates excessive strain on the motor and prevents effective cleaning until the obstruction is cleared.
How to Clean Kitchen Garbage Disposal Using Ice Cubes and Rock Salt

The Ice Cube Method for Removing Built-Up Debris
Fill your disposal halfway with ice cubes and add ½ cup of coarse rock salt. Turn on a steady stream of cold water and activate the disposal. The ice cubes create a scouring action against the interior walls and impellers, dislodging stubborn food particles and grease buildup. The rock salt acts as a mild abrasive that scrubs away residue without damaging metal components. Continue running until all ice has processed (approximately 30-45 seconds), then flush with additional cold water for 15 seconds to clear debris from the drainpipe.
Why This Method Works Better Than Vinegar Alone
While vinegar is popular for odor elimination, it lacks the mechanical action needed to remove physical buildup. The ice cube method physically scrapes away accumulated gunk that vinegar solutions can’t reach. Vinegar only addresses surface odors without removing the source of the problem—the decomposing food particles trapped in crevices. For best results, follow the ice cube treatment with a vinegar rinse to neutralize any remaining odors.
Baking Soda and Vinegar Deep Cleaning Technique
Proper Application for Maximum Effectiveness
Pour ¼ cup of baking soda directly into the disposal chamber, followed by 1 cup of white vinegar. The chemical reaction creates a foaming action that penetrates hard-to-reach areas. Allow the mixture to bubble and work for 5-7 minutes—this gives the solution time to break down grease and organic matter. Never cover the drain during this process, as trapped gas could create pressure buildup. After the reaction subsides, flush with hot water for 30 seconds to clear the drain line completely.
Common Mistake That Reduces Effectiveness
Many homeowners pour vinegar first, then baking soda, which causes an immediate violent reaction that mostly occurs in the sink basin rather than inside the disposal. For optimal results, always add baking soda first, letting it settle in the chamber before introducing vinegar. This ensures the foaming action happens where it’s needed most—in the grinding chamber and upper drainpipe.
Citrus Peel Refreshing Method for Odor Elimination
Using Lemon and Orange Peels Correctly
Cut citrus fruits into small wedges that can safely pass through the disposal. Run cold water before activating the unit, then feed 2-3 lemon or orange peels into the disposal. The citrus oils naturally neutralize odors while the fibrous texture scrubs away residue. Continue running for 15-20 seconds after the last peel disappears. For enhanced results, freeze citrus peels beforehand—the frozen texture provides additional scrubbing action against buildup.
Which Citrus Varieties Work Best
Lemons provide the strongest deodorizing effect due to their high citric acid content, while oranges leave a sweeter residual scent. Grapefruit works well but may leave bitter traces, and limes offer a middle ground between lemon and orange. Avoid using thick-skinned citrus like pomelos, as their tough rinds can damage disposal components or cause jams.
Commercial Cleaner Options Worth Using
Enzyme-Based Cleaners vs. Chemical Alternatives
Enzyme cleaners work gradually by breaking down organic matter through natural biological processes. They’re safe for plumbing and effective for regular maintenance but require overnight treatment. Chemical cleaners provide immediate results but can damage pipes with frequent use. For severe clogs, choose oxygen-based cleaners that release bubbles to dislodge debris without harsh fumes. Always verify compatibility with your specific disposal model before purchasing commercial products.
When to Choose Professional-Grade Solutions
If home remedies fail after three consecutive attempts, consider professional-strength cleaners designed for commercial kitchens. These contain higher concentrations of active ingredients but require strict adherence to safety protocols. Never use drain snakes or augers in garbage disposals—they can damage internal components and void warranties. Instead, opt for disposal-specific cleaning tablets that dissolve slowly while targeting problem areas.
Monthly Maintenance Schedule to Prevent Buildup
Weekly Cleaning Routine for Odor Prevention
Run ice cubes through your disposal every Monday morning for 30 seconds with cold water. This simple habit prevents grease accumulation and keeps impellers sharp. Every fourth use, follow with citrus peels to maintain freshness. Monthly, perform the baking soda and vinegar treatment during your regular dishwasher cycle to coincide with hot water availability.
Seasonal Deep Cleaning Protocol
Every three months, disassemble removable components (if your model allows) and clean the splash guard thoroughly. Soak the rubber baffle in a vinegar solution for 20 minutes to remove stubborn stains. Inspect for rust or corrosion around the mounting assembly, which indicates potential leaks needing professional attention. This seasonal maintenance extends disposal life by up to 40% compared to units receiving only basic care.
What NOT to Put in Your Garbage Disposal
Fibrous Foods That Cause Permanent Damage
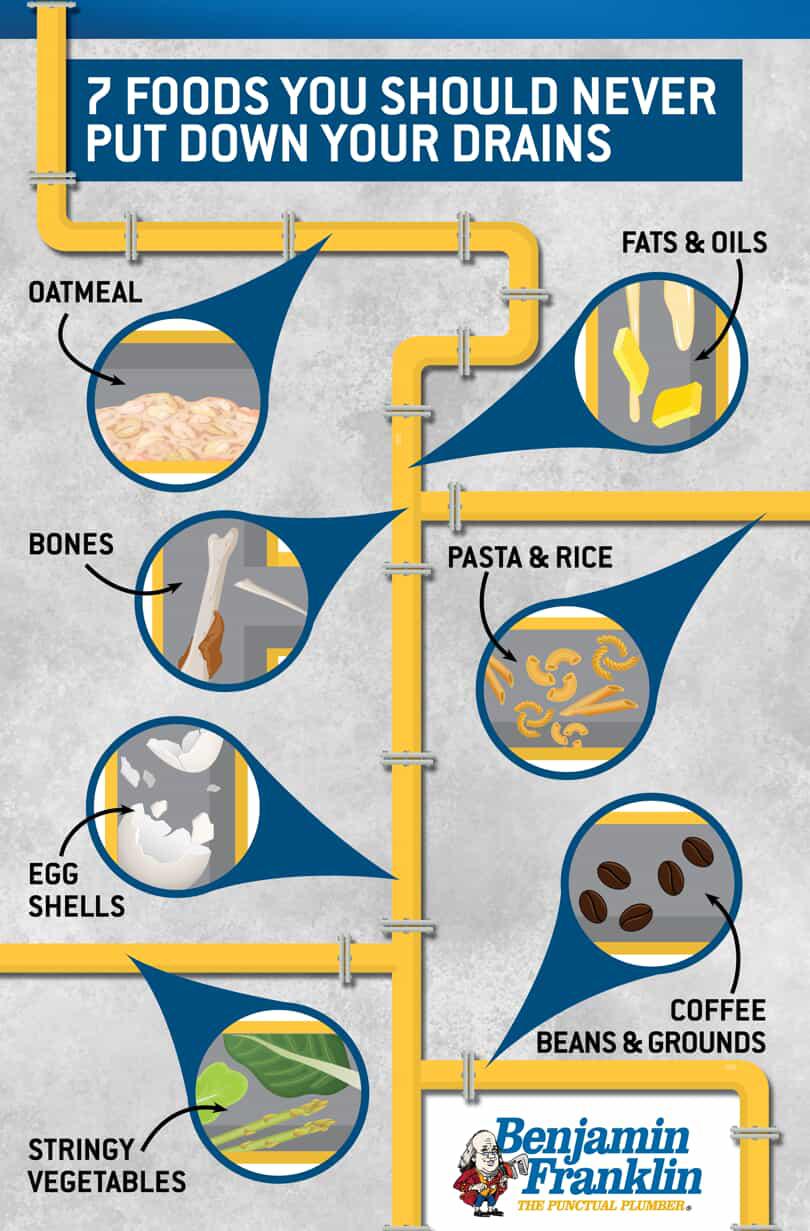
Celery stalks, onion skins, and artichoke leaves contain long fibers that wrap around impellers, causing jams and motor strain. Potato peels create a starchy paste that hardens in pipes, leading to clogs downstream. Avoid all fibrous vegetables entirely—these account for 35% of all disposal repairs according to plumbing industry data.
Grease and Oil That Create Solid Blockages
Never pour cooking grease, bacon fat, or oil down your disposal. These substances cool and solidify inside pipes, creating stubborn blockages that resist standard cleaning methods. Even small amounts accumulate over time, eventually requiring professional hydro-jetting to clear. Instead, collect grease in a container and dispose of it in the trash once solidified.
Troubleshooting Common Cleaning Problems
Persistent Odors After Multiple Cleaning Attempts
If smells linger after three cleaning sessions, the problem likely extends beyond the disposal unit into the drainpipe. Prepare a quart of boiling water mixed with ½ cup baking soda and slowly pour it down the drain. Let it sit for 15 minutes before flushing with cold water. For severe cases, remove the P-trap under your sink to clean the curved section where debris commonly accumulates.
Disposal Makes Grinding Noise But Doesn’t Process Waste
This indicates either a jammed impeller or worn grinding components. First, try the reset button on the unit’s bottom. If that fails, use an Allen wrench in the center hex socket to manually rotate the impellers. If the unit still doesn’t function properly after clearing jams, internal components may need replacement by a professional technician.
Regular maintenance prevents 90% of garbage disposal problems before they start. By implementing these cleaning methods monthly, you’ll avoid costly repairs and keep your kitchen smelling fresh. Remember to always run cold water during operation, never put fibrous foods or grease down the drain, and perform the ice cube treatment weekly for optimal performance. When in doubt about persistent issues, consult a plumbing professional rather than risking further damage with aggressive cleaning attempts. Your properly maintained garbage disposal should provide reliable service for 8-15 years with consistent care.


