
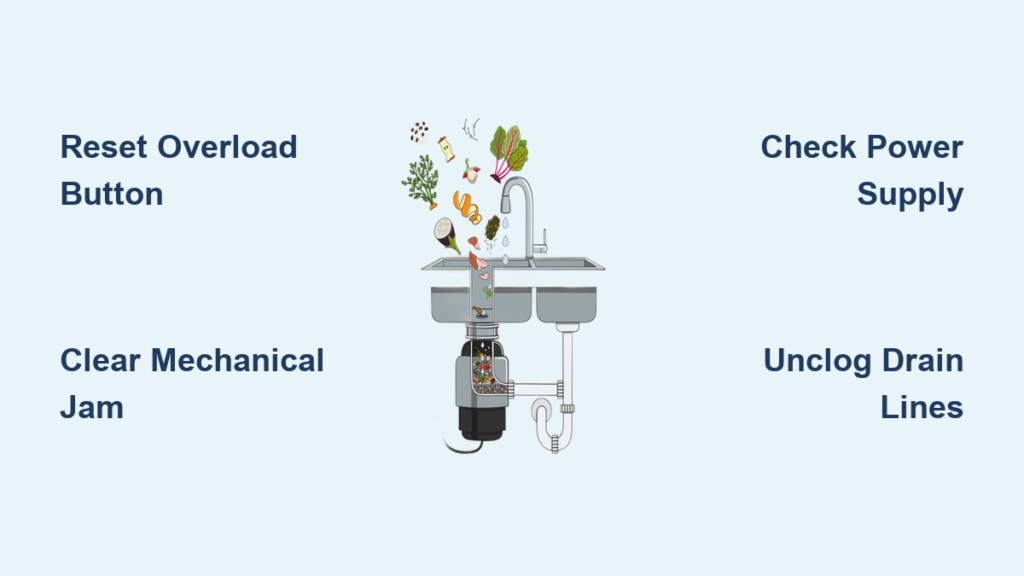
That sinking feeling when you flip the switch and nothing happens—your kitchen sink food disposal not working means food scraps pile up while your cooking routine grinds to a halt. When your disposal suddenly stops functioning, the problem typically falls into one of four categories: electrical issues, mechanical jams, drain clogs, or worn components. Most malfunctions can be diagnosed and fixed in under 30 minutes with basic tools you probably already own, saving you costly plumber visits for problems you can solve yourself.
Don’t panic when your disposal quits—this guide delivers precise troubleshooting steps to identify why your kitchen sink food disposal not working and get it running again. You’ll learn to interpret the sounds (or silence) your unit makes, safely clear jams, reset electrical faults, and determine when replacement becomes necessary. With these practical solutions, you’ll restore your kitchen’s workflow without professional help in most cases.
Diagnose the Exact Failure Mode by Listening Carefully

Your disposal’s behavior when activated provides critical diagnostic clues before you touch any tools. Different symptoms point to specific problems requiring distinct solutions—knowing what to listen for prevents wasted effort on incorrect repairs.
Why your disposal hums but won’t grind
A loud humming noise with no grinding action means power reaches the motor but mechanical rotation is blocked. Something has jammed the impeller against the shredding ring—typically utensils, glass shards, or fibrous food waste like celery stalks. The motor tries to turn but can’t overcome the obstruction, triggering the overload protector within seconds.
Complete silence when flipping the switch indicates no power reaches the motor. This could stem from a tripped circuit breaker, failed wall switch, damaged power cord, or internal electrical failure. Check your electrical panel first—many disposals share circuits with other kitchen appliances that may have overloaded the breaker.
Loud grinding or screeching sounds during operation signal either foreign objects in the grinding chamber or worn motor bearings. If these noises developed gradually, bearing wear is likely the culprit. Continuing to run the unit in this condition risks complete motor failure.
Standing water that won’t drain often gets mistaken for disposal failure. If the unit runs but water remains in the sink, the problem lies downstream in the P-trap or drain line rather than the disposal itself.
Reset the Overload Protector Immediately
The reset button serves as your first line of defense when your kitchen sink food disposal not working. This red or black button, located on the unit’s bottom or side, automatically trips when the motor overheats or draws excessive current—typically from jams or prolonged use.
Press the reset button firmly with your thumb until you feel a distinct click, indicating the overload protector has re-engaged. Don’t just tap it—apply steady pressure for 2-3 seconds. After resetting, wait 3 minutes before testing operation to allow the motor to cool fully.
If the reset button immediately pops out again when pressed, the overload protector remains engaged due to an unresolved issue. This persistent tripping means either a severe jam still binds the impeller, motor windings have failed, or an electrical short exists. Proceed to jam clearance before attempting another reset.
Clear Mechanical Jams in Under 10 Minutes
Jammed impellers cause most disposal failures and require immediate attention before attempting further operation. Never insert hands into the grinding chamber—even with power off—as accidental activation could cause severe injury.
First, disconnect power completely at the circuit breaker—don’t rely solely on the wall switch. Use tongs or pliers to remove any visible obstructions like utensils or large food particles through the sink opening.
Insert a disposal wrench (included with most units) or sturdy wooden broom handle into the hex socket on the unit’s bottom. Rotate the impeller back and forth firmly through a full 360-degree range. You’ll feel resistance as the impeller moves through bound material, followed by smoother rotation as the jam clears.
After freeing the impeller, remove all dislodged debris with tongs before resetting the unit. Test operation with cold water running—if the jam was the sole issue, normal grinding should resume immediately.
Test Electrical Components Systematically

Electrical faults require methodical diagnosis starting from the power source and working toward the disposal unit. Begin by verifying power at the outlet beneath your sink—plug in a working lamp or phone charger to confirm the outlet functions.
Check the wall switch next by removing its faceplate (with power still off at the breaker). Inspect for scorch marks or melted plastic indicating switch failure. Test continuity with a multimeter set to resistance mode—proper switches show zero resistance when activated and infinite resistance when off.
Inspect internal wiring connections by removing the access plate on the disposal’s bottom. Look for loose wire nuts, corroded terminals, or damaged insulation. All connections should be tight with matching wire colors connected (black to black, white to white, green to ground).
Examine the power cord thoroughly for cuts, fraying, or crushed sections. Damaged cords require replacement—never attempt field repairs on appliance power cords due to fire and shock hazards.
Unclog Drain Lines Without Chemicals
Even when your disposal runs perfectly, clogged drain lines prevent proper drainage and mimic disposal failure. The P-trap beneath your sink collects debris first—place a bucket underneath, unscrew both ends, and clean out accumulated grease and food particles before reassembling.
For clogs further down the line, use a plunger effectively by filling the sink with 3-4 inches of cold water. Create a tight seal over the drain and pump vigorously for 15-20 seconds to dislodge blockages with hydraulic pressure.
Employ a drain snake when plunging fails—insert through the disposal outlet (with power off) and rotate while advancing through the pipe. When you hit resistance, continue rotating to break up the clog, then retract the snake with debris attached.
Never use chemical drain cleaners near your disposal—they corrode internal components, damage seals, and create hazardous splatter risks during subsequent use. Mechanical clearing methods work safely without risking appliance damage.
Identify Worn Components Requiring Replacement
:max_bytes(150000):strip_icc()/gar_disp_expl_view-640-56a4a2d25f9b58b7d0d7effe.jpg)
Internal parts wear out over time and eventually need attention. Grinding or rumbling noises during operation indicate failing motor bearings—a sign your unit is nearing end-of-life. Continuing to operate with bad bearings accelerates damage and may require full replacement.
Leaks from the bottom of the unit typically mean failed seals between the motor housing and grinding chamber. Seal replacement requires complex disassembly often exceeding the value of units older than 5 years—complete replacement usually proves more economical.
Reduced grinding performance with frequent jams suggests dulling shredding components. While disposals lack true “sharpening” capability, monthly ice cube treatments help maintain cutting edges by scouring built-up residue from the impeller and ring.
Prevent Future Failures With Simple Maintenance
Run ice cubes monthly through your disposal with cold water for 30 seconds. The ice chips scour internal surfaces while solidifying grease for easier removal, keeping the grinding mechanism clear and odors at bay.
Freshen with citrus peels by dropping lemon, orange, or lime scraps into the running disposal. The natural oils break down grease while leaving a pleasant scent and providing mild lubrication to moving parts.
Avoid these disposal killers: Fibrous foods (celery, corn husks), hard items (bones, pits), grease/oil, and non-food objects. These cause 80% of preventable jams and component damage—dispose of them in the trash instead.
Always run cold water during operation and for 30 seconds after grinding. Cold water solidifies fats for better processing while hot water melts grease that later solidifies in pipes causing stubborn clogs.
Determine When Replacement Beats Repair
Consider new unit installation when repair costs exceed 50% of replacement value or when multiple components fail simultaneously. Units older than 10 years typically lack modern efficiency features and safety enhancements found in newer models.
Choose appropriate horsepower based on household size—1/2 to 3/4 HP suits most families while 1 HP+ models handle heavier workloads. Measure your under-sink space carefully to ensure proper fit for the replacement unit.
Opt for continuous feed models if you prefer adding food during operation, or batch feed systems for enhanced safety that require a cover before activation. Stainless steel grinding components justify higher initial costs through longer service life and corrosion resistance.
When your kitchen sink food disposal not working, systematic troubleshooting starting with simple resets and jam clearance resolves most issues within an hour. Understanding the sounds your unit makes, performing regular maintenance, and knowing disposal limitations prevents future breakdowns while extending service life. With these practical solutions, you’ll keep your kitchen functioning smoothly without unnecessary service calls—only calling professionals when true component failure occurs beyond DIY repair capabilities.


