
That rubber stopper you dropped down your kitchen sink has flipped upside down and won’t budge, trapping water while you’re trying to wash dishes. Learning how to remove drain stopper from kitchen sink doesn’t require calling a plumber—most stuck stoppers yield to simple DIY techniques using tools you already own. Whether your stopper is wedged tight from reversed insertion or clogged with food debris, this guide delivers the exact steps to extract it without damaging your sink.
Kitchen sink stoppers differ fundamentally from bathroom models—they’re typically removable rubber or silicone plugs rather than built-in mechanisms. When these simple stoppers invert and seal against the drain walls, they create a vacuum lock that resists manual removal. The good news? Most stuck kitchen sink stoppers can be freed in under 15 minutes using the right approach for your specific stopper type. This guide progresses from simplest to most involved methods so you can start with the quickest solution first.
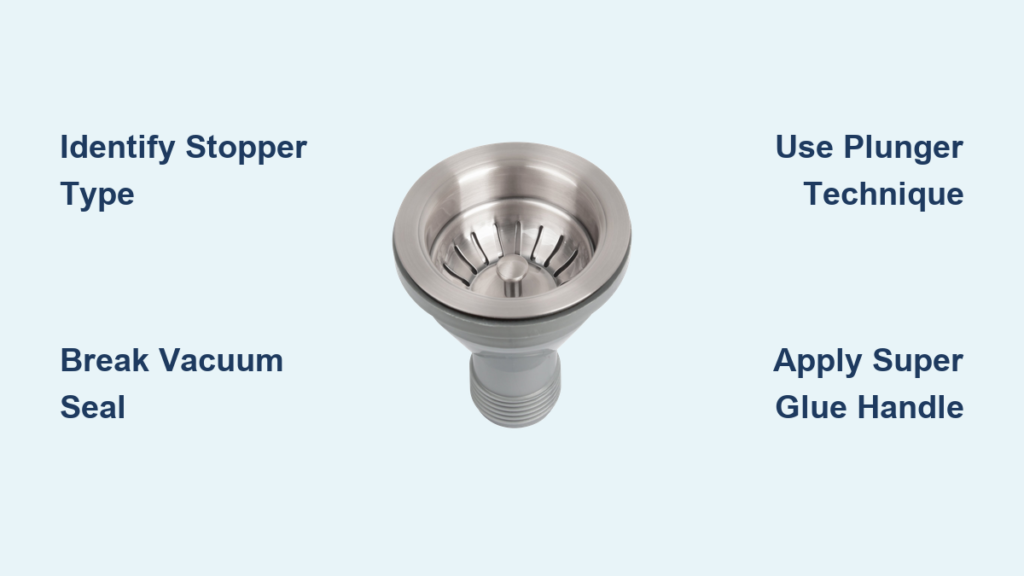
Identify Your Kitchen Sink Stopper Type Before Attempting Removal
Your removal strategy depends entirely on what type of stopper you’re dealing with. Most kitchen sinks use one of three stopper configurations, each requiring different extraction techniques.
Removable rubber or silicone stoppers are the most common type found in kitchen sinks. These flexible plugs press into the drain opening to hold water and lift out when you need drainage. When these stoppers flip upside down in the drain, they lose their grip point and create an airtight seal that resists manual extraction. The absence of handles means you must create artificial grip using household items.
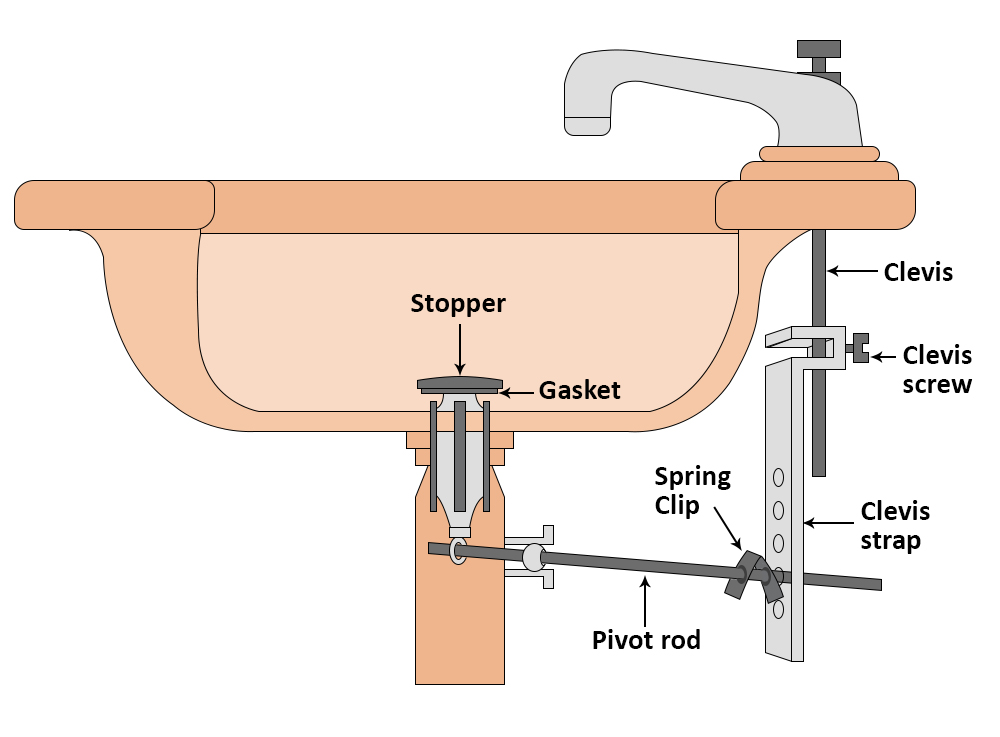
Pop-up stopper assemblies connect to a lever mechanism behind your faucet through a linkage system beneath the sink. While less common in kitchens than bathrooms, some modern sinks feature this design. These stoppers remain permanently installed but can be removed by disconnecting the under-sink linkage components.
Threaded stopper mechanisms function like a bolt screwed into the drain opening. The visible portion twists or presses to open and close the drain, while the threaded base remains secured within the drainpipe. These require unscrewing rather than pulling for removal.
How to Extract a Stuck Rubber Stopper Without Tools

When your removable kitchen sink stopper has inverted in the drain, creating grip becomes your primary challenge. These techniques require no special tools and work for most basic rubber stoppers.
Use Long-Nose Pliers for Maximum Leverage
Open the pliers wide enough to fit around the stopper’s edge or any central projection, then close firmly and pull upward with steady force. The narrow jaws of long-nose pliers can reach into tight spaces where standard pliers cannot fit. Position the jaws to grip any ridge or raised feature on the stopper for maximum holding power—this is critical when dealing with smooth rubber surfaces.
Pro tip: If the pliers slip, wrap rubber bands around the jaws for extra grip before attempting extraction again.
Employ Nail Clippers as an Emergency Grip Tool
Open ordinary household nail clippers and position the cutting edges around the rubber ridge on top of the stopper, essentially clamping onto it as if it were a fingernail. Press the handles together firmly while pulling upward—the spring tension creates surprisingly strong grip. This unlikely household item has successfully extracted stoppers that resisted other removal methods.
Break the Vacuum Seal with a Thin Knife
Carefully insert the spine (non-sharpened edge) of a butter knife along the stopper’s perimeter, working it around the full circumference to release vacuum pressure. Slide the blade between the stopper and drain wall without forcing it deeply to avoid scratching the sink surface. Once the seal breaks, the stopper typically lifts out with minimal effort.
Plunger Technique for Removing Sealed Kitchen Sink Stoppers
Creating differential pressure through vacuum mechanics generates substantial pulling force that often dislodges stubborn stoppers without direct grip.
Toilet Plunger Method for Maximum Extraction Power
Fill the sink with approximately one inch of water—this is essential because water is less compressible than air, allowing the plunger to create a stronger vacuum. Position the plunger’s rubber cup directly over the stuck stopper and press down firmly to create a seal. Critical technique: Instead of pushing down (which forces the stopper deeper), lift the handle upward after pressing. This pulling motion creates suction that draws the stopper upward. Repeat the lifting action several times if needed.
Why this works: The water creates an effective seal, and atmospheric pressure (about 14.7 psi) acting on a standard 3.5-inch drain creates over 140 pounds of pulling force when a proper vacuum forms.
Double Sink Water Pressure Technique
Fill the other basin of your double sink with water, then quickly pull the drain plug. The sudden release of water creates pressure waves through connected plumbing that can push the stuck stopper upward. This method works best when the drains connect directly without complex branching.
Super Glue Method for Impossible-to-Grip Stoppers
When physical grip fails and vacuum methods prove ineffective, adhesive techniques create instant handles for extraction.
Card and Super Glue Extraction Process
Apply a single drop of super glue to the corner of a note card and allow it to set for several seconds until tacky. Press the glued portion firmly onto the top surface of the stuck stopper and hold for thirty seconds. Once cured, lift the card directly upward—the stopper will follow due to the strong rubber-to-glue bond. Any minimal paper residue scrapes away easily after removal.
Warning: Use minimal glue to avoid permanent bonding—this technique should create a temporary handle, not a permanent fixture!
P-Trap Disconnection for Direct Access
Place a container beneath the sink, locate the P-trap assembly, and disconnect the retaining nuts connecting the pipe sections. Carefully lower the assembly to access the stopper from underneath, then push it upward and out. This method requires basic plumbing knowledge but provides direct access when other techniques fail.
Disassembling Pop-Up and Push-Button Kitchen Sink Stoppers
When your sink features built-in stopper mechanisms rather than removable plugs, specific disassembly procedures apply.
Pop-Up Stopper Removal Sequence
Locate the horizontal arm beneath the sink connected to the lift rod behind your faucet. This connects through a clevis secured by a retaining nut. Loosen this nut and disconnect the lift rod from the horizontal arm. With the linkage disconnected, the stopper lifts directly out. Before reassembly, clean all components and inspect for wear that might have contributed to binding.
Push-Button Stopper Extraction Steps
First pop the stopper into its fully open position by pressing and releasing the button. Then twist the button mechanism counterclockwise to unscrew it from its mount. The stopper should loosen enough to pull from the drain. Some designs require removing a retaining nut beneath the sink to fully free the component.
Threaded Stopper Removal Without Pipe Spinning
Lift the bottom portion of the mechanism while rotating the upper component counterclockwise to unscrew it. Crucial step: Hold the waste pipe beneath the sink to prevent it from spinning while you work on the upper portion. Grip the outer rim rather than side gaps for sufficient torque. If resistance occurs, mineral buildup around the threads may require vinegar soaking before extraction.
Troubleshooting Stubborn Stoppers That Resist Standard Methods
When basic techniques fail, these advanced approaches overcome resistance from severe binding or unusual obstructions.
Reapply Plunger Technique with Correct Motion
Many people instinctively push with a plunger, forcing the stopper deeper. Ensure you’re lifting the handle rather than pushing down, and maintain adequate water depth (about one inch) around the plunger’s base. The water depth is critical for maintaining the seal necessary for vacuum generation.
Complete Under-Sink Disassembly for Maximum Access
Clear workspace beneath the sink, then disconnect all linkage components to identify which specific part causes binding. Often, accumulated hair and soap residue create friction that prevents smooth operation. Cleaning all components during disassembly typically resolves these issues without replacement.
Penetrating Oil for Corroded Threaded Connections
For twist-and-pull stoppers that resist unscrewing, apply penetrating oil around the threaded connection and allow it to soak for fifteen to thirty minutes. The oil dissolves corrosion and mineral buildup that creates binding between threaded components, making removal possible without excessive force.
Prevent Future Drain Stopper Problems with Simple Maintenance
Regular care prevents the majority of stuck stopper situations and extends your stopper’s lifespan.
Monthly Cleaning Routine for Smooth Operation
Remove the stopper and under-sink linkage monthly to wash away accumulated debris. Soak components in white vinegar to dissolve mineral deposits, then scrub with an old toothbrush. This simple maintenance catches minor issues before they become major problems.
Strategic Lubrication of Moving Components
Apply plumber’s grease or silicone-based lubricant to threads and pivot points after cleaning. This creates a protective barrier against moisture and mineral deposits, significantly extending time between maintenance sessions and making future removal much easier.
Proper Stopper Usage Habits
Always insert stoppers right-side up with the flat sealing surface facing down, and remove them completely after use. Avoid placing stoppers in drains without proper seating, as partial insertion creates the conditions that lead to difficult removal situations.
Understanding these removal techniques puts you in control when your kitchen sink stopper gets stuck. Most problems resolve with simple manual extraction or basic vacuum methods—only rarely requiring complete disassembly. By identifying your stopper type first and progressing through these methods from simplest to most involved, you’ll successfully remove virtually any stuck kitchen sink drain stopper and restore proper function to your sink. Regular maintenance following these procedures will prevent 90% of future stopper problems before they develop.


