
Your kitchen sink won’t drain, you’ve grabbed the plunger, and after multiple frustrating attempts, the water just sits there. When your kitchen sink clogged and plunger not working situation has you stumped, you’re facing one of the most common yet perplexing household problems. Unlike toilet clogs that respond well to plunging, kitchen sink blockages resist standard techniques because they’re primarily composed of grease, food particles, and soap scum that create stubborn, sticky obstructions. The good news is that several proven alternatives exist—this guide reveals exactly why plunging fails and provides specific solutions that actually clear kitchen sink clogs on the first try.
Most homeowners waste precious time repeatedly plunging when they should switch tactics immediately. Kitchen sink clogs behave differently because grease solidifies as it cools, forming semi-rigid barriers that simply won’t budge under plunger pressure. Instead of fighting with the same failed approach, understanding why your plunger isn’t working guides you toward the right solution for your specific clog type. This article walks through seven effective methods—from simple household remedies to professional techniques—that resolve the kitchen sink clogged plunger not working dilemma without risking pipe damage.
Why Your Plunger Fails on Kitchen Sink Clogs
Kitchen sink clogs resist plunging for three specific reasons that make standard techniques ineffective. Double-basin sinks create a vacuum break that completely derails plunging efforts—the unclogged basin allows air to escape instead of building pressure against the blockage. Without sealing the second drain with a wet cloth or stopper, your plunging creates zero pressure where it matters. Even single-basin sinks often fail because users don’t add enough water to submerge the plunger cup fully, breaking the essential seal needed for effective pressure transfer.
The nature of kitchen sink clogs themselves defeats plungers. Grease from cooking oil, butter, and bacon fat coats pipe walls and traps food particles, creating dense obstructions that resist the intermittent pressure cycles of plunging. When this grease cools and solidifies, it forms barriers that the plunger might temporarily shift but rarely dislodges completely. This explains why some people report temporary success only to have the clog return within hours—the underlying grease remains intact, quickly reassembling the blockage.
Improper technique compounds these challenges. Effective plunging requires 20-30 seconds of consistent, rhythmic motion while maintaining perfect seal throughout both push and pull phases. Most users pump too gently, too briefly, or break the seal repeatedly. The plunger must stay centered—if it tilts even slightly, air escapes around the edges. Short, half-hearted attempts rarely succeed regardless of how determined you feel.
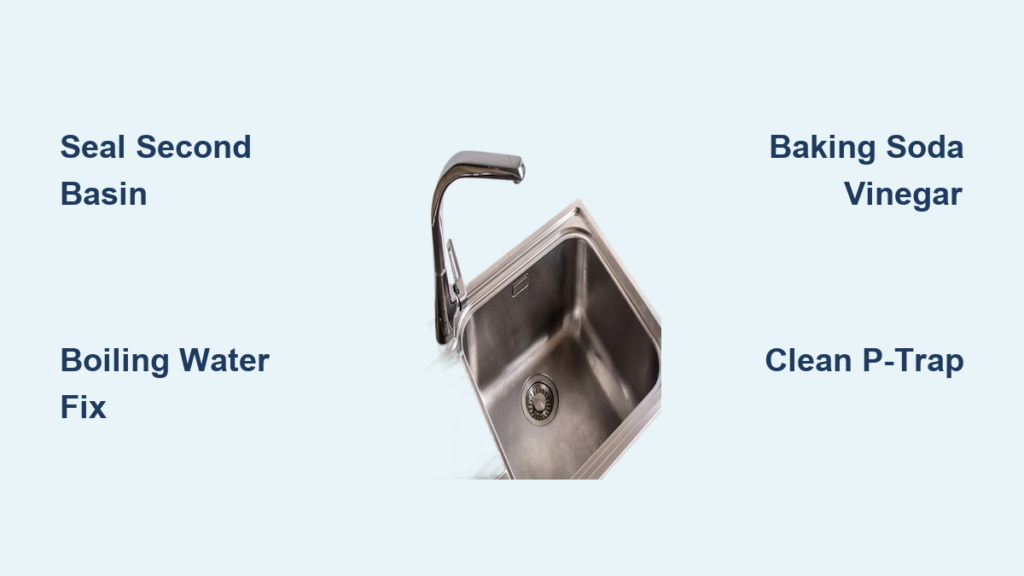
How to Seal Double-Basin Sinks for Effective Plunging
Before attempting to plunge a double-basin sink, completely seal the unclogged basin with a wet cloth or drain stopper. This simple step transforms plunging effectiveness by preventing air escape through the second drain. Fill the clogged basin with enough water to submerge the plunger cup by at least half—an inch of standing water won’t create proper seal. Position the plunger directly over the drain opening, ensuring the rubber cup forms a tight seal before beginning. Start with gentle pumps to establish the seal, then increase to vigorous, consistent strokes for 20-30 seconds. Maintain downward pressure during the pull phase to prevent seal breakage—this technique succeeds where previous attempts failed.
Boiling Water Method for Grease Clogs
The simplest solution when your kitchen sink clogged plunger not working situation involves nothing more than hot water from your kettle. This method targets the exact materials that cause kitchen sink blockages—grease and soap scum—without chemicals or special tools. Begin by removing as much standing water as possible using a cup or bowl. Bring a full kettle of water to a rolling boil, then carefully pour it directly down the drain in a steady stream. For PVC pipes, allow water to sit briefly after boiling (modern PVC handles boiling water safely).
If the initial attempt doesn’t fully resolve the clog, repeat the process two or three more times with brief pauses between applications. Each application builds on the previous one, progressively melting the grease blockage. For stubborn clogs, add liquid dish soap to the boiling water—the soap acts as a degreaser that breaks down fatty substances more effectively. Pour about one cup of dish soap followed by the kettle of boiling water, then allow it to work for several minutes before flushing with additional hot water. This combination dissolves grease clogs that resisted plunging alone.
Baking Soda and Vinegar Solution That Works
When plunging fails, the baking soda and vinegar combination creates a powerful natural remedy that generates carbon dioxide bubbles for mechanical action plus chemical dissolution. Remove standing water from the sink, then pour one-half cup of baking soda directly down the drain. Immediately follow with one cup of white vinegar—the mixture triggers an immediate foaming reaction. Cover the drain immediately using a stopper or wet cloth to trap the reaction and direct its force toward the clog.
Allow the mixture to work for 15-30 minutes, giving the bubbling action time to dislodge debris while the mild acidity dissolves soap scum and grease. Flush thoroughly with hot water to clear dissolved material. For particularly stubborn clogs, try this enhanced variation: Mix one cup of baking soda with one-half cup of coarse salt and pour down the drain. Let it sit overnight for maximum scouring power, then follow with a full kettle of boiling water. This method safely breaks down obstructions without damaging pipes.
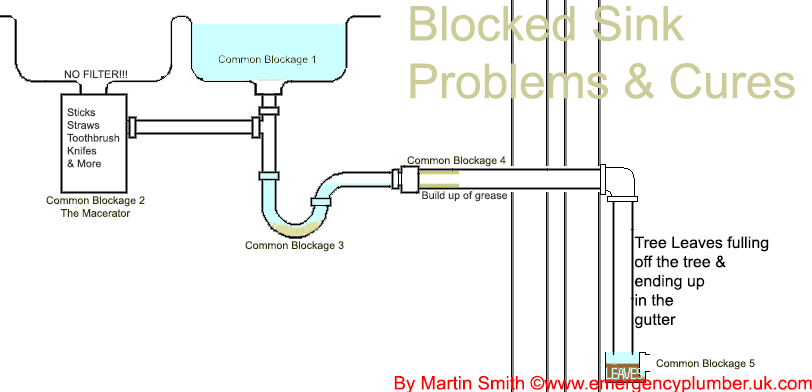
How to Clean the P-Trap When Other Methods Fail

The P-trap—the U-shaped pipe beneath your sink—contains approximately 90% of kitchen sink clogs. When plunging, boiling water, and natural remedies all fail, cleaning the P-trap often resolves the issue. Before starting, wear rubber gloves and eye protection—especially if chemical drain cleaners were previously used. Place a bucket and towels beneath the P-trap to catch water and debris.
Loosen the slip nuts connecting the P-trap to the drainpipe by hand or with adjustable pliers, then carefully remove the curved section. Expect water and debris to spill out—inside you’ll typically find a dark, greasy mass representing the core of your clog. Dispose of this material in a trash bag rather than rinsing it back into the plumbing. Clean the P-trap thoroughly with hot water and dish soap, then reattach it securely by hand-tightening the slip nuts (avoid overtightening). Test with running water to confirm the clog is cleared.
Using a Drain Snake Properly for Kitchen Sink Clogs
When clogs exist deeper in the plumbing system beyond the P-trap’s reach, a drain snake provides the mechanical force necessary to break through stubborn blockages. Insert the snake through the drain opening (or better yet, through the pipe where the P-trap connects after removal). Feed the snake through the pipes until you feel resistance—this indicates the clog’s location.
Rotate the snake handle while maintaining gentle forward pressure. The rotating head either breaks apart the clog into smaller pieces that flush away or catches debris for removal. Exercise care to avoid scratching pipe interiors, which creates rough surfaces that accelerate future clog formation. If you hear scratching sounds, immediately readjust the snake’s position. For immediate access, a straightened wire coat hanger with a small hook at one end can serve as an improvised snake for clogs near the drain opening.
Why Chemical Drain Cleaners Often Make Things Worse
Commercial drain cleaners like Drano Gel seem tempting when your kitchen sink clogged plunger not working situation persists, but they carry significant risks that make them a last resort. These products work through chemical reactions that generate heat to dissolve organic matter, but effectiveness varies dramatically based on clog composition. Repeated use damages pipes—particularly older metal pipes—creating rough interiors that actually accelerate future clog formation.
The most serious risk involves combining multiple chemical products. Frustrated homeowners often try different cleaners in succession, creating toxic fumes, explosive reactions, or dangerous heat buildup. If chemical methods have been attempted multiple times, avoid adding more products and instead pursue mechanical methods. When attempting P-trap cleaning after chemical use, wear full protective equipment and allow adequate time for residual chemicals to dissipate.
Preventing Future Clogs After Your Sink Is Clear
Addressing your current kitchen sink clogged plunger not working problem provides temporary relief, but implementing preventive practices stops the cycle from repeating. Never pour cooking oil, bacon grease, or butter down the sink—these substances flow liquid when hot but solidify as they cool, coating pipe walls. Collect grease in disposable containers and discard with trash.
Implement a monthly maintenance routine: Pour one-half cup of baking soda down the drain followed by one cup of vinegar, cover the drain, and allow the mixture to work for 15 minutes before flushing with hot water. This treatment breaks down gradual grease buildup before it becomes a major clog. Run hot water through the sink for 30 seconds after each use to flush away residual grease. For sinks with garbage disposals, avoid overloading it—feed waste gradually with cold water running.
When to Call a Professional Plumber Immediately
Some kitchen sink clogged plunger not working situations require professional intervention despite your best DIY efforts. Multiple failed attempts using different methods suggest the clog exists deeper in the plumbing system than DIY tools can reach. Warning signs that indicate serious problems include multiple drains affected simultaneously, unusual plumbing sounds, persistent sewage odors, or water backing up in other fixtures.
If a drain snake has become stuck during your attempt, professional assistance is needed to retrieve it without causing further pipe damage. Plumbers have access to motorized drain augers with longer cables and video inspection equipment that identifies problems invisible from the surface. When safety concerns exist—particularly involving multiple chemical drain cleaner applications—professional handling protects you from dangerous reactions. The investment often proves more economical than repeated DIY attempts that fail to resolve the underlying issue.


