
Kitchen cracks might seem insignificant, but they’re actually major trouble spots that waste energy, invite pests, and create moisture problems. Every unsealed gap around your windows, doors, pipes, and cabinets allows conditioned air to escape—forcing your HVAC system to work harder and increasing utility bills by up to 20%. More importantly, these tiny openings let moisture seep into wall cavities where mold grows unseen and pests like ants and cockroaches enter your food preparation areas. Learning how to seal cracks in kitchen properly transforms this simple maintenance task into a powerful defense against costly damage and health hazards.
The kitchen presents unique sealing challenges compared to other rooms due to constant temperature shifts from cooking, steam exposure, and numerous pipe penetrations. Unlike bedrooms or living rooms, your kitchen experiences daily cycles of heat, moisture, and grease that degrade improper sealants quickly. You need specific products and techniques designed for these demanding conditions. This guide shows you exactly how to identify problem areas, select the right sealants, and apply them correctly—so your repairs last for years rather than months.
Why Unsealed Kitchen Cracks Cost You Money and Health
Air leaks around kitchen windows, doors, and plumbing penetrations create significant energy waste that hits your wallet every month. When conditioned air escapes through unsealed gaps, your heating and cooling system must work substantially harder to maintain comfortable temperatures. The Department of Energy confirms that properly sealed homes can reduce heating and cooling costs by up to 20%—translating to hundreds of dollars in annual savings for most households. In the kitchen specifically, these leaks become even more problematic due to frequent temperature fluctuations from oven use and cooking steam.
Moisture infiltration through unsealed cracks creates hidden dangers that develop gradually before becoming catastrophic. Water seeping around sink pipes, under cabinets, and through exterior wall gaps creates concealed dampness where mold thrives. This mold compromises indoor air quality and can trigger respiratory issues, particularly dangerous in the room where you prepare food. Left unchecked, persistent moisture also causes wood rot behind cabinets and within wall structures, requiring expensive remediation that far exceeds the cost of proper sealing.
Pest intrusion through kitchen cracks creates immediate hygiene concerns. Ants, cockroaches, and even rodents follow air currents through tiny gaps around pipes, electrical outlets, and door thresholds. Once inside your kitchen walls, these pests contaminate food surfaces and stored items, creating health hazards that are difficult and expensive to eliminate. Sealing entry points provides the most effective prevention—stopping infestations before they begin.
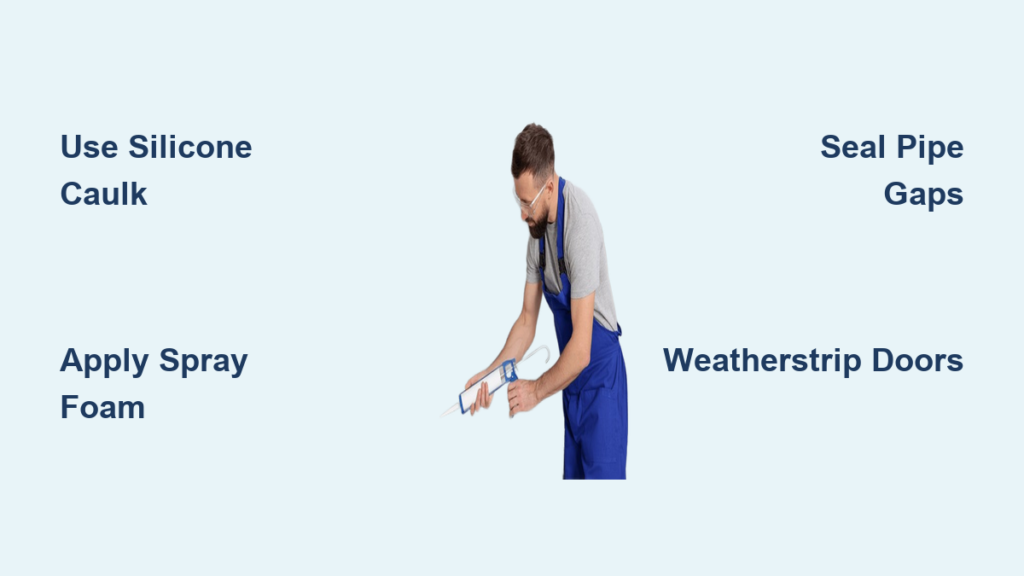
Choose the Right Sealant for Each Kitchen Crack Type
Silicone Acrylic Caulk for Precision Sealing
Clear silicone acrylic caulk works best for areas where you want the sealant to disappear visually. Apply it around glass window frames, ceramic tile backsplashes, and polished stone countertops where you want the natural surfaces to remain visible. This formulation adheres exceptionally well to non-porous surfaces and maintains flexibility through kitchen temperature changes. Use it for sealing gaps less than 1/4 inch wide around sink fixtures, countertop edges, and window perimeters.
White silicone acrylic caulk creates clean, professional-looking seals that complement white fixtures and light cabinetry. It’s ideal for sealing gaps along white window frames, where cabinets meet walls, and around white sink bases. The white color masks minor application imperfections while providing the same moisture resistance and flexibility as clear caulk. Both formulations contain mildewcides specifically for kitchen humidity, preventing the fungal growth that plagues standard caulks.
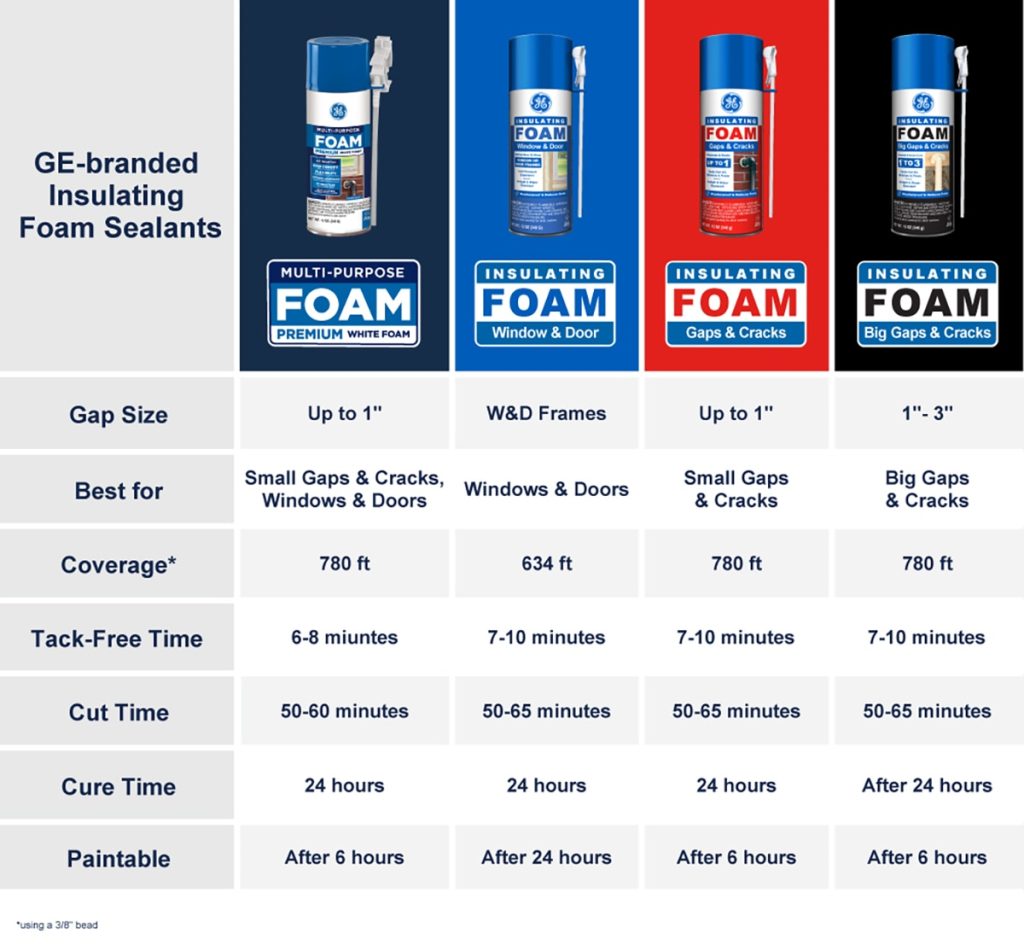
Spray Foam for Large Gaps and Pipe Penetrations
Spray foam caulk solves problems that tube caulk can’t handle—filling irregular voids around plumbing pipes, electrical boxes, and larger wall cracks. The polyurethane foam expands up to three times its initial volume as it cures, completely filling gaps that would require multiple applications with traditional caulk. For kitchen use, select low-expansion formulations designed for interior applications near food preparation areas.
Apply spray foam around:
– Water supply lines under sinks
– Drain pipe penetrations through cabinets
– Gaps behind refrigerator or dishwasher installations
– Larger cracks between countertops and walls
– Spaces around range hood ductwork
Remember to wear gloves and ensure proper ventilation during application, as uncured foam can be difficult to remove from skin and surfaces.
Essential Tools Checklist for Kitchen Sealing Projects

Gather these specific tools before starting your kitchen crack sealing project to ensure professional results:
- Caulk gun with smooth pressure control – Avoid cheap models that deliver inconsistent bead thickness
- Quality silicone acrylic caulk in both clear and white formulations – Choose kitchen/bath rated products
- Low-expansion spray foam – Specifically for interior kitchen use
- Foam outlet gaskets – For sealing electrical boxes on exterior walls
- Door sweeps with replaceable vinyl inserts – For gaps under exterior kitchen doors
- Utility knife and putty knife – For surface preparation and cleanup
- Safety glasses and nitrile gloves – Protection during application
Critical Preparation Steps Before Sealing
- Clean all surfaces thoroughly – Remove grease, dust, and old crumbling caulk using a putty knife and damp cloth
- Allow surfaces to dry completely – Moisture prevents proper adhesion and causes premature failure
- Test spray foam in inconspicuous area – Verify expansion rate before applying to visible locations
- Protect surrounding surfaces – Use masking tape on adjacent areas to prevent messy overspray
Locate Hidden Kitchen Cracks Before Sealing
Find Problem Areas Around Exterior Vents
Check range hood vents where they penetrate exterior walls—these often develop gaps as materials expand and contract. Feel for drafts around vent covers and inspect for deteriorating sealant. Pay special attention to the junction between the vent housing and wall surface, as this area commonly develops cracks that allow pests to enter.
Identify Pipe Penetration Gaps
Examine all plumbing lines under sinks and behind appliances where pipes enter walls and cabinets. These gaps frequently harbor pests and allow moisture infiltration. Shine a flashlight along pipe routes to spot hidden openings, especially where pipes meet cabinet floors or wall surfaces.
Detect Window and Door Perimeter Leaks
Perform the “dollar bill test” on kitchen windows—close the window on a dollar bill and try to pull it out. If it slides easily, you need new weatherstripping. For doors, check along the entire perimeter with your hand while someone operates the door from the other side—any detectable airflow indicates sealing gaps.
Seal Small Cracks with Professional Results
Proper Caulk Application Technique
- Prepare the caulk tube – Cut the tip at a 45-degree angle with opening size matching your gap width
- Load the caulk gun – Pull back plunger, insert tube, and press pressure pad against base
- Apply consistent pressure – Maintain steady hand speed while keeping tip in contact with both surfaces
- Create a concave bead – Run a damp finger along the sealant immediately after application
- Work in manageable sections – Complete no more than 2-3 feet before the caulk skins over
Allow 24 hours for complete curing before exposing sealed areas to moisture. For kitchen surfaces near cooking areas, select caulk specifically rated for grease resistance to prevent premature breakdown.
Fix Medium and Large Gaps with Spray Foam
Step-by-Step Foam Application
- Shake can vigorously for 30-60 seconds – Ensures proper component mixing
- Insert straw into gap – Push deeply before dispensing foam
- Apply in thin layers – Fill voids gradually to prevent excessive expansion
- Allow partial curing – Wait 5-10 minutes between layers for large gaps
- Trim excess foam – Use a utility knife once fully cured (typically 24 hours)
Leave foam slightly proud of surrounding surfaces—this allows for clean trimming to a professional finish. Never attempt to fill large voids in a single application, as excessive heat buildup during curing can damage surrounding materials.
Weatherstrip Kitchen Doors for Complete Sealing
Install Effective Door Bottom Seals
Attach aluminum-bodied door sweeps with replaceable vinyl inserts to kitchen doors leading to garages or exterior areas. These provide durable, long-lasting seals that withstand frequent use while maintaining effectiveness. For best results:
- Measure door width precisely before purchasing
- Position sweep so vinyl insert contacts threshold without impeding door operation
- Use stainless steel screws for secure attachment that won’t loosen with use
- Check sweep alignment regularly and adjust as needed
Temporary solutions like adhesive-backed foam tape work for seasonal sealing but degrade quickly in kitchen environments with frequent temperature changes and occasional grease exposure.
Maintain Your Kitchen Seals for Long-Term Protection
Inspect all sealed areas annually, focusing on locations exposed to direct sunlight or frequent temperature changes. Check for:
- Cracking or shrinking of caulk beads
- Discoloration indicating mold growth
- Separation from surrounding surfaces
- Compression issues with weatherstripping
Address small failures immediately by applying fresh caulk over affected areas. For complete adhesion failure, remove all old material before reapplying sealant. In kitchen environments, prioritize products with enhanced mildew resistance and grease tolerance to maximize seal longevity.
Critical Safety Steps for Kitchen Crack Sealing
Ensure proper ventilation when applying sealants—open windows and use fans to circulate fresh air. Choose low-VOC products specifically rated for kitchen use near food preparation areas. Always follow manufacturer instructions regarding curing times before resuming normal kitchen activities around newly sealed areas. Store unused sealants according to label directions to maintain product effectiveness for future touch-ups.
Sealing cracks in your kitchen delivers immediate benefits that compound over time—lower energy bills, improved indoor air quality, and protection against costly moisture damage. By systematically addressing gaps with the right products and techniques, you create a more comfortable, efficient, and healthier kitchen environment that protects your home investment for years to come. Start with the most problematic areas first, and soon you’ll wonder why you didn’t tackle this simple but impactful project sooner.


