
Kitchen cabinets from the 1980s often feature dated finishes, outdated hardware, and inefficient layouts that no longer suit modern lifestyles. If your home still sports honey oak finishes, brass hardware, or flat-paneled doors with minimal detailing, you’re not alone—millions of American homes are stuck with these time-capsule kitchens. Updating your 1980s cabinets can transform your space without the expense and disruption of a full kitchen remodel. This guide provides practical, budget-friendly approaches to modernizing your dated cabinets while working with their existing structure.
Why Updating 80’s Cabinets Beats Full Replacement
Replacing kitchen cabinets entirely can cost anywhere from $5,000 to $20,000 depending on your kitchen size and materials. For most homeowners, updating existing cabinets offers significant savings while delivering dramatic visual improvements. The structural integrity of 1980s cabinets is generally sound—they were built with solid wood or thick plywood construction before the industry shift toward more particleboard components. By working with what you have, you avoid demolition mess, reduce project timelines from weeks to days, and minimize waste sent to landfills.
How to Determine If Your Cabinets Are Worth Updating
Before investing time and money, assess your cabinets’ condition with these specific checks:
– Structural soundness: Open and close every door and drawer. Listen for squeaks, feel for binding, and check for loose hinges or drawer slides
– Surface condition: Run your hand over cabinet faces. Deep scratches, water damage, or significant warping may require more extensive work
– Layout functionality: Note pain points—do you constantly bump your head on upper cabinets? Are base cabinets too shallow for modern appliances?
– Material composition: 80s cabinets were typically solid wood (oak was extremely popular) or high-quality plywood. Tap the surface—hollow sounds indicate particleboard, which accepts paint less readily
Painted Cabinet Transformation Process
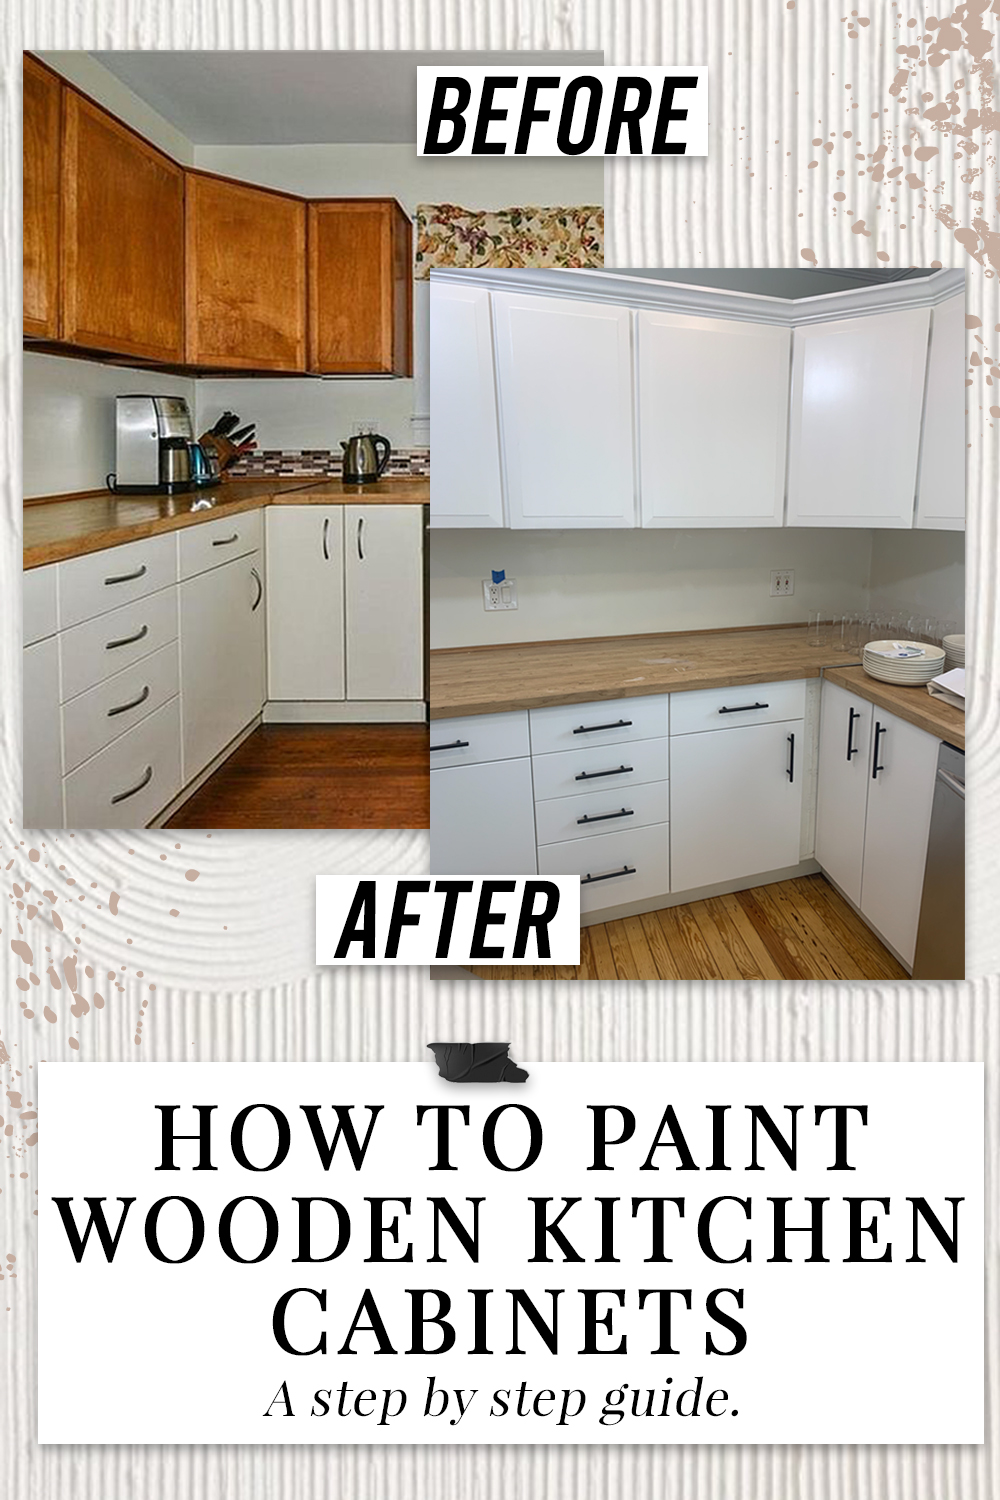
Painting remains the most cost-effective way to modernize dated 80s cabinets, with materials costing $100-$300 versus thousands for replacement.
Essential Supplies Checklist for Cabinet Painting
- Degreaser: TSP (trisodium phosphate) or Krud Kutter
- Sandpaper: 120-grit and 220-grit
- Primer: Oil-based or bonding primer specifically for cabinets
- Paint: High-quality satin or semi-gloss acrylic enamel
- Brushes: 2″ angled sash brush and small detail brush
- Foam roller: 4″ with 1/4″ nap for smooth finish
- Painter’s tape: Blue 3M Precision or equivalent
- Drop cloths: Canvas, not plastic (prevents condensation)
- Screwdriver: For removing doors and hardware
Step-by-Step Painting Procedure
-
Complete cabinet emptying and hardware removal (allow 2-3 hours)
– Remove all items from cabinets
– Label each door with painter’s tape indicating its location
– Remove all hinges, knobs, and pulls—keep hardware organized in labeled bags -
Thorough cleaning and degreasing (3-4 hours)
– Mix TSP according to package directions
– Wipe all surfaces with TSP solution using microfiber cloths
– Pay special attention to areas around handles and stove splash zones
– Allow 24 hours for complete drying -
Strategic sanding for optimal adhesion (4-6 hours)
– Start with 120-grit to remove gloss and smooth imperfections
– Finish with 220-grit for smooth surface
– Vacuum all dust thoroughly—any particles will create bumps in final finish -
Precision priming (2-3 hours plus drying time)
– Apply oil-based primer to all surfaces using quality brush
– Focus on edges and end grains which absorb more product
– Allow full 24 hours drying before painting -
Professional-quality paint application (4-6 hours plus drying)
– Use foam roller for flat surfaces, brush for details
– Apply thin, even coats—two quality coats beat three rushed ones
– Maintain “wet edge” to prevent lap marks
– Allow 48 hours curing before reassembly
Hardware Replacement Strategies That Make a Difference
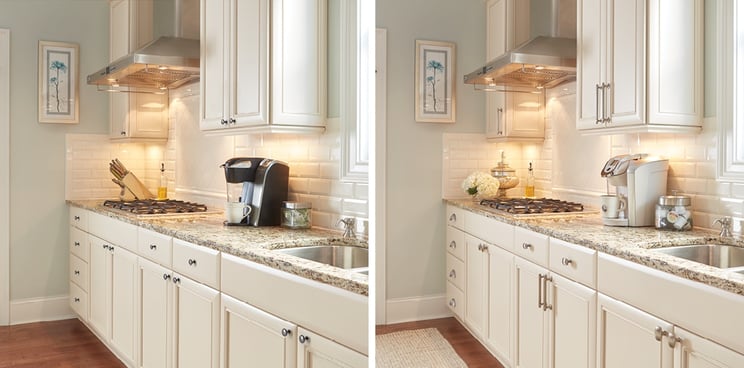
Swapping outdated 80s hardware instantly refreshes cabinet appearance. The brass or gold-toned knobs and pulls popular in the 1980s now look dated next to modern stainless steel appliances and fixtures.
Choosing the Right Modern Hardware
- For traditional cabinets: Brushed nickel or matte black pulls create contemporary contrast
- For minimalist update: Invisible touch-latch systems eliminate hardware entirely
- For vintage charm: Ceramic or glass knobs in muted tones (avoid shiny brass)
- Measurement tip: Standard 80s hardware spacing was 3″ or 5″—measure existing holes before purchasing
Professional Installation Technique
- Cover cabinet fronts with painter’s tape
- Use existing holes as reference points
- For consistent placement, create a cardboard template with hole spacing
- Drill new pilot holes slightly smaller than screw diameter
- Hand-tighten initially, then finish with screwdriver for even pressure
Adding Architectural Interest to Flat Cabinet Doors
Most 1980s cabinets featured simple flat-panel doors with minimal detailing. Adding architectural elements creates visual interest without cabinet replacement.
Cost-Effective Molding Upgrade Options
- Stile and rail enhancement: Add 1/2″ molding to create raised panel effect on flat doors
- Crown molding installation: Add 3-4″ crown molding to top of upper cabinets
- Beadboard inserts: Replace solid lower cabinet panels with beadboard for texture
- Glass door conversion: Replace 1-2 prominent cabinet doors with glass fronts
Installation Process for Raised Panel Effect
- Purchase 1/2″ square edge molding from home improvement store
- Measure and cut molding to create frame around existing door panel
- Apply wood glue to back of molding pieces
- Clamp in place until dry (follow glue manufacturer’s instructions)
- Fill nail holes with matching wood filler
- Sand smooth and paint along with cabinet refinish
Modernizing Cabinet Functionality

Updating appearance matters, but improving functionality makes your kitchen genuinely better to use.
Essential Functional Upgrades
- Soft-close hinge installation: Eliminates door slamming and extends cabinet life
- Pull-out shelf systems: Convert deep base cabinets to accessible storage
- Lazy Susan corner solutions: Maximize awkward corner cabinet space
- Under-cabinet lighting: LED strips provide task lighting while hiding dated finishes
Drawer Organization Systems
- Measure drawer interior dimensions precisely
- Choose modular system that fits your specific needs (cutlery, utensils, pots)
- Install dividers before placing items back in drawers
- Consider soft-close drawer slides if replacing entire drawer boxes
Color Selection Guidance for Modern Appeal
The honey oak and golden pine finishes dominating 1980s kitchens now feel dated. Choosing the right color transforms your space while maintaining resale value.
Current Color Trends That Work
- Classic white: Crisp, clean, and timeless (try “Simply White” by Benjamin Moore)
- Moody blues: Deep navy or slate blue creates sophisticated contrast
- Warm grays: Avoid cool tones which look sterile with oak undertones
- Two-tone approach: Dark lower cabinets with light uppers creates visual interest
Critical Color Testing Process
- Paint 2’x2′ samples on actual cabinet doors
- View at different times of day—natural light changes color appearance
- Test with your existing countertops and flooring
- Live with samples for 3-5 days before committing
Budgeting Your Cabinet Update Project
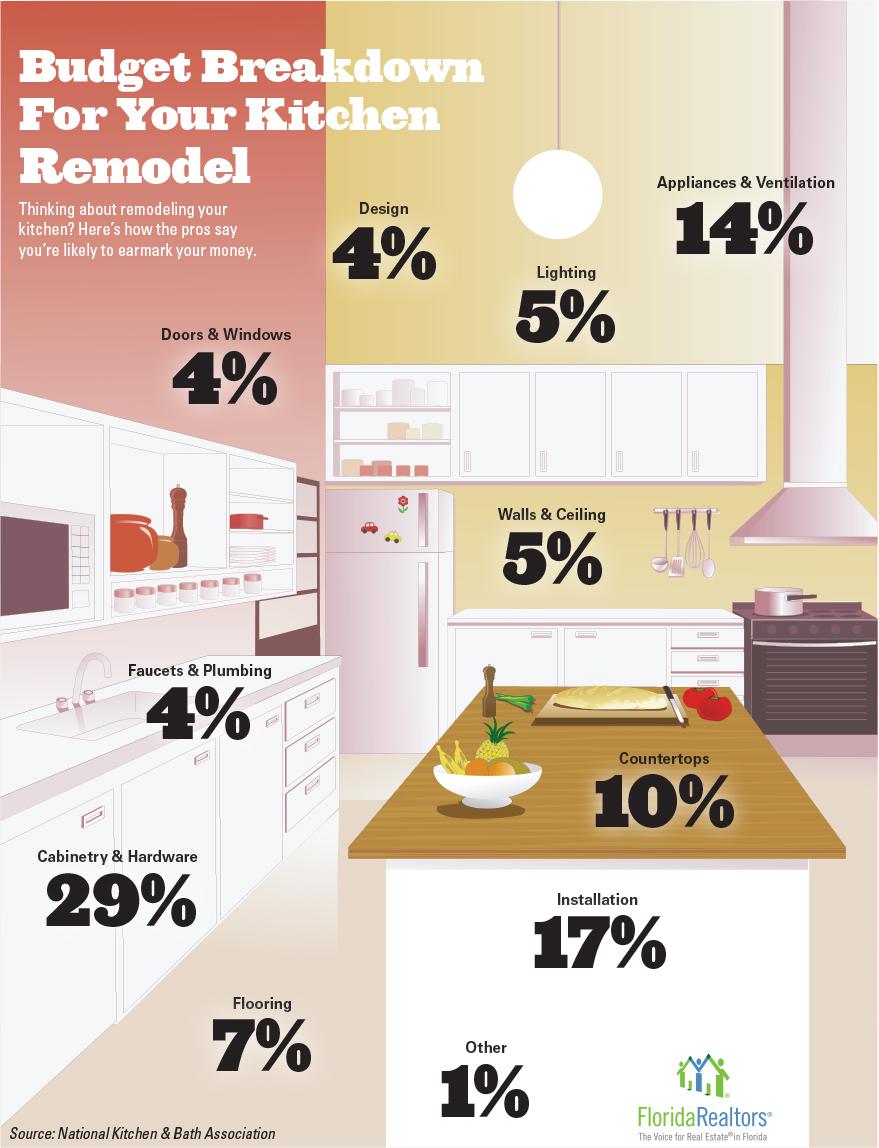
Understanding realistic costs prevents budget overruns and helps prioritize improvements.
Cost Breakdown for Typical 10×10 Kitchen
- Painting supplies: $150-$300 (DIY)
- Hardware replacement: $200-$500 (for 30 cabinet doors/drawers)
- Molding upgrades: $100-$250
- Functional improvements: $300-$800 (pull-outs, soft-close mechanisms)
- Professional painting: $1,500-$3,500 (if outsourcing)
Smart Budget Allocation Strategy
Focus 60% of your budget on painting (the most visible change), 25% on hardware, and 15% on functional upgrades. This approach maximizes visual impact while improving daily usability.
Maintenance Tips for Long-Lasting Results
Protect your investment with proper care after completing your cabinet update.
- Cleaning protocol: Use microfiber cloths with mild soap—avoid abrasive cleaners
- Hardware tightening: Check screws quarterly as they naturally loosen over time
- Moisture management: Wipe spills immediately, especially near sink base cabinets
- Sun protection: Install window treatments to prevent UV fading on exposed cabinets
Updating your 1980s kitchen cabinets delivers dramatic results without the expense of full replacement. By focusing on strategic painting, thoughtful hardware selection, and functional improvements, you can create a kitchen that feels completely new while working with your existing cabinet structure. The process typically takes 3-5 days for a DIYer, with most homeowners recouping 50-75% of their investment when selling their home. Start with one cabinet as a test area, then proceed with confidence knowing you’re making cost-effective improvements that enhance both daily enjoyment and long-term property value.


