
Tired of staring at outdated pressboard kitchen cabinets but dreading the cost of replacement? You’re not alone—over 60% of American homeowners choose to refinish rather than replace their cabinets, and for good reason. Pressboard cabinets present unique challenges that make standard painting techniques fail within months, leading to peeling, chipping, and wasted effort. The secret to a professional-looking finish that lasts lies in understanding pressboard’s specific requirements and following a meticulous process designed for this problematic surface. This guide reveals the exact steps professionals use to transform dated pressboard cabinets into stunning focal points that withstand daily kitchen demands.
Painting pressboard cabinets successfully requires patience, the right products, and most importantly, proper surface preparation. Unlike solid wood, pressboard features a slick laminate or melamine coating that repels standard paint adhesion. Skip the critical prep work, and you’ll watch your hard work peel away within weeks. But do it right, and you’ll achieve results rivaling custom cabinetry at a fraction of the cost. Whether your cabinets suffer from water damage, outdated finishes, or simply don’t match your kitchen’s new aesthetic, this guide provides the proven methods to achieve beautiful, durable results without breaking the bank.
Why Your Pressboard Cabinets Keep Peeling After Painting
Pressboard cabinets fail to hold paint because of their factory-applied laminate coating—a smooth, non-porous surface that prevents proper adhesion. This engineered wood product consists of compressed wood particles bonded with resin and faced with a thin protective layer designed for water resistance, not paint bonding. When you apply standard primer and paint directly to this slick surface, you’re essentially creating a temporary decoration rather than a durable finish.
The consequences of skipping proper preparation include immediate problems like poor coverage and brush marks, plus long-term failures such as peeling, bubbling, and chipping—especially around high-traffic areas like door edges and handles. Pressboard also swells when exposed to moisture, so inadequate sealing allows humidity to penetrate the material, causing irreversible damage beneath your paint job. Understanding these material limitations explains why 80% of DIY cabinet painting projects fail within the first year—they use techniques designed for solid wood on a completely different surface.
Essential Supplies for Pressboard Cabinet Painting Success

Gathering the right materials before starting prevents costly mid-project failures. For pressboard cabinets, standard painting supplies won’t cut it—you need specialized products designed for slick, non-porous surfaces. Start with surface preparation: 120-grit and 220-grit sandpaper or sanding sponges, trisodium phosphate (TSP) or dedicated cabinet cleaner, microfiber cloths, wood filler for damaged areas, and a putty knife.
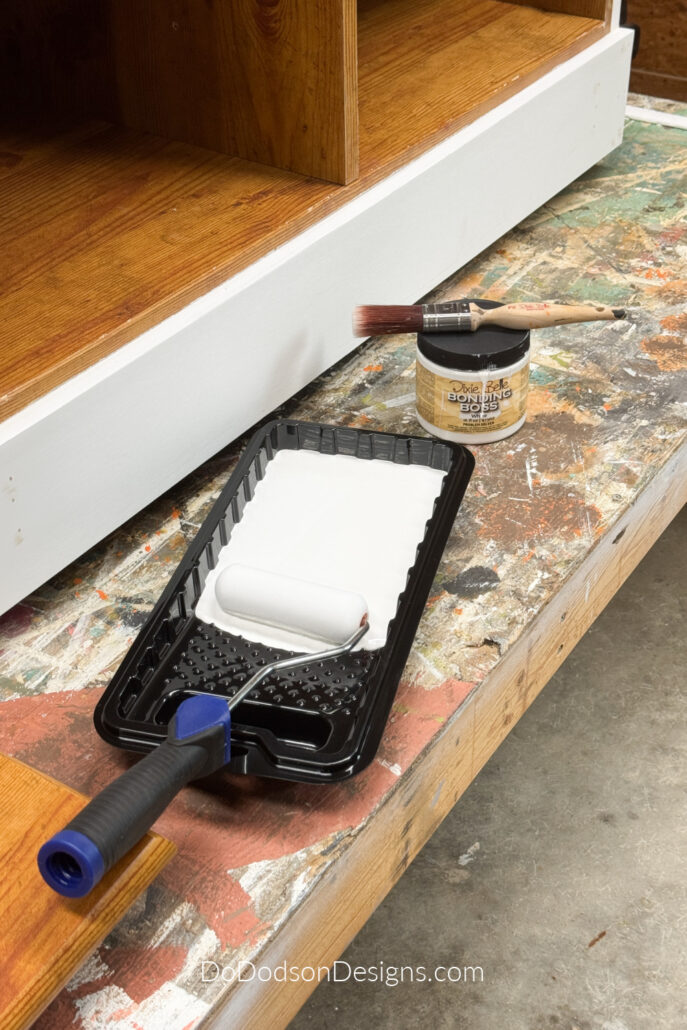
Your primer selection makes or breaks the project—invest in a high-quality bonding primer specifically formulated for laminate or melamine surfaces. Look for products containing shellac or specialized bonding agents that create mechanical adhesion where standard primers fail. For application tools, choose a high-quality angled brush (2-2.5 inches) for edges and a foam roller (4-inch) with a 1/8-inch nap for smooth, mark-free coverage on flat surfaces.
For topcoats, select cabinet-specific paint like Benjamin Moore Advance or Sherwin-Williams Emerald Urethane. These water-based alkyd formulas provide the durability of oil paints with easier cleanup. Complete your kit with painter’s tape designed for delicate surfaces, drop cloths, and proper ventilation equipment—don’t risk your health for a DIY project.
Complete Surface Preparation Process for Pressboard
Surface prep accounts for 80% of your project’s success, so never skip these critical steps. Begin by removing all cabinet doors, drawers, and hardware—this allows you to work on flat surfaces and access every angle. Label each piece with painter’s tape noting its location to simplify reassembly later.
Thoroughly clean all surfaces with TSP solution to remove cooking oils and residues that invisible barriers to adhesion. Mix 1/4 cup TSP per gallon of warm water, apply with a microfiber cloth, and rinse with clean water. For stubborn grease, use a dedicated degreaser but avoid ammonia-based cleaners that leave residue.
Sanding creates the microscopic texture needed for primer adhesion. Start with 120-grit to remove the laminate’s gloss, applying even pressure across the entire surface. Pay special attention to edges where laminate often wears thin. Follow with 220-grit to smooth the surface without removing your initial texture. Wipe away all dust with a tack cloth—any remaining particles will compromise your finish.
Perfect Primer Application Technique for Pressboard
Primer serves as the crucial bridge between pressboard’s slick surface and your topcoat. Apply a thin, even coat of bonding primer using your angled brush for edges and foam roller for flat surfaces. Foam rollers prevent the streaking common with traditional rollers on smooth surfaces. Work in a well-ventilated area with temperatures between 65-75°F for optimal drying.
Apply primer in the direction of the cabinet panel details, maintaining a wet edge to prevent lap marks. Don’t overload your roller—excess primer creates drips that ruin your smooth finish. Allow the first coat to dry completely (typically 2-4 hours), then inspect for coverage. Any visible laminate or uneven areas require a second coat.
Once dry, lightly sand with 220-grit to remove any raised grain or imperfections. The surface should have a uniform, slightly matte appearance with no shiny spots showing through—this indicates proper preparation for your topcoat. Rushing primer application guarantees peeling paint, so take time to get this step right.
Professional Paint Selection and Application Methods
Choose cabinet-specific paint for maximum durability in high-traffic kitchen environments. Water-based alkyd paints like Benjamin Moore Advance provide the smoothest finish with excellent durability and easier cleanup than traditional oil paints. Avoid standard wall paints—they lack the hardness needed for cabinet surfaces and will wear quickly.
For application, use the “cut and roll” technique: First, carefully cut in around all edges and details with your angled brush using minimal paint. Then, apply paint to flat surfaces with your foam roller using light, even pressure. Maintain a wet edge by working in small sections, and avoid overworking the paint once applied. Two thin coats produce better results than one thick coat—allow 4-6 hours drying time between coats.
For the smoothest professional finish, consider spraying your cabinets. Properly thin your paint according to manufacturer instructions and practice on cardboard first. Maintain consistent distance (8-12 inches) and use steady, overlapping passes. Spray painting eliminates brush marks entirely but requires more preparation to protect surrounding areas.
Critical Sealing and Protection for Long-Lasting Results
Protect your investment with a quality topcoat designed for cabinetry. Even the most durable paint benefits from this additional protective layer, which creates a harder surface resistant to scratches, moisture, and cleaning products. Choose a water-based polyurethane topcoat compatible with your paint type—matte or satin finishes hide minor imperfections better than high-gloss.
Apply the topcoat using the same techniques as your paint, maintaining thin, even coats and allowing thorough drying between applications. Two to three topcoat layers provide optimal protection for high-traffic areas. For extra durability around handles and edges, consider a hardwax oil as a final layer—this penetrates the surface to create flexible, water-resistant protection.
Allow full cure time (typically 2-3 weeks) before heavy use. During this period, avoid slamming doors, placing heavy objects on shelves, or cleaning with harsh chemicals. Proper curing ensures maximum durability and prevents premature wear that compromises your entire project.
Top 3 Pressboard Painting Mistakes That Cause Peeling
Skipping surface preparation ranks as the #1 mistake that causes paint failure on pressboard cabinets. Many DIYers think light cleaning and sanding suffice, but pressboard requires aggressive surface treatment to create proper adhesion. Without thorough degreasing and proper sanding to 120-grit, your primer and paint have nothing to grip.
Using standard primer instead of bonding primer guarantees adhesion failure. Regular primers sit on top of the laminate rather than bonding with it. When doors close or handles are gripped, the paint simply lifts away. Invest in a quality bonding primer—it’s the most critical product in your entire project.
Applying paint too thickly creates numerous problems including extended drying times, increased susceptibility to dust, and a greater likelihood of drips and runs. Multiple thin coats produce superior results to fewer thick coats, even when the project feels like it’s taking longer. Rushing the process by applying thick coats or skipping drying time between coats weakens the bond between layers.
Maintenance Secrets for Years of Beautiful Cabinets
Preserve your painted cabinets with proper cleaning techniques that extend their life significantly. For regular cleaning, use a soft cloth dampened with water and mild dish soap, wiping in the direction of the panel details to avoid spreading residues. Avoid abrasive cleaners, scrubby sponges, and harsh chemicals which damage both paint and topcoat.
Address spills and splatters immediately, particularly around stove areas where cooking oils and sauces can accumulate. These substances penetrate finishes over time, causing discoloration and adhesion failure. Keep a small amount of your original paint stored for touch-ups—this simplifies maintenance and ensures perfect color matching.
Periodically inspect your cabinets for areas showing wear, particularly around handles and frequently touched surfaces. Light sanding and touch-up paint address minor chips before they worsen, while more extensive damage may require repainting affected areas. With consistent care, your painted pressboard cabinets will maintain their beauty and functionality for many years, providing significant return on your investment of time and materials.


