
Your outdated kitchen with yellowed cabinets, dated fixtures, and tired countertops doesn’t have to stay stuck in the 1990s. Many homeowners waste thousands on complete kitchen remodels when simple, strategic updates can transform an old kitchen into a modern space for a fraction of the cost. If you’re wondering how to make an old kitchen look modern without tearing out walls or draining your savings account, you’re not alone—over 68% of homeowners prefer cosmetic updates over full renovations. This guide reveals practical, proven techniques that deliver maximum visual impact with minimal disruption, helping you achieve that clean, contemporary kitchen aesthetic you’ve been dreaming of.
The good news is that modern kitchen design focuses more on clean lines, smart storage, and strategic lighting than expensive materials. You don’t need to replace every cabinet or install new countertops to achieve a fresh, updated look. By targeting specific problem areas that scream “outdated,” you can create dramatic visual improvements that make your old kitchen feel completely transformed. Whether your kitchen needs subtle tweaks or more significant changes, these actionable strategies work for almost any budget and skill level—no contractor required.
Paint Your Cabinets Instead of Replacing Them
Choose the Right Paint Formula for Long-Lasting Results
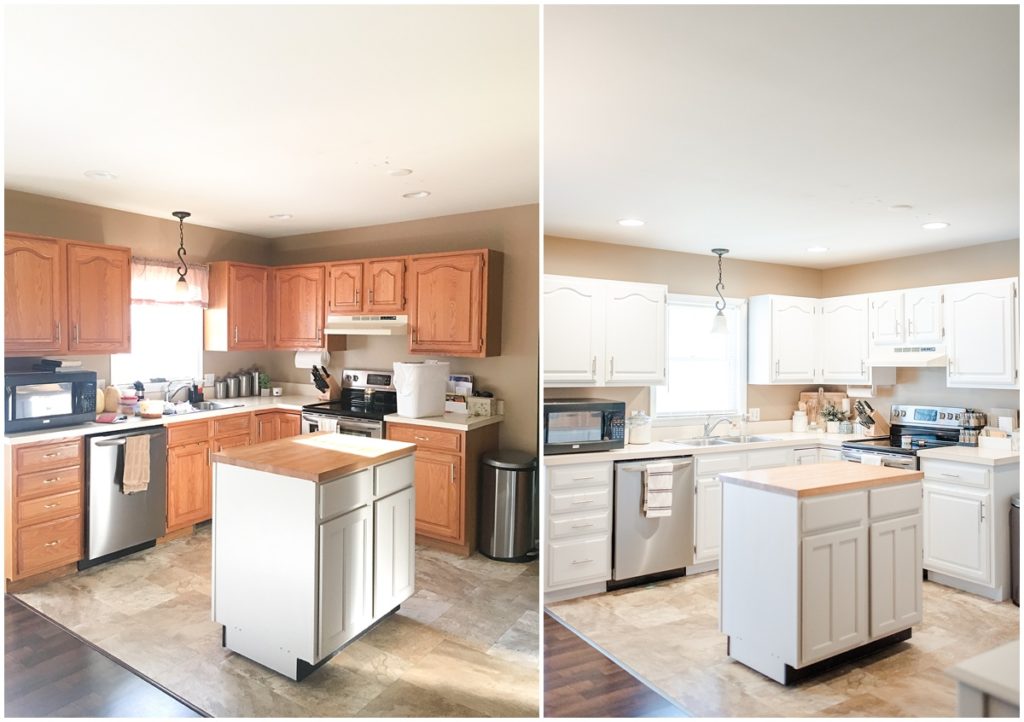
Cabinet painting ranks as the single most impactful update for dated kitchens. Skip the expensive cabinet replacement and transform honey oak or dark wood cabinets with a fresh coat of modern paint. For best results, use a bonding primer specifically designed for cabinets followed by a premium water-based alkyd paint in a satin or semi-gloss finish. These formulas resist chipping and yellowing far better than standard latex paints. Stick with classic white, warm greige, or deep matte black for immediate modern appeal that won’t look dated in five years.
Proper Surface Preparation Prevents Costly Mistakes
Most DIY cabinet painting projects fail because of inadequate preparation. Remove all cabinet doors and hardware, then thoroughly clean surfaces with TSP substitute to remove grease buildup. Lightly sand with 220-grit paper to create “tooth” for paint adhesion, then fill any dents or scratches with wood filler. Apply painter’s tape to edges and hinges before painting with a high-quality mini-roller for smooth, brush-mark-free results. Allow at least 48 hours drying time between coats for professional-looking durability.
Upgrade Hardware for Instant Modern Appeal
Select Contemporary Styles That Complement Your Cabinets
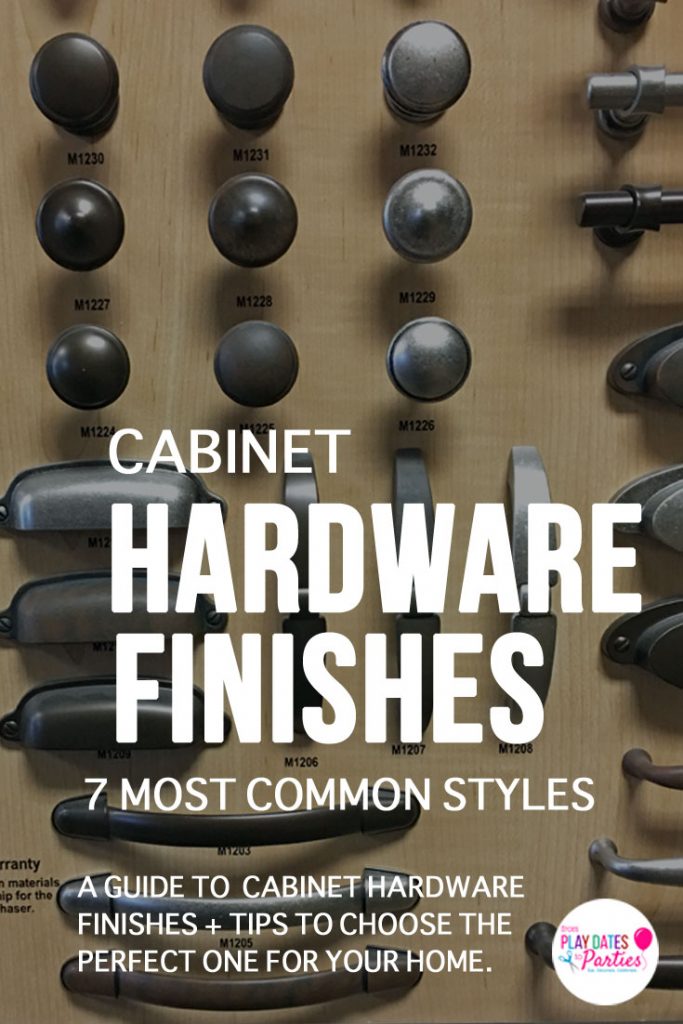
Swapping outdated brass or ceramic knobs for modern hardware creates an immediate visual upgrade. For traditional cabinets, try matte black or oil-rubbed bronze pulls in linear designs. Flat-front cabinets pair beautifully with minimalist bar pulls or integrated finger pulls. Measure existing hardware holes before purchasing new pieces to avoid visible patching—most modern hardware fits standard 3-inch or 5-inch center-to-center spacing. Spend $100-$200 on quality hardware that won’t tarnish or break, focusing on consistent finishes throughout your kitchen.
Strategic Placement Creates Visual Harmony
Install new hardware using a template to ensure perfect alignment—uneven pulls instantly look amateurish. For upper cabinets, position hardware along the bottom edge; for lower cabinets, place along the top edge. This creates visual continuity that draws the eye horizontally, making your kitchen feel more expansive. Consider mixing knob and pull styles strategically—use pulls for drawers and lower cabinets, knobs for uppers—to add subtle visual interest without overwhelming the space.
Modernize Lighting Without Rewiring
Replace Dated Fixtures with Contemporary Options
The right lighting transforms an old kitchen into a modern space faster than almost any other update. Remove those fluorescent ceiling fixtures or dated brass chandeliers and install sleek LED options. Under-cabinet lighting creates task lighting while making upper cabinets appear to float. Recessed LED downlights with 2700K-3000K color temperature provide warm, inviting illumination without harsh shadows. For personality, hang a single modern pendant over your sink or island—choose matte black, brass, or glass designs that complement your new hardware.
Layer Your Lighting for Maximum Impact
Create depth with three lighting layers: ambient (overhead), task (under cabinets), and accent (pendants or open-shelf lighting). Install dimmer switches to adjust lighting for different times of day and activities. Avoid the common mistake of relying solely on overhead lighting, which creates harsh shadows and makes your kitchen feel institutional rather than welcoming. Properly layered lighting makes even modest updates look intentional and high-end.
Refresh Backsplashes Without Tearing Tiles
Apply Peel-and-Stick Options for Rental-Friendly Updates
Full backsplash replacement requires demolition and grout work that most DIYers avoid. Instead, use modern peel-and-stick tiles that mimic subway tile, marble, or geometric patterns. These self-adhesive options work on clean, smooth surfaces and can be removed without damage—perfect for renters. For best results, clean the wall thoroughly with alcohol before application, then use a level and spacer to ensure straight lines. Focus on the visible areas behind your stove and sink for maximum visual impact with minimal effort.
Paint Existing Tiles for Unexpected Transformation
If your backsplash has solid-color tiles with intact grout, try painting them instead of replacing. Use a bonding primer followed by epoxy-based paint designed for tile surfaces. Choose a color that contrasts with your cabinets but complements your overall scheme—light cabinets with dark backsplash creates striking modern contrast. This technique works best on subway tile patterns where grout lines will remain visible, creating an intentionally industrial look that reads as contemporary rather than dated.
Update Countertops Without Replacement
Apply Concrete Overlay for Industrial-Style Transformation
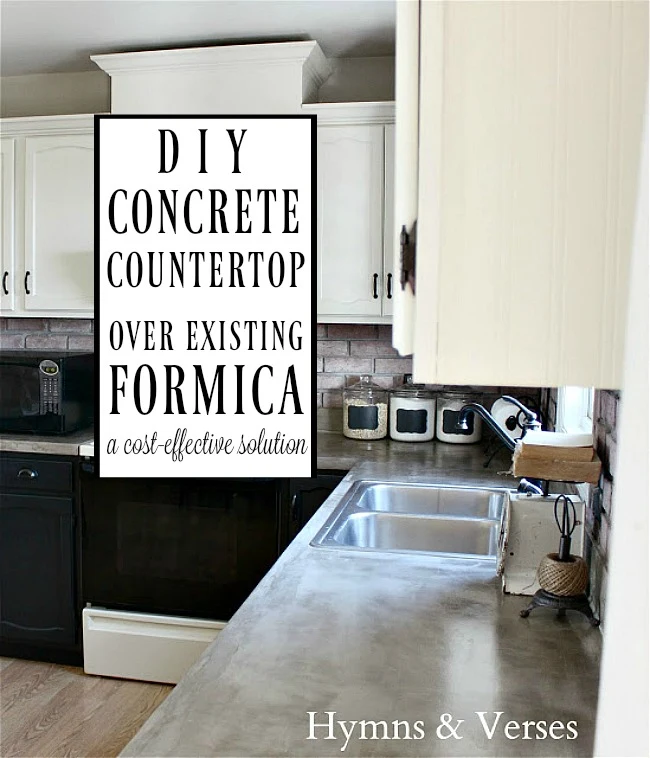
Instead of costly countertop replacement, consider a concrete overlay that transforms laminate counters into modern statement pieces. These DIY-friendly kits create a seamless, custom-looking surface in matte gray or white. The process involves applying a bonding agent, then spreading the concrete mixture with a trowel before sealing with food-safe epoxy. Concrete overlays work particularly well with painted cabinets, creating that sought-after modern contrast between warm wood tones and cool, industrial surfaces.
Use Countertop Paint for Budget-Friendly Refresh
Specialty countertop paints designed to withstand heat and wear can revive worn laminate surfaces. Thoroughly clean and lightly sand counters before applying multiple thin coats of product like Rust-Oleum Countertop Transformations. Choose neutral tones like quartz white or warm gray that match current design trends. This technique works best on counters with minimal damage—deep scratches or burns will remain visible through the paint. Allow at least 72 hours curing time before regular use.
Install Open Shelving for Airy Modern Feel
Replace Upper Cabinets Strategically for Visual Impact
Remove just the upper cabinets above your counter space and replace with floating shelves to create immediate openness. This technique works best in smaller kitchens where full upper cabinets feel oppressive. Use sturdy brackets and thick wood shelves (1.5-2 inches) in natural wood tones or painted to match your cabinets. Display only your most attractive dishes and glassware—cluttered shelves look messy rather than modern. Start with just one section of upper cabinets to test the look before committing to a full open-shelving design.
Create Visual Balance with Strategic Placement
Position shelves at varying heights rather than uniform spacing for visual interest. Leave more negative space around shelves than you think necessary—modern design emphasizes breathing room. Use matching hardware on remaining upper cabinets to create cohesion between open and closed storage. Add under-shelf lighting to highlight displayed items and create depth. This update makes your kitchen feel larger and more contemporary without permanent structural changes.
Refresh Walls with Modern Color Schemes
Choose Contemporary Neutrals That Enhance Space
Skip bold accent walls and paint your entire kitchen in modern neutral tones that make the space feel larger and more cohesive. Warm whites, soft grays, and earthy beiges create the perfect backdrop for modern kitchens. Consider Benjamin Moore’s Simply White or Sherwin-Williams’ Agreeable Gray for foolproof choices that work with almost any cabinet color. Paint walls, trim, and ceiling the same color for an ultra-modern, seamless look that visually expands small spaces.
Add Texture with Modern Wall Treatments
For subtle visual interest without overwhelming the space, consider modern wall treatments. Lightly textured drywall finishes, vertical wood slats, or even large-scale geometric wall decals add dimension without looking dated. Avoid traditional wallpaper borders or overly busy patterns that quickly feel outdated. A single accent wall with textured paint technique like limewash creates depth while maintaining the clean aesthetic essential to modern kitchen design.
Final Note: These strategic updates deliver maximum visual impact while respecting your budget and timeline. Focus on two or three key changes that address your kitchen’s most dated elements rather than attempting everything at once. Remember that modern design emphasizes simplicity—clutter is the enemy of contemporary style, so invest in smart storage solutions as you modernize. Most importantly, choose updates that reflect your personal style rather than chasing fleeting trends, ensuring your newly modernized kitchen remains fresh and inviting for years to come. With these techniques, you’ve taken the first crucial steps in transforming your old kitchen into a space that feels completely new without the stress and expense of a full remodel.


