
That stubborn white film clinging to your kitchen sink isn’t just unsightly—it’s a persistent problem that creates slippery surfaces, traps bacteria, and gradually damages your sink’s finish. If you’ve noticed hazy patches around your faucet, a gritty ring along the water line, or that annoying film that won’t come off with regular dish soap, you’re dealing with soap scum. The good news is that removing this common kitchen nuisance doesn’t require professional help or expensive equipment. This guide delivers practical, step-by-step methods using ingredients you probably already have in your pantry, along with smart prevention strategies that keep your sink sparkling with minimal effort.
Understanding your enemy is half the battle won. Soap scum forms when soap molecules react with minerals in hard water, creating an insoluble residue that bonds tightly to surfaces. Unlike ordinary dirt, this film actually gets harder to remove the longer it sits. But with the right approach tailored to your sink material, you can eliminate even stubborn buildup and establish a simple routine that prevents its return. Whether you prefer natural solutions or need commercial power for severe cases, this guide covers everything you need to restore your kitchen sink to its original shine.
Why Soap Scum Forms in Your Kitchen Sink
Soap scum develops through a chemical reaction between soap (particularly bar soap containing fatty acids) and minerals like calcium and magnesium present in hard water. When these elements combine, they create a sticky, insoluble film that adheres strongly to sink surfaces. In kitchen environments where soap is used frequently for handwashing and dish cleaning, this residue accumulates rapidly, especially in areas where water pools and evaporates near the drain and faucet base.
The composition of soap scum makes it particularly challenging to remove through ordinary washing. Unlike loose food particles or dirt, soap scum chemically bonds with surfaces and hardens over time. In kitchen sinks, it often combines with cooking grease, food residues, and other kitchen byproducts, creating an even more stubborn composite. This explains why regular dish soap and water won’t cut through existing buildup—you need either an acidic substance to dissolve the mineral deposits or the right abrasive method to physically break them away without damaging your sink.
Match Your Cleaning Method to Sink Material
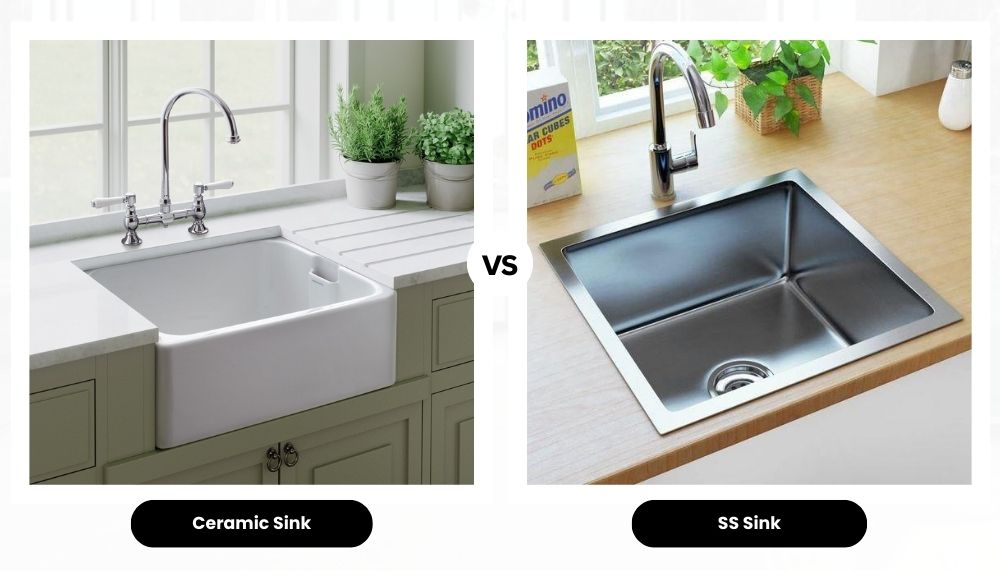
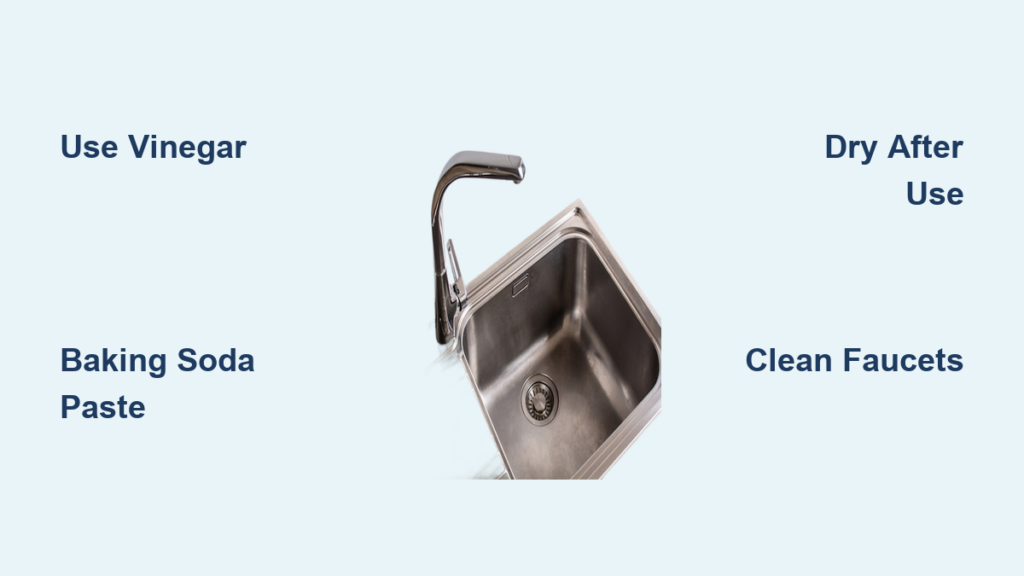
Stainless Steel Sinks: Gentle Acid Treatments Only
Stainless steel sinks require special care because harsh abrasives will leave visible scratches that actually trap more soap scum over time. For these sinks, white vinegar solutions work best but must be followed by thorough rinsing and drying. Never use steel wool or abrasive pads, as they’ll create microscopic grooves where future buildup will cling more easily. After cleaning, buff dry with a soft microfiber cloth to maintain the sink’s protective finish and prevent water spots that accelerate new soap scum formation.
Porcelain and Ceramic Sinks: Avoid Abrasives Near Chips
While more durable than stainless steel, porcelain sinks develop micro-chips over time that become soap scum traps. When cleaning these surfaces, avoid harsh abrasives near any chipped areas as they’ll make the damage more noticeable. The baking soda and vinegar method works exceptionally well here, but let the mixture sit for the full 20 minutes to penetrate the porous surface. For older sinks with deep-set stains, a paste of hydrogen peroxide and baking soda applied overnight can lift discoloration without damaging the glaze.
Effective Natural Cleaning Solutions
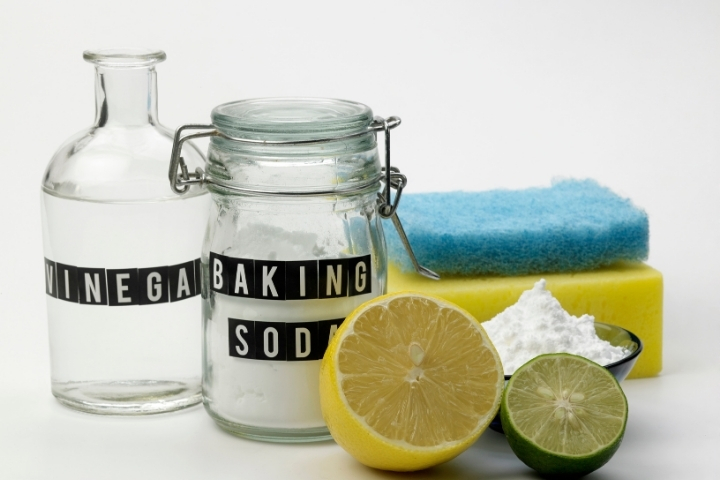
Vinegar and Baking Soda Deep Treatment
For moderate to heavy buildup, create a thick paste of baking soda and water (ratio of 3:1) and apply it liberally to all soap scum areas. Let it dry completely—this may take 2-3 hours—before spraying white vinegar over the dried paste. The reactivated fizzing action works deep into the residue. After 15 minutes, scrub with a soft-bristled toothbrush to reach crevices around the drain. This method works particularly well for the ring that forms at the water line, where soap scum accumulates fastest. Rinse thoroughly with warm water, then dry completely to prevent immediate reformation of new deposits.
Lemon Juice for Routine Maintenance
For weekly maintenance on light buildup, cut a lemon in half and rub the cut side directly on affected areas, focusing on faucet handles and the sink rim. Let the citric acid work for 10 minutes, then scrub with a soft sponge. The natural oils in lemon peel help create a temporary barrier against new buildup. For hard-to-reach areas, squeeze juice into a spray bottle and apply directly. This method leaves your sink smelling fresh while preventing soap scum accumulation between deep cleanings—ideal for households that prefer natural solutions and want to avoid chemical odors near food preparation areas.
Commercial Products for Severe Buildup

When natural remedies fail against years of accumulated soap scum, specially formulated commercial cleaners provide stronger results. Look for products containing lactic acid or citric acid rather than harsh chemicals like bleach, which can damage sink finishes. Spray the product directly onto dry surfaces (most work better without pre-wetting) and let it dwell for the full recommended time—typically 3-5 minutes. For vertical surfaces, use a thick gel formula that won’t run off. Always wear gloves and ensure good ventilation. After scrubbing with a non-scratch pad, rinse thoroughly with warm water. Test any new product on a small inconspicuous area first, especially on composite or stone sinks where chemical sensitivity is higher.
Deep Cleaning Neglected Sinks
For sinks with years of unaddressed buildup, combine multiple methods in sequence. Start with the baking soda paste treatment, let it dry overnight, then apply vinegar in the morning. After scrubbing and rinsing, follow with a commercial lime scale remover for any remaining deposits. For extremely stubborn areas, create a vinegar-soaked paper towel “mask” held in place with plastic wrap for several hours—this extended contact time dissolves even hardened deposits. Finish by polishing with a paste of baking soda and a few drops of water to restore shine. This intensive process may need repeating for severely neglected sinks, but it’s far more cost-effective than sink replacement.
Fixtures and Faucets: Special Attention Needed
Faucet handles and spray heads collect soap scum rapidly due to constant water contact. Wrap vinegar-soaked paper towels around affected areas and secure with rubber bands for 30-60 minutes. For aerators and spray heads, unscrew them and soak in vinegar overnight. Use an old toothbrush to clean crevices, then rinse thoroughly. After cleaning, apply a thin coat of car wax to metal fixtures—this creates a protective barrier that repels water and makes future cleaning easier. Regularly drying fixtures after each use prevents the majority of buildup, as evaporation is what leaves mineral deposits behind.
Drain Maintenance to Prevent Clogs
Soap scum accumulates inside drains too, causing slow drainage and odors. Monthly, pour ½ cup baking soda followed by 1 cup vinegar down the drain, cover the opening, and let it fizz for 15 minutes before flushing with boiling water. For severe buildup, remove the stopper and use a plastic drain snake to physically remove accumulated residue. Never use chemical drain cleaners regularly, as they corrode pipes over time. Installing a simple drain screen catches food particles that would otherwise combine with soap scum to create clogs.
Prevention Strategies That Actually Work
The single most effective prevention method is drying your sink after each use. Keep a microfiber cloth beside the sink and spend 15 seconds wiping down surfaces after washing dishes or hands. This simple habit prevents 90% of soap scum formation by removing the water that would evaporate and leave mineral deposits. For added protection, mix equal parts water and vinegar in a spray bottle and mist surfaces after drying—this acidic residue prevents new buildup. Switching from bar soap to liquid soap reduces fatty acid content that contributes to stubborn scum. If you have hard water, consider a faucet-mounted water softener, which dramatically reduces the minerals that create soap scum in the first place.
When to Call a Professional
If you’ve tried multiple methods without success, or if your sink shows signs of damage from previous cleaning attempts, professional help may be warranted. Professionals have access to industrial-strength cleaners and specialized tools that can safely remove decades of buildup. They can also assess whether refinishing is possible for damaged surfaces. For valuable or antique sinks, professional cleaning may preserve value better than DIY methods. The cost typically ranges from $100-$300, but it’s a small price compared to sink replacement costs.
Don’t let soap scum make your kitchen feel perpetually dirty. With the right approach tailored to your sink material and the severity of buildup, you can restore shine with minimal effort. Remember that consistent maintenance—just a minute of drying after each use—prevents 90% of future problems. Your kitchen sink gets more use than almost any other surface in your home; keeping it clean isn’t just about appearance, but about maintaining a hygienic space for food preparation. Start with one deep cleaning session, then implement the simple daily and weekly habits outlined here, and you’ll enjoy a spotless sink with surprisingly little ongoing effort.


