
Stone kitchen sinks transform ordinary kitchens into spaces of natural elegance, but their beauty requires specific maintenance to prevent damage from everyday kitchen hazards. Unlike stainless steel or porcelain fixtures, stone sinks demand careful cleaning methods that protect their porous surfaces from etching, staining, and seal degradation. Knowing how to clean a stone kitchen sink properly preserves both its aesthetic appeal and structural integrity, saving you from costly repairs or premature replacement. Daily exposure to acidic foods, hard water minerals, and abrasive cleaning tools can permanently damage these surfaces if you don’t use the right techniques.
Many homeowners mistakenly treat stone sinks like other kitchen fixtures, reaching for vinegar solutions for hard water stains or abrasive scrubbers for tough grime. These common approaches cause irreversible damage to natural stone surfaces, creating dull spots, etching, and discoloration that diminish your sink’s value. This guide provides proven methods specifically designed for stone surfaces, helping you maintain that showroom finish for years to come. You’ll learn daily routines that take minutes but prevent major problems, targeted approaches for stubborn stains, and essential maintenance schedules that protect your investment.
Understanding your specific stone type is crucial—what works for granite could damage marble, and composite materials have their own requirements. By tailoring your cleaning approach to your sink’s composition, you’ll achieve superior results while avoiding common mistakes that lead to permanent damage. Whether you have a marble, granite, or composite stone sink, this guide delivers actionable solutions that keep your fixture looking pristine.
Why Daily Stone Sink Maintenance Prevents Permanent Damage
Skipping daily care for your stone sink creates conditions where minor issues become permanent problems that require professional restoration. The cumulative effect of water spots, food residue, and acidic spills gradually degrades your sink’s protective seal and alters the stone’s surface chemistry.
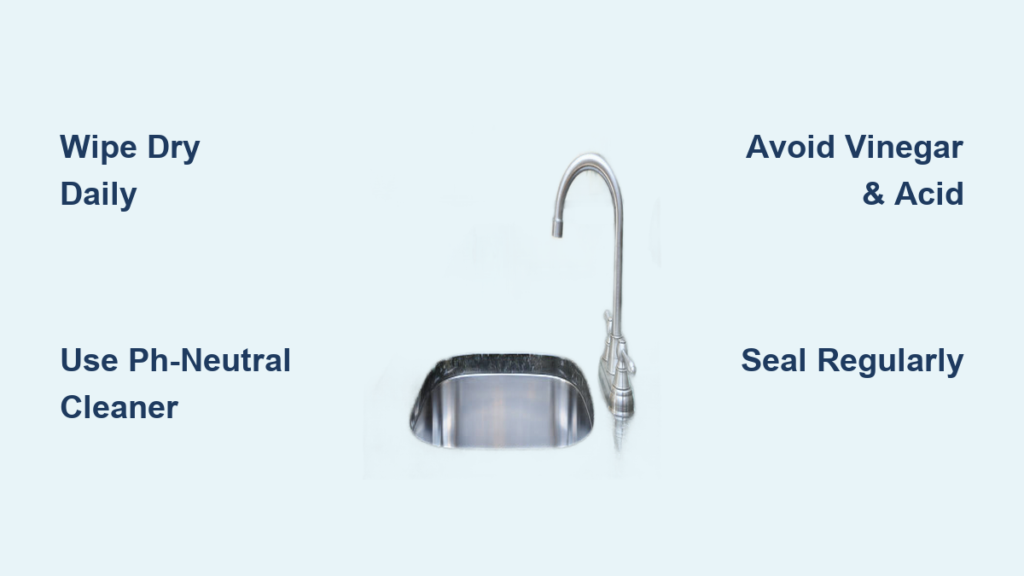
Immediate Post-Use Wiping Stops Water Spot Formation
Leaving water to evaporate on your stone sink allows minerals from hard water to deposit on the surface, creating unsightly white spots that bond to the stone over time. Keeping a dedicated microfiber cloth beside your sink and wiping it dry after every use prevents 90% of maintenance issues. This simple action takes seconds but eliminates the mineral buildup that leads to stubborn stains requiring intensive treatment. When wiping, use circular motions that follow the stone’s natural pattern, applying light pressure to avoid pushing debris into pores.
pH-Neutral Cleaning Solutions Protect Stone Integrity
Standard dish soats contain citric acids and surfactants that gradually break down stone seals with repeated use. Instead, choose cleaners specifically formulated for natural stone with a neutral pH between 7-8. These products effectively cut through kitchen grease without compromising your sink’s protective barrier. When applying cleaner, spray directly onto a cloth rather than the sink surface to prevent pooling in crevices. For quick daily cleanings, a solution of warm water and a few drops of stone-safe cleaner applied with a soft sponge removes residue without risking damage.
Thorough Drying Prevents Seal Degradation
Moisture trapped along the sink’s edges and around the drain gradually degrades the protective seal, creating entry points for stains. After rinsing, use a dry microfiber cloth to absorb all moisture, paying special attention to the transition points between sink and countertop. This final drying step not only prevents water spots but also gives you a chance to inspect for early signs of seal failure or developing stains. For sinks in high-humidity environments, consider using a small fan to accelerate drying in hard-to-reach areas.
Weekly Deep Cleaning That Restores Stone Luster
Daily maintenance prevents major issues, but weekly deep cleaning addresses the inevitable buildup in a heavily used kitchen sink. This comprehensive process revitalizes your stone’s appearance and reinforces its protective properties.
Drain Area Scrubbing Eliminates Organic Buildup
Food particles and soap scum accumulate around the drain faster than any other area, creating stubborn buildup that standard cleaning misses. Remove the strainer and soak it in warm, soapy water while you clean the drain opening. Use an old toothbrush dipped in stone-safe cleaner to scrub the drain circumference in circular motions, working outward toward the basin. For persistent buildup, apply a paste of baking soda and water, let it sit for 10 minutes, then gently scrub before rinsing thoroughly. This focused attention prevents odors and maintains proper drainage.
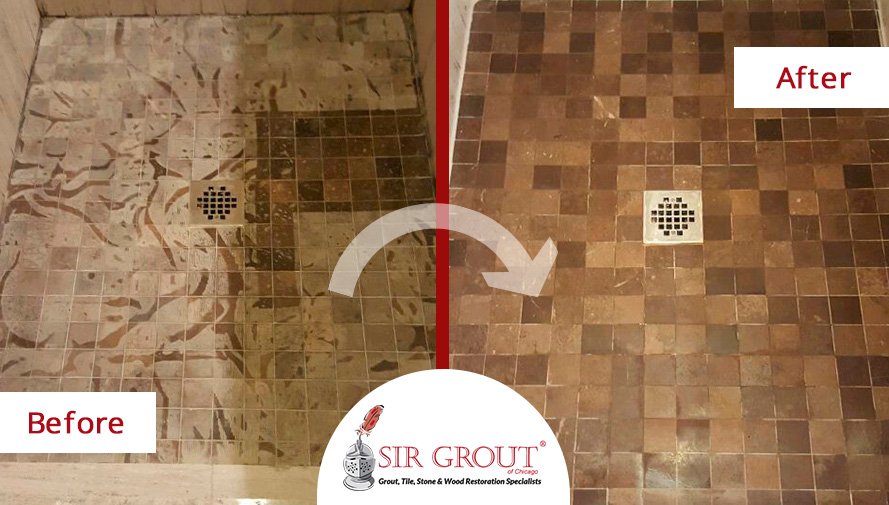
Edge and Seam Cleaning Prevents Mold Growth
The transition points where your stone sink meets the countertop create natural traps for moisture and debris. Neglecting these areas leads to mold growth and seal degradation that can damage both your sink and cabinetry. Apply stone-safe cleaner along all seams using a cotton swab for precision, then gently scrub with a soft-bristled brush. Rinse thoroughly with a damp cloth, then dry completely with a microfiber towel. Pay particular attention to corners where multiple surfaces meet, as these spots collect the most debris.
Removing Specific Stains Without Damaging Stone

Different stains require different approaches—using the wrong method can set stains permanently or cause additional damage to your stone surface.
Organic Stain Removal for Wine and Coffee Spills
Fresh wine or coffee spills should be blotted immediately with a clean cloth, not wiped, to avoid spreading the stain. For set-in stains, create a poultice of hydrogen peroxide and baking soda mixed to a toothpaste consistency. Apply the paste to the stain, cover with plastic wrap to prevent drying, and leave for 24-48 hours before rinsing. The peroxide penetrates the stone to break down organic compounds while the baking soda provides gentle abrasion. For light stains, a single application often suffices, while darker stains may require multiple treatments.
Hard Water Deposit Dissolution Techniques
White, chalky deposits around faucets and drains indicate hard water mineral buildup. Apply a commercial stone-safe hard water remover according to package directions, allowing it to dwell for the recommended time before gently scrubbing with a soft brush. For stubborn deposits on granite (not marble), a vinegar-water solution (1:1 ratio) applied for no more than 2 minutes can dissolve minerals, but must be immediately neutralized with baking soda and thoroughly rinsed. Prevention through daily drying remains more effective than removal—keep a squeegee beside your sink for quick post-use moisture removal.
Stone Sink Sealing: When and How to Protect Your Investment
Your stone sink’s protective seal degrades with regular use, requiring periodic reinforcement to maintain its defense against stains and damage.
Water Bead Test Determines Seal Needs
Sprinkle water droplets across your sink surface and time how long they remain beaded. Intact sealant keeps water beaded for 5+ minutes; absorption within 1-2 minutes indicates seal degradation. Focus testing on high-traffic areas like the basin bottom and around the drain, where seal wear occurs fastest. If water absorption varies across the sink, spot-treat only the degraded areas rather than applying sealer to the entire surface.
Proper Sealer Application Prevents Uneven Protection
After thorough cleaning and complete drying, apply penetrating sealer in thin, even coats with a soft cloth. Work in small sections, allowing 5-10 minutes for absorption before wiping away excess. Most sinks require two coats applied 30 minutes apart. Avoid pooling sealer in corners or along edges, as this creates sticky residues that attract dirt. Allow 48 hours for full curing before normal use—during this period, keep the sink completely dry to ensure proper bonding.
Materials That Permanently Damage Stone Sinks
Certain common household items cause irreversible damage to stone surfaces despite their effectiveness on other fixtures.
Why Vinegar and Citrus Destroy Stone Surfaces
Acidic substances like vinegar, lemon juice, and wine etch calcium-based stones by dissolving the surface layer. Even brief contact creates microscopic pits that catch light differently, appearing as dull spots. Granite offers more resistance but still suffers seal degradation from repeated acid exposure. Keep acidic substances in glasses or containers with coasters, and immediately rinse any spills with water followed by pH-neutral cleaner.
Abrasive Tools That Scratch Stone Finishes
Steel wool, scrubbing pads, and even some “non-scratch” sponges create microscopic scratches that accumulate into visible wear. These scratches catch dirt and accelerate staining while diminishing your sink’s luster. Replace abrasive tools with soft microfiber cloths, natural fiber brushes, or stone-specific non-scratch pads. For stubborn residue, use baking soda paste with a soft cloth rather than mechanical abrasion.
Composite Stone Sink Care Differences
Composite sinks (quartz, granite composite, etc.) share similarities with natural stone but require different maintenance approaches.
Heat Protection Prevents Composite Discoloration
While more heat-resistant than natural stone, composite sinks can still discolor from direct contact with hot pans. Always use trivets for hot items, as thermal shock creates stress points that lead to micro-cracks. Avoid placing extremely hot pots directly into the sink—let them cool slightly on the counter first. For stubborn heat marks, apply a composite-specific polish with a soft cloth using circular motions.
Non-Porous Surface Cleaning Advantages
Composite materials resist staining better than natural stone due to their non-porous nature. Daily cleaning often requires only warm water and mild soap, with weekly deep cleaning using composite-specific cleaners. Avoid bleach-based products that can yellow some composite materials over time. When disinfecting, use isopropyl alcohol diluted with water rather than harsh chemical alternatives.
Monthly Maintenance Checklist for Long-Term Protection
Consistent care prevents the need for intensive restoration. This simple monthly routine preserves your sink’s beauty:
- Perform water bead test to check seal integrity
- Deep clean drain assembly and overflow
- Apply stone-specific polish to restore luster
- Inspect for developing scratches or etching
- Reapply sealer to degraded areas only
By following these specific methods for how to clean a stone kitchen sink, you’ll maintain its beauty while protecting your investment. The few extra minutes spent on proper maintenance prevent costly damage that diminishes both function and value. Remember that prevention through immediate attention to spills, proper drying, and using stone-safe products creates results that intensive cleaning can’t restore once damage occurs. Your stone sink rewards consistent care with enduring elegance that enhances your kitchen for decades.


