
A malfunctioning kitchen sink sprayer transforms simple tasks like rinsing vegetables or cleaning dishes into frustrating ordeals. When your current sprayer hose develops leaks, loses pressure, or simply wears out after years of use, replacing it yourself saves you the $150-$250 plumber’s fee for what’s actually a straightforward DIY project. Most homeowners can complete a kitchen sink sprayer hose installation in 30-45 minutes with basic tools and minimal plumbing experience. This comprehensive guide provides the exact steps you need to replace your sprayer hose successfully, whether you’re dealing with a quick-connect system or traditional threaded connections. By the end of this article, you’ll know how to safely remove your old hose, properly install the new one, and troubleshoot any issues that might arise during the process.
Gather Your Installation Tools and Materials
Having the right tools and materials ready before you start prevents frustrating interruptions and ensures your installation goes smoothly. Working under the sink with limited space demands proper preparation to avoid dropped parts or forgotten essentials.
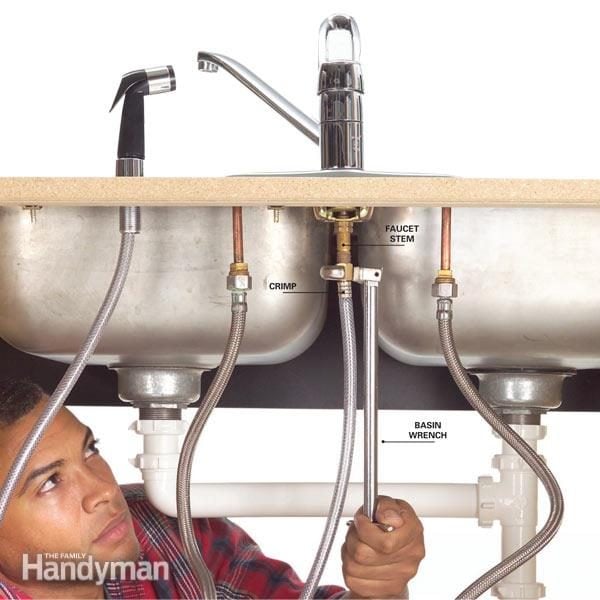
Essential tools for this project include an adjustable wrench or basin wrench—the basin wrench’s long handle and pivoting head make it invaluable for reaching tight connections under the sink. Keep a bucket and several clean rags nearby to catch water from the supply lines and wipe up spills. Slip-joint pliers provide extra grip for stubborn connections, while a bright LED work light or headlamp illuminates the dark cabinet space. Don’t forget safety glasses to protect your eyes from debris and dripping water.
Your materials checklist starts with the replacement sprayer hose assembly, which should match your faucet’s specific connection type—either quick-connect or threaded. Verify compatibility with your faucet model before purchasing, as mismatched connections will cause leaks. You’ll need plumber’s tape (PTFE tape) for sealing threaded connections—wrap it clockwise around male threads for a proper seal. If your sprayer has a base that sits on the sink deck, have plumber’s putty ready to create a watertight seal around the mounting area. A small container of white vinegar proves useful for cleaning mineral deposits during installation.
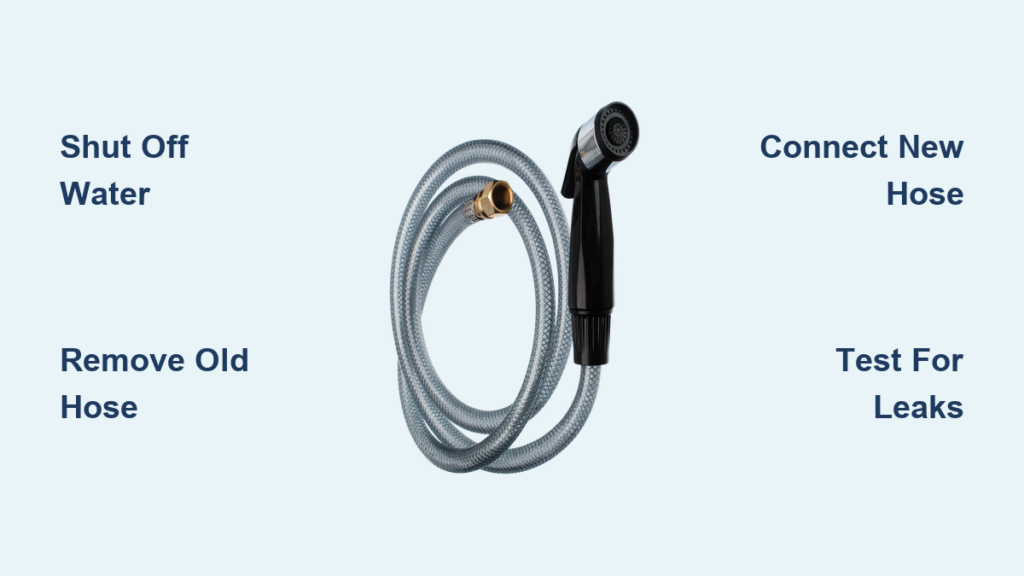
Shut Off Water and Prepare the Workspace
Skipping proper water shutoff and workspace preparation risks flooding your kitchen cabinet and creating a messy, dangerous work environment. These critical first steps protect your home and set up conditions for a successful installation.
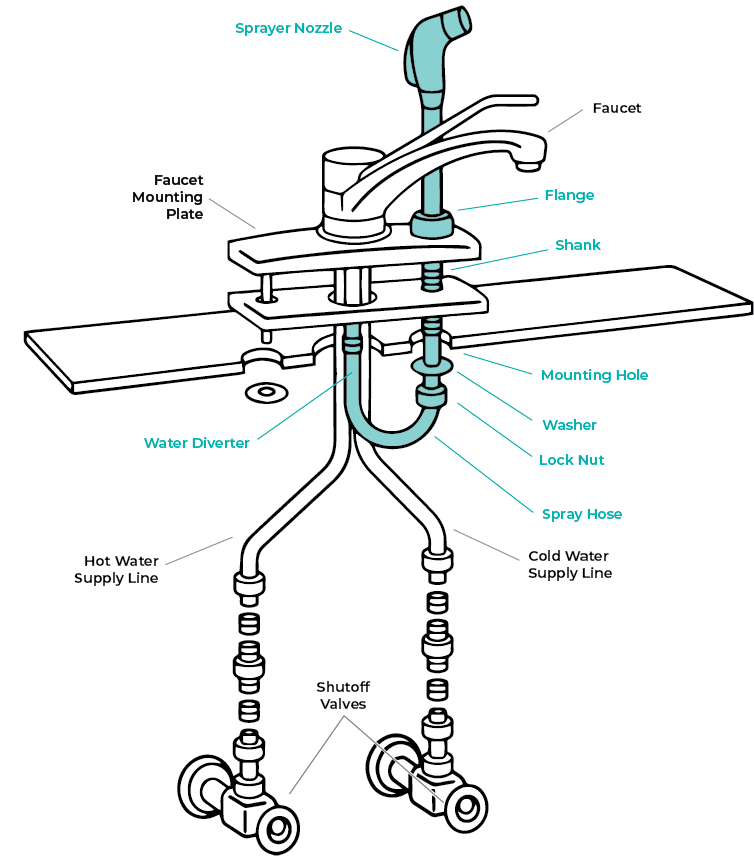
Locate the hot and cold shut-off valves beneath your sink—turn both valves clockwise until they stop to completely shut off water flow. After closing the valves, turn on your faucet and let it run for 15-20 seconds to release pressure and drain remaining water from the lines. Place your bucket directly under the supply lines before disconnecting anything, as residual water will drip out. For extra precaution, turn off the main water supply to your home if you’re uncomfortable with just the under-sink valves.
Clear out the cabinet beneath your sink completely, removing all cleaning supplies, trash cans, and other stored items. Lay down old towels or a plastic drop cloth to protect the cabinet floor from tools and water spills. Position your work light to illuminate the connection points without creating shadows—consider using a magnetic light that attaches to metal pipes for hands-free operation. Organize your tools within easy reach using a small container or magnetic tray to prevent dropped parts from rolling into inaccessible corners. This preparation transforms a cramped, dark workspace into an efficient work area where you can move freely.
Remove the Old Sprayer Hose

Disconnecting your existing sprayer hose requires careful attention to connection types and a systematic approach to avoid damaging surrounding plumbing components. Rushing this step can lead to broken fittings or unexpected water leaks.
Start by locating where the sprayer hose connects to the faucet body underneath the sink. Most modern faucets use quick-connect fittings with a small release clip—press this clip while pulling the hose straight out from the connection. For older faucets with threaded connections, use your adjustable wrench to hold the faucet’s connection nut stationary while you unscrew the hose counterclockwise with your other hand. Apply penetrating oil if connections are corroded, waiting 10 minutes before attempting to loosen them.
Trace the hose to its other connection point at the water supply line, which typically connects to a tee fitting between the shut-off valve and faucet supply line. This connection usually features a compression nut that you can unscrew by hand or with slip-joint pliers—turn counterclockwise while supporting the tee fitting to prevent it from rotating. As you disconnect each fitting, note the orientation of any washers or O-rings inside the connections; these components often need replacement on your new installation. Carefully pull the old hose up through the sink opening, removing any mounting hardware or grommets that secure the spray head to the sink deck.
Connect the New Sprayer Hose Properly
Proper connection technique ensures your new sprayer hose delivers leak-free performance and withstands years of daily use. Incorrect installation creates immediate leaks or causes premature failure that requires repeating the entire process.
Begin by feeding the spray head end of the new hose down through the sink opening, positioning it exactly where the old hose was located. For sprayers with a deck-mounted base, apply a thin, continuous bead of plumber’s putty around the underside of the base before setting it in the sink hole—press firmly to create a seal, then wipe away excess putty with a damp cloth. For faucet-mounted sprayers, ensure any included rubber seals or washers are properly seated in their grooves before making connections.
For the faucet connection end of the hose, wrap plumber’s tape clockwise around any male threads—two to three tight wraps provide optimal sealing without risking tape bunching. Thread the hose connector onto the faucet connection by hand first, ensuring threads engage smoothly without cross-threading, then tighten with your wrench no more than a quarter turn beyond hand-tight. Over-tightening cracks plastic fittings and strips metal threads. Connect the supply line end using the same technique—hand-tighten first, then give a slight additional turn with pliers if needed. The hose should follow a smooth path without sharp bends that could kink during use.
Test for Leaks and Verify Functionality
Thorough testing after installation prevents hidden leaks that cause significant cabinet damage over time. Many DIYers make the mistake of assuming everything works after initial water restoration, only to discover water damage weeks later.
Slowly turn both shut-off valves counterclockwise to restore water flow, opening them about halfway initially to check for leaks before fully opening. Immediately inspect all connection points under the sink while water flows—look closely at the faucet connection, supply line connection, and spray head mounting area for any drips or moisture. Run your hand along the entire hose length to feel for wet spots that might indicate a small leak or crack in the new hose.
Test spray functionality by pressing the spray head button and switching between stream and spray modes through several cycles. Water flow should be strong and consistent in both modes without sputtering or reduced pressure. If spray pressure seems weak, check for kinks in the hose path—reposition the hose to eliminate sharp bends. Run the sprayer continuously for 30 seconds in each mode, then check all connections again after water pressure has stabilized. Any leaks require shutting off water, drying the connection thoroughly, and reapplying plumber’s tape before retightening.
Troubleshoot Common Sprayer Problems
Even with proper installation, you might encounter issues with your new sprayer hose. Understanding common problems and their solutions helps you diagnose and fix issues quickly without unnecessary stress.
Low water pressure at the sprayer often results from partially closed shut-off valves, so verify both valves are fully open. Kinks in the hose—either from sharp bends during installation or objects stored under the sink—restrict flow and cause weak spray. Check the entire hose path and reposition it to eliminate sharp curves. Mineral deposits from hard water can clog the spray head’s small holes; soak the spray head in vinegar overnight to dissolve buildup, then rinse thoroughly before reinstalling.
Leaking at the spray head when the faucet runs indicates worn washers or seals inside the spray head mechanism. For spray heads with internal washers, unscrew the head and inspect the rubber components—replace any that appear cracked or flattened. Leaking at the faucet connection typically means the fitting isn’t sealed properly; try re-wrapping with plumber’s tape and tightening again, being careful not to over-tighten. If your sprayer button sticks or fails to switch between modes, debris inside the mechanism is usually the culprit—disassemble, clean, and lubricate with food-safe silicone spray if needed.
Extend the Life of Your Kitchen Sink Sprayer
Regular maintenance keeps your sprayer operating efficiently for years and prevents common problems before they develop. A few simple habits can significantly extend the life of your kitchen sink sprayer hose and spray head.
Descaling your spray head monthly prevents mineral buildup that restricts flow and clogs spray patterns. Simply unscrew the spray head, soak it in white vinegar for thirty minutes, then use a small brush or toothpick to clear any debris from the spray holes. Rinse thoroughly before reinstalling. For households with hard water, consider installing a whole-house water softener or using a faucet-mounted filter to reduce mineral deposits throughout your plumbing.
Inspect your sprayer hose annually for signs of wear, cracking, or deterioration. Check connection points for corrosion or mineral buildup, and clean these areas with a cloth and mild vinegar solution. Avoid hanging heavy objects from the sprayer or using it to drain containers, which strains the hose connections and can cause premature failure. By treating your sprayer gently and maintaining it regularly, you’ll enjoy reliable performance and avoid premature replacement for the life of your faucet.


