
Water emergencies in your kitchen can happen without warning—a sudden leak, a dripping faucet, or a burst supply line can turn into a costly disaster within minutes. Knowing exactly how to turn off kitchen faucet water isn’t just a handy skill; it’s essential home maintenance that every homeowner should master. Whether you’re facing an urgent plumbing issue or simply need to isolate water for routine maintenance, understanding your shut-off options empowers you to act quickly and confidently when it matters most.
This guide walks you through every method for stopping kitchen faucet water flow, from quick temporary solutions to permanent emergency shut-offs. You’ll learn where your shut-off valves are located, how different valve types operate, and what to do when valves refuse to turn. By the end, you’ll have the knowledge to handle both routine maintenance and unexpected emergencies without panic or costly service calls.
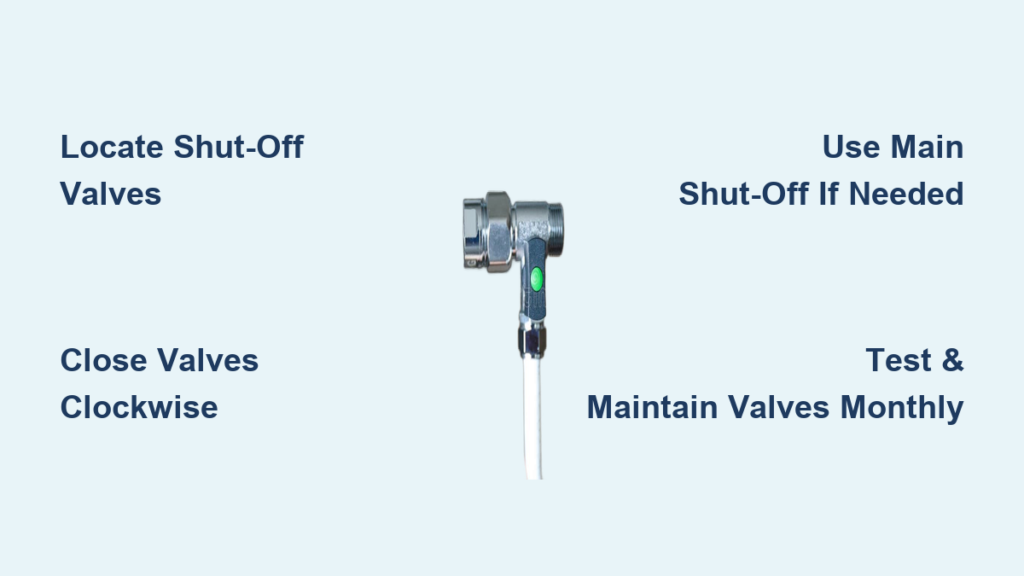
Locate Your Under-Sink Shut-Off Valves Immediately
The most common and convenient way to turn off kitchen faucet water is through individual shut-off valves located beneath your sink. These small but critical components connect your faucet’s flexible supply lines to your home’s main water pipes, allowing you to isolate the kitchen without disrupting water service to the rest of your house.
Locating these valves requires nothing more than opening your cabinet doors and looking at the pipes coming from the wall or floor. You’ll find two valves—one for hot water and one for cold—each with a small handle extending from a brass or chrome-plated valve body. The hot valve traditionally has a red handle, while the cold valve has a blue handle, though color coding isn’t universal, so check both if you’re uncertain which is which. The valves typically sit where the flexible hose from your faucet meets the rigid supply pipe, usually within arm’s reach once you open the cabinet.
Understanding your valve handle style helps you operate it correctly. Knob-style handles are round and turn like a traditional faucet handle, requiring multiple rotations to close fully. Lever handles are flat or curved and flip perpendicular to the pipe when closed, making them easy to identify at a glance. Stem handles are T-shaped or oval and operate similarly to a screwdriver, turning with moderate pressure. Regardless of style, the operation principle remains the same: clockwise turns close the valve, while counterclockwise turns open it.
Close Individual Kitchen Faucet Valves Properly
When you need to stop water flow for faucet repairs, cartridge replacement, or addressing a leak, closing your individual shut-off valves is the proper first step. This method preserves water service to your entire home while isolating only the kitchen faucet, making it ideal for maintenance tasks and minor plumbing issues.
Begin by opening your cabinet doors and clearing any stored items that might obstruct your access. Take a moment to identify both valves and determine which one controls your problem—if you’re fixing a hot water issue, you only need to close the hot valve, but full maintenance typically requires closing both. Once you’ve located the valves, turn each handle clockwise until it stops turning. For lever handles, this means flipping them so they sit perpendicular to the pipe; for knob-style handles, you’ll need several complete rotations.
After closing both valves, test your work by turning on the faucet. If water stops flowing, you’ve successfully isolated the supply. However, don’t proceed with repairs immediately—open the faucet fully to release any remaining pressure in the lines, which prevents unexpected sprays when you disconnect supply lines. Place a bucket beneath the connections before loosening any fittings, as residual water will inevitably drain out. This simple step prevents water damage to your cabinet floors and saves you from sopping up spills later.
Activate Main House Water Shut-Off During Emergencies
Sometimes individual valves fail, are missing entirely, or simply won’t close during an emergency. In these situations, knowing how to turn off kitchen faucet water at the main supply becomes critical. The main shut-off valve controls water to your entire house, stopping flow everywhere at once rather than isolating just the kitchen.
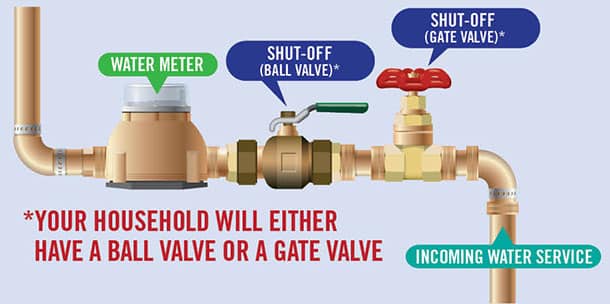
Locating your main shut-off valve requires understanding where water enters your home. Interior valves are typically found in basements, utility rooms, or crawl spaces—anywhere the main water line first enters the house. Look for a brass valve attached to a pipe coming through your foundation wall or floor. Exterior shut-off valves are usually located in ground-level valve boxes near your property line or against your home’s foundation. These boxes are often marked with a small lid labeled “WATER” or “Shut-Off.” If you have a water meter, the main shut-off might be located at the meter itself, though accessing it may require contacting your local water utility.
When using the main shut-off, turn the valve clockwise until it stops completely. Most main valves are either gate valves (round handles requiring multiple rotations) or ball valves (lever handles requiring a quarter-turn). After closing the main supply, open faucets throughout your house—starting with the lowest faucet—to drain remaining water from the pipes. This step reduces pressure and prevents water from continuing to drip from fixtures after you’ve closed the main valve. Remember that shutting off the main valve affects your entire household, including your refrigerator’s ice maker, your water heater’s pressure relief valve, and any irrigation systems, so plan accordingly before taking this step.
Fix Stuck or Leaking Kitchen Shut-Off Valves
Shut-off valves that refuse to turn or leak when closed create serious problems during emergencies. Understanding why valves fail and how to address these issues can save you from costly service calls and potential water damage.
Mineral deposits and scale buildup represent the most common cause of stuck valves. Over years of operation, dissolved minerals in your water deposit inside the valve body, gradually restricting movement. If your valve won’t turn, start by applying a penetrating oil like WD-40 or PB Blaster around the stem where it enters the valve body. Allow the oil to work for fifteen to thirty minutes, then attempt to turn the valve gently. If it still resists, apply gentle heat using a hair dryer to expand the metal and loosen deposits. Never force a stuck valve—excessive pressure can crack the valve body or break the stem, creating a much more expensive problem.
Leaking valves require different diagnosis and repair. If water drips from the stem when the valve is open, the packing nut might simply need tightening. This nut sits just below the valve handle and compresses a washer against the stem to create a seal. Turn the packing nut clockwise one-quarter turn with an adjustable wrench, being careful not to overtighten. If the leak continues or water sprays from the valve body itself, internal components are likely damaged and the valve should be replaced. For compression valves, replacing the washer often resolves minor leaks, but cracked valve bodies require complete valve replacement.
Respond to Kitchen Faucet Emergencies Correctly
A sudden kitchen faucet leak or burst supply line demands immediate action. Knowing how to turn off kitchen faucet water quickly can mean the difference between a minor cleanup and extensive water damage requiring hundreds of dollars in repairs.
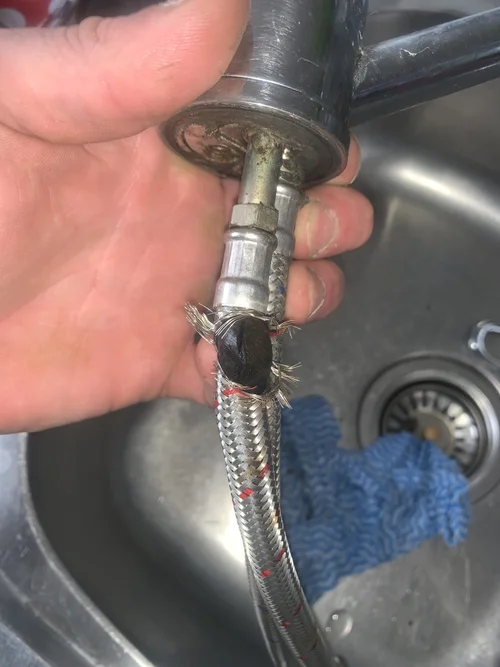
When you discover a leak, stay calm and assess the situation before acting. Determine whether water is coming from the faucet itself, from the supply lines connecting to the faucet, or from the drain pipes beneath the sink. If water sprays from a cracked supply line or bursts from a failed connection, your individual shut-off valves are your first line of defense. Reach under the sink and turn both valves clockwise as quickly as possible. If the valves are stuck or inaccessible, proceed directly to your main house shut-off.
If the leak originates from the faucet body itself and individual valves are stuck, try closing the faucet handle fully as a temporary measure. This won’t stop water pressure in the supply lines but can reduce flow from the spout, buying you time to access your shut-off valves or call for help. Place towels or buckets around the affected area to contain water spread while you work. Once water flow stops, open the faucet to drain remaining pressure and clean up standing water immediately to prevent damage to cabinet floors, subflooring, or items stored beneath the sink.
Prevent Kitchen Valve Failures with Simple Maintenance

Preventive maintenance keeps your shut-off valves functional when you need them most. Valves that sit unused for years often seize shut, leaving you unable to close them during emergencies. A simple maintenance routine takes minutes but ensures reliable operation.
Monthly maintenance requires nothing more than operating each valve through its full range of motion. Locate both shut-off valves beneath your sink and turn them fully closed, then fully open again. This action redistributes lubricants inside the valve and prevents mineral deposits from binding the mechanisms. While performing this check, visually inspect for signs of moisture, corrosion, or mineral buildup that might indicate developing problems. Tighten any loose handles by tightening the packing nut slightly, being careful not to over-tighten.
Quarterly maintenance involves deeper inspection and cleaning. Clear any debris from around the valve bodies and wipe away mineral deposits using a cloth dampened with white vinegar. For stubborn buildup, allow the vinegar to sit for several minutes before scrubbing. Check the flexible supply lines connecting your faucet to the shut-off valves for cracks, bulges, or corrosion at the connections. These lines typically last ten to fifteen years but should be replaced at the first sign of deterioration.
Never store items directly in front of or covering your shut-off valves—this seemingly minor oversight can cost you precious time during an emergency. Keep a small flashlight in your kitchen cabinet to ensure you can see clearly when operating valves in low-light conditions. Consider labeling your valves with permanent markers to make identification faster during stressful situations.
Final Emergency Water Shut-Off Checklist
When water starts flowing unexpectedly from your kitchen faucet, follow this critical sequence: first attempt individual shut-off valves, then move to the main house shut-off if needed. Remember the universal rule—clockwise closes, counterclockwise opens—applies to virtually all residential plumbing valves. Test your valves monthly by closing and reopening them to ensure they operate smoothly when emergencies strike.
After stopping the water flow, always open the faucet fully to release trapped pressure before disconnecting any components. If you encounter stuck or leaking valves, address them immediately rather than waiting for an emergency. Keep essential tools—a bucket, towels, adjustable wrench, and penetrating oil—readily accessible under your sink for quick response.
By understanding how to turn off kitchen faucet water properly and maintaining your shut-off system regularly, you’ll transform potential disasters into manageable situations. This knowledge not only protects your home from water damage but also gives you confidence that you can handle plumbing emergencies without panic or expensive service calls.


