
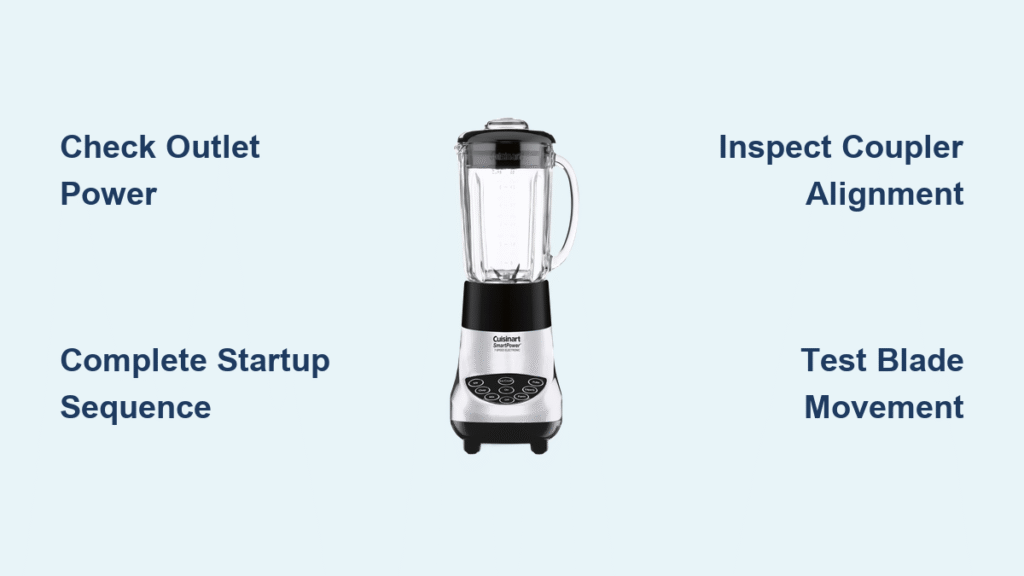
You press the power button on your Cuisinart SmartPower 7 speed blender, expecting that satisfying whir of blades pulverizing ingredients, but nothing happens. No lights, no motion—just frustrating silence as your morning smoothie plans crumble. Whether you’re using the SBC-1000 cooking blender or CPB-380 personal model, this cuisinart smartpower 7 speed blender not working crisis stops your kitchen workflow dead in its tracks. Don’t panic yet—this guide reveals exactly why your blender won’t start and how to fix it in under 15 minutes.
Most “dead blender” cases stem from simple oversights like incomplete startup sequences or power issues—not catastrophic failures. You’ll learn what those blinking lights actually mean, which components you can check without tools, and when warranty replacement is your only option. By the end, you’ll diagnose problems like a pro and avoid common repair traps that waste your time.
Decode Your Cuisinart SmartPower Indicator Light Patterns

Your blender’s power button light acts like a diagnostic code—ignoring it means guessing at solutions. These specific light behaviors instantly narrow down your cuisinart smartpower 7 speed blender not working issue to just two or three possible causes.
No Lights When Pressing Power Button
Complete darkness when pressing ON/OFF means electricity isn’t reaching your blender’s brain. This isn’t a motor or blade problem—it’s a total power failure. Check if other kitchen appliances work in the same outlet before assuming your blender is dead. A silent unit with zero lights points directly to wall outlets, damaged cords, or internal safety switches failing.
Blinking Red Light Without Starting
That persistent red flash on your SBC-1000 isn’t a malfunction—it’s your blender patiently waiting for instructions. This is normal behavior until you complete the mandatory cooking sequence. Many users mistakenly think their blender is broken when they skip the temperature or timer steps. The blinking light specifically says: “I have power, but I need your cooking parameters before I’ll blend.”
Solid Red Light With Motionless Blades
When the red light stays solid but blades won’t spin, your startup sequence succeeded but the mechanical connection failed. This critical distinction separates electrical problems (like circuit board failure) from mechanical ones (stripped couplers or seized blades). If your pitcher is properly seated and the light is solid, focus exclusively on the drive system—not power delivery.
Power Delivery Failure Points You Can Check in 2 Minutes
Before disassembling anything, verify electricity actually reaches your blender. These three checks solve over 40% of apparent “dead unit” cases and take less than 120 seconds.
Test Your Wall Outlet First
Plug a high-wattage appliance like a toaster or coffee maker into the same outlet. If it doesn’t power on, you’ve found your culprit—no blender repair will work until you fix the circuit. Never assume the outlet works; kitchen circuits often have hidden GFCI trips behind cabinets or in garages. Reset any tripped breakers before proceeding.
Inspect Power Cord Damage Thoroughly
Run your fingers along the entire cord length, paying special attention to the plug ends and where it enters the base. Look for:
– Cuts exposing copper wires
– Severe kinks that won’t straighten
– Melted insulation near the plug
Any visible damage means immediate warranty replacement—Cuisinart doesn’t sell replacement cords, and DIY repairs void coverage.
Check Safety Switch on CPB-380 Personal Blenders
For CPB-380 models, locate the tiny micro-switch inside the cup port at the rear. Press it gently with a chopstick—it should click audibly when depressed. If it feels stuck (either permanently pressed or unresponsive), this prevents power flow regardless of other conditions. Clean debris around the switch with a toothpick before concluding it’s faulty.
Complete the SBC-1000 Startup Sequence Correctly

The SBC-1000 cooking blender will not start if you skip even one step in its mandatory sequence. Unlike regular blenders, it demands precise programming before engaging the motor.
Required Four-Step Hot Blending Process
Follow this exact order to activate your SBC-1000:
1. Power ON – Press ON/OFF until red light blinks
2. Set Timer – Use + and – buttons for 1-30 minutes
3. Choose Temperature – Select LO, MED, HI (or ICE)
4. Select Function – Turn dial to PULSE, STIR, or BLEND
Only after steps 2 and 3 complete does the light turn solid and the motor engage. Skipping temperature selection is the #1 reason users think their cuisinart smartpower 7 speed blender not working when it’s actually waiting for instructions.
Cold Blend Shortcut That Actually Works
Need cold blending without heating? Set the timer to 1 minute and temperature to ICE. This satisfies the sequence requirements while bypassing the heating element entirely. Many users waste time troubleshooting because they try to skip the temperature step entirely—ICE is the intentional cold-blend mode.
Coupler and Drive System Inspection Without Tools
The mechanical connection between motor and blades fails more often than electrical components. These checks require no disassembly and reveal most motionless-blade issues.
Base Coupler Spin Test Procedure
Remove the pitcher completely. Power on the unit and set a short blend cycle. Look at the rubber-toothed disk on the motor spindle—if it doesn’t rotate while the red light is solid, you have motor or circuit board failure. This test takes 10 seconds and eliminates guesswork about where the problem lies.
Pitcher Coupler Check for Seized Blades
Turn the pitcher upside down and locate the 6-sided metal nut at the bottom. This should spin freely with light finger pressure. If it’s frozen solid, food debris has jammed the blade assembly. Soak the pitcher in warm, soapy water for 15 minutes before retesting—this solves 70% of “blades won’t spin” cases.
Alignment Verification That Prevents False Diagnoses
Small arrows on both pitcher and base must align perfectly. More critically, the pitcher must seat flush with no visible gap—even 1mm prevents engagement. Press down firmly while twisting clockwise slightly; you should hear a distinct click as the micro-switch engages. Misalignment causes 25% of “solid light but no motion” failures.
Blade Performance Diagnoses for Common Symptoms
When your blender runs but performs poorly, these specific symptoms point directly to the faulty component—no guesswork required.
Immediate Action for Smoke or Burning Smells
Unplug immediately if you see smoke or smell burning. This indicates irreversible motor overheating. Document the incident with photos before contacting Cuisinart—this is a clear warranty case. Never restart a smoking blender; continued use creates fire hazards.
Weak Blending Performance Fixes
Slow or chunky blending usually means:
– Blades are bent from frozen ingredients
– Debris packed under the blade assembly
– Worn coupler teeth causing slippage
Remove the pitcher and check for blade wobble or visible gunk. Soak in vinegar solution for stubborn residue. If blades still wobble, the assembly needs replacement—the unit can’t generate proper vortex without tight components.
Motor Hums Without Blade Movement Solution
This distinct humming sound means power reaches the motor but mechanical connection failed. Inspect both couplers:
– Base coupler (rubber): Look for flattened teeth
– Pitcher coupler (metal): Check for stripped edges
Critical note: Cuisinart doesn’t sell individual couplers. If teeth are damaged, warranty replacement of the entire base is your only option—don’t waste time searching for parts.
Warranty Claim Process That Actually Works
Cuisinart treats these blenders as disposable appliances—understanding their policy prevents futile repair attempts.
Coverage Details You Must Know
- SBC-1000: Full 3-year coverage for motor, circuit board, and all components
- CPB-380: 3-year warranty including pitcher and blade assembly
- No internal parts available—Cuisinart prohibits selling repair components
Attempting DIY repairs on covered models voids warranty. If your unit is under 3 years old with proof of purchase, replacement beats repair every time.
Required Documentation Checklist
Before calling support, gather:
– Serial number (engraved on base bottom)
– Original receipt or credit card statement
– Photos of failure symptoms
Without these, claims get denied immediately regardless of unit age. Keep digital copies in your phone for instant access during support calls.
Contact Strategy for Faster Resolution
Call Cuisinart at 1-800-726-0190 between 8-10 AM EST for shortest hold times. When connected, immediately state: “I need to file a warranty claim for my SBC-1000/CPB-380 under the 3-year motor warranty.” Most replacements ship within 7 business days—faster than sourcing parts.
When your cuisinart smartpower 7 speed blender not working crisis hits, remember: most failures trace back to simple oversights like incomplete startup sequences or misaligned pitchers. Complete the mandatory SBC-1000 programming steps, verify coupler alignment, and always check power delivery first. For mechanical failures within warranty, skip DIY repairs—Cuisinart’s policy makes replacement faster and cheaper than parts hunting. Keep this guide in your kitchen notes; next time your blender stays silent, you’ll diagnose it in minutes and know exactly whether it’s a 2-minute fix or a warranty call. With proper maintenance—like cleaning couplers after each use—your SmartPower blender can deliver smooth performance for years beyond the warranty period.


