
Ever wonder why your kitchen faucet delivers the perfect water temperature with just a flick of the wrist? Behind that sleek chrome finish lies an engineering marvel that controls water flow, mixes temperatures, and prevents leaks—all while enduring daily use. Understanding how a kitchen faucet works transforms you from a passive user to an informed homeowner who can troubleshoot issues before they become emergencies. Whether you’re dealing with a drip, considering an upgrade, or simply curious about the plumbing under your sink, knowing the inner workings of this essential fixture saves time, money, and frustration.
Your faucet operates 20-30 times daily yet most people never consider what happens inside when they turn that handle. Water enters through separate hot and cold supply lines, passes through precision-engineered valves that control flow and temperature, then exits through an aerator that shapes the stream. When any component fails, the entire system suffers—resulting in drips, low pressure, or temperature fluctuations. This guide reveals exactly what makes your kitchen faucet function reliably day after day.
Water Supply and Entry Points
Kitchen faucets connect to your home’s plumbing through two flexible supply lines—one for hot water and one for cold—typically made of braided stainless steel or reinforced rubber. These lines attach to shutoff valves under your sink using compression fittings that create watertight seals. The cold line connects directly to your main water supply while the hot line routes through your water heater first.
Why Water Pressure Matters for Faucet Performance
Your faucet requires 40-80 psi water pressure to operate correctly. When pressure drops below this range, you’ll notice weak streams and inconsistent temperature control. The inlet ports where supply lines connect contain small mesh screens that catch sediment before it enters the valve mechanism—these often clog in hard water areas causing reduced flow. Cleaning these screens quarterly prevents 70% of low-flow issues before they escalate.
Critical Connection Points That Cause Leaks
The most common leak points occur where supply lines meet the faucet body. Over-tightening these connections cracks the brass fittings, while under-tightening creates slow drips that damage cabinets over time. Proper installation requires hand-tightening plus a quarter-turn with pliers—never using full force. Always test connections by turning water on slowly while watching for drips before securing the faucet to the sink.
Valve Mechanisms Control Flow

The valve assembly represents your faucet’s operational heart, determining how water flows and mixes. Different valve types offer varying durability, repair complexity, and user experience—knowing which one you have simplifies maintenance.
Ceramic Disc Valves: The Longest-Lasting Option
High-end faucets increasingly use ceramic disc valves featuring two precisely ground ceramic plates that slide against each other. When aligned, water flows through; when misaligned, the near-frictionless ceramic creates a perfect seal. These valves withstand 500,000+ on/off cycles (vs. 150,000 for cartridge valves) and resist mineral buildup better than rubber-sealed alternatives. If they fail—which rarely happens before 10-15 years—it’s usually due to debris between discs rather than worn components.
Cartridge Valve Troubleshooting Guide
Most single-handle faucets use cartridge valves containing rubber seals that wear every 5-8 years. When your faucet develops a drip requiring constant handle adjustment, the cartridge likely needs replacement. The repair process takes 20 minutes: shut off water, remove the decorative cap, unscrew the handle screw, extract the retaining clip, then pull out the old cartridge. Match the replacement exactly to your model—cartridges vary significantly between brands despite similar appearances.
Why Ball Valves Leak at the Spout Base
Delta-style faucets with rounded bases use ball valves where a rotating stainless steel ball controls flow. These commonly leak around the spout base when the rubber O-rings surrounding the ball deteriorate. The fix requires disassembling the entire valve assembly to replace four specific O-rings—using the exact size matters because mismatched rings create immediate leaks. Keep spare O-rings on hand since they cost less than $5 but prevent water damage that could cost hundreds.
Handle Systems and Temperature Control
Your faucet’s handle design directly impacts daily usability and maintenance requirements. Single-handle and double-handle configurations solve the same problem—mixing hot and cold water—through fundamentally different mechanisms.
Single-Handle Temperature Memory Features
Modern single-handle faucets often include temperature memory stops that prevent accidental scalding. These adjustable limits let you set maximum hot water exposure—critical in homes with children. To adjust, remove the handle cap, locate the temperature stop screw, then rotate it clockwise to reduce maximum hot water. Properly set, your faucet delivers consistent lukewarm water with a single forward push, eliminating dangerous temperature fluctuations.
Double-Handle Precision for Specialized Tasks
While less common today, double-handle faucets offer precise temperature control through independent hot and cold valves. This design shines when you need pure cold water for drinking or ice-making without any hot water mixing in. The separate valves also simplify repairs—you can replace a leaking hot water stem without disturbing the cold side. When handles become stiff, replacing the stem washer usually restores smooth operation in under 10 minutes.
Aerators Shape the Water Stream
That small screen at your faucet’s tip does far more than filter debris—it transforms raw water pressure into a usable stream while conserving water. Most homeowners overlook this critical component until flow diminishes.
How Aerators Save 30% More Water Than You Realize
Aerators mix air with water to create a full-feeling stream at reduced flow rates. A standard 2.2 GPM (gallons per minute) faucet feels identical to a 1.5 GPM aerated stream, saving 10,000+ gallons annually in average households. The fine mesh screen breaks water into micro-streams that reduce splashing while maintaining pressure—essential when filling large pots. When mineral deposits clog the screen (common in hard water areas), flow drops by 50% despite full water pressure.
Cleaning Aerators in 90 Seconds Flat
Remove your aerator by twisting counterclockwise—no tools needed for most models. Disassemble the components over a towel to catch small parts, then soak in white vinegar for 30 minutes to dissolve mineral deposits. For stubborn buildup, use an old toothbrush to gently scrub the screen without damaging it. Reassemble in reverse order, ensuring rubber washers sit flush to prevent leaks. Do this quarterly to maintain optimal performance.
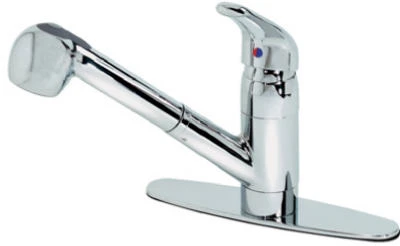
Pull-Down Spray Head Mechanics
Pull-down faucets combine traditional stream functionality with versatile spray options through clever engineering that hides complexity behind sleek design.
Magnetic Docking Systems That Last Decades
Modern pull-down faucets use rare-earth magnets in both the spray head and docking station to create secure, self-aligning connections. Unlike older mechanical clips that wore out, these magnets maintain strength indefinitely. When you pull the spray head down, the internal hose extends smoothly through the spout while a counterweight mechanism ensures automatic retraction. The hose itself contains three layers: an inner PEX tube for water, a stainless steel braid for strength, and an outer nylon sheath for smooth movement.
Diverter Valve Problems That Kill Spray Function
When your pull-down spray stops working but the main faucet still functions, the diverter valve has likely failed. This small component inside the spout redirects water from the main stream to the spray hose when you activate the spray mode. Mineral buildup is the usual culprit—disassemble by removing the set screw on the spout, then clean the diverter with vinegar. Replacement takes 15 minutes and costs under $20, preventing unnecessary full-faucet replacement.
Common Problems and Solutions

Most faucet issues stem from predictable component failures rather than mysterious malfunctions. Recognizing these patterns saves unnecessary service calls.
Why Faucets Drip After Shutting Off
Post-shutoff dripping almost always indicates worn valve seals. In cartridge faucets, the rubber edges that create the watertight seal develop micro-tears over time. Replacing the cartridge solves 95% of drip issues—don’t waste money on temporary “faucet repair” chemicals that only mask symptoms. For compression valve faucets (common in older homes), replacing the rubber washer and brass seat restores perfect sealing.
Handle Wobble That Leads to Catastrophic Failure
A loose handle seems minor but often signals serious internal problems. In cartridge faucets, wobble means the retaining clip has failed, allowing the cartridge to shift position. If ignored, the misaligned cartridge wears unevenly, causing sudden leaks that flood cabinets. Tighten the handle screw immediately—most require only 15 inch-pounds of torque (about half what you’d use on a door hinge screw).
Maintenance Extends Faucet Life
Preventative care doubles your faucet’s lifespan and prevents 80% of common issues. These simple routines take less than five minutes monthly.
Monthly Maintenance Checklist
- Wipe down the entire faucet with vinegar solution to prevent mineral buildup
- Test shutoff valves by turning them fully off/on to prevent seizing
- Remove and clean the aerator (as described earlier)
- Check for handle play and tighten screws as needed
- Inspect supply line connections for moisture
When to Call a Professional vs. DIY
Most faucet repairs suit DIYers with basic tools, but call a plumber when you encounter:
– Cracked valve bodies (requires replacement)
– Stripped mounting nuts under the sink
– Supply line leaks at shutoff valves
– Persistent leaks after component replacement
Understanding how a kitchen faucet works empowers you to maintain this critical kitchen component effectively. By recognizing valve types, identifying common failure points, and performing simple maintenance, you’ll extend your faucet’s life significantly while avoiding costly emergency repairs. The next time you turn on your faucet, appreciate the precision engineering that delivers perfect water temperature with minimal effort—it’s a small marvel of modern plumbing that deserves your attention before problems arise.


